# Developer Documentation
Developer Documentation
# Account Area
Account Area
# What are the default pages in the account area?
The following classes are in the **Aero\AccountArea\Http\Responses**namespace.
****
****
****
| Class | Route | Description |
| ------------------------- | -------------------- | -------------------------------------------------------------------------------------- |
| AccountLoginPage | login | A page where users can log in. |
| AccountRegisterPage | register | A page where guests can register. |
| AccountPasswordForgotPage | password.forgot | A page where users can send a password reset email to their email. |
| AccountPasswordResetPage | password.reset | A page where users can reset their password. |
| AccountOrdersPage | account.orders | A page that lists all of a user's orders and lets them filter/search. |
| AccountOrderViewPage | account.view-order | A page that shows more information about an order. |
| AccountAddressesPage | account.addresses | A page that lists all of the users addresses. |
| AccountAddressNewPage | account.new-address | A page where users can create a new address, |
| AccountAddressEditPage | account.edit-address | A page where users can edit one of their addresses. |
| AccountDetailsPage | account.details | A page where users can update their account details and change their password. |
| AccountInvoicePage | account.view-invoice | A simple invoice for an order - currently not linked to from anywhere. |
| AccountOverviewPage | account | The first page a user sees after they log in - currently redirects to the orders page. |
# What are the default sets in the account area?
The following classes are in the **Aero\AccountArea\Http\Responses**namespace.
****
****
****
| Class | Method | Route |
| ---------------------------- | ------ | ---------------------------- |
| AccountLoginSet | Post | login |
| AccountLogoutSet | Post | logout |
| AccountRegisterSet | Post | register |
| AccountPasswordForgotSet | Post | password.forgot |
| AccountPasswordResetSet | Post | password.reset |
| AccountAddressNewSet | Post | account.new-address |
| AccountAddressEditSet | Put | account.edit-address |
| AccountAddressMakeDefaultSet | Put | account.make-default-address |
| AccountDetailsSet | Put | account.details |
| AccountAddressDelete | Delete | account.delete-address |
# What are the default forms in the account area?
The following classes are in the **Aero\AccountArea\Http\Forms**namespace.
| Class | Description |
| ------------------------- | ---------------------------- |
| AccountAddressEditForm | The edit address form. |
| AccountAddressNewForm | The new address form. |
| AccountDetailsForm | The account details form. |
| AccountLoginForm | The login form. |
| AccountPasswordForgotForm | The forgotten password form. |
| AccountPasswordResetForm | The password reset form. |
| AccountRegisterForm | The register form. |
# How do I inject into a slot in the account area?
You can inject into account area slots using the **Aero\AccountArea\AccountAreaSlot::inject**method. This method accepts two parameters, the key of the slot you want to inject into and then the view or a closure that defines the view to be injected. When passing a closure it enables you to add additional view data to use inside of your injected view.
```
loadViewsFrom(__DIR__.'/../resources/views', 'my-module');
AccountAreaSlot::inject('orders.order.card.header', 'my-module::account-area-slot');
AccountAreaSlot::inject('orders.order.card.header', function ($data) {
$data['custom_data'] = 'custom value';
return view('my-module::account-area-slot', $data);
});
}
}
```
# How do I configure the account area?
## ENV Variables
****
****
****
****
| Variable | Default | Description |
| ------------------------ | ------------------------- | --------------------------------------------------------------------------------------------------------------------------------------------------------------- |
| AERO_ACCOUNT_AREA_THEME | aerocommerce/account-area | Defines the namespace that should be registered as having the views and resources for the account area. This should only be changed under unique circumstances. |
| AERO_ACCOUNT_AREA_LAYOUT | layouts.main | Defines the layout that the account area views use. If the layout provided doesn’t exist, account-area::layouts.blank will be used. |
## Config File
If you would like to change any of the config values you can publish the config file by running:
```
php artisan vendor:publish --provider="Aero\AccountArea\ServiceProvider"
```
Once the file is published you will be able to edit it through the config php file created at **/config/aero/account-area.php**.
### Date Format
This defines the format used when displaying any dates in the account area.
### Order Status State Classes
This defines the map used to find the colour for the order status state.
The colours are defined using CSS classes:
| Class | Colour |
| ------- | ------ |
| success | Green |
| warning | Orange |
| error | Red |
### Order Status Radio Options
This defines the order statuses shown in the radio options on the orders page and what order status states they map to.
### Order Years
This defines the number of previous years to display in the years dropdown on the orders page.
### Page Sections
This defines the sections that make up each page by default. You can add/edit/remove sections through code, it is not necessary to adjust these values usually.
### Slots
This defines the views that are injected into slots by default.
### Links
This defines the links that should be in the navbar by default. You can add/edit/remove links through code, it is not necessary to adjust these values usually.
# How do I create a custom page in the account area?
To create and register a custom account area page you need to use the **Aero\AccountArea\AccountArea::registerPage()**helper method. This method expects you to pass a class that extends **Aero\AccountArea\AccountAreaPage**.
```
'account-area::sections.navbar',
'page-header' => 'account-area::partials.page-header',
'wishlist' => 'wishlist::account-area-wishlist',
];
static function title(): string
{
return __('My Custom Page');
}
static function route(): string
{
return __('custom-page');
}
static function routeName(): string
{
return 'acme.my-module.custom-page';
}
}
```
## Adding your Page to the Navbar
To add your page to the navbar you need to make sure your page class uses the **Aero\AccountArea\Traits\HasAccountAreaLink**trait and then add the link to the navbar using the **addLink**, **addLinkBefore**, or **addLinkAfter**methods from within the pipeline.
The **Aero\AccountArea\Traits\HasAccountAreaLink**trait makes you implement a **toLink**method that returns an array of data used to render your link. The array should have an icon and text key.
```
public static function toLink(): array
{
return [
'icon' => 'my-module::icon',
'text' => 'My Page',
];
}
```
```
addLink(CustomPage::class);
});
}
}
```
# How do I extend a form in the account area?
Forms can be extended using a pipeline from your modules service providers setup method or your projects app service providers boot method. You can read more about pipelines in the article "[Introduction to pipelines](../../introduction/4409548756369-introduction-to-pipelines/index.md)
## Adding a Field
To add fields to a form you can use the **addSection**, **addSectionBefore**, or **addSectionAfter**methods from within the pipeline.
### addSection Method
This method accepts a key and a view to be injected. A field added with this method will be added as the first field.
### addSectionBefore Method
This method accepts the same parameters as the **addSection**method but additionally accepts a third parameter, the key of the field this new field should be added before.
### addSectionAfter Method
This method accepts the same parameters as the **addSection**method but additionally accepts a third parameter, the key of the field this new field should be added after.
### Finding the Current Field Keys
If you do not know the keys of the current fields you can use this code snippet to dump the current keys when visiting the page with the form.
```
getSections()->keys()->toArray());
});
}
}
```
```
addSection('my-section', 'my-view');
});
}
}
```
## Removing a Field
You can use the **removeSection**method within the pipeline to remove a field from a form. The methods expect one parameter, the key of the field that you would like to remove.
```
removeSection('line2');
});
}
}
```
# How do I create a custom set in the account area?
Sets are used for POST/PUT/DELETE requests. To create and register a custom account area set you need to use the **Aero\AccountArea\AccountArea::registerPost()**, **Aero\AccountArea\AccountArea::registerPut()**, or **Aero\AccountArea\AccountArea::registerDelete()**, helper method. This method expects you to pass a class that extends **Aero\AccountArea\AccountAreaSet**.
```
getSections()->keys());
});
}
}
```
```
loadViewsFrom(__DIR__.'/../resources/views', 'my-module');
AccountOrdersPage::extend(function (AccountOrdersPage $page) {
$page->addSection('my-section', 'my-module::view');
$page->addSectionAfter('my-other-section', 'my-module::view', 'navbar');
});
}
}
```
# How do I add a custom CSS file to the account area?
You can add a custom CSS file to the account area by creating a file named `account-area.css`in your public directory.
Example contents where we're overriding the default colours:
```
:root {
--bpa-color-primary: deepskyblue;
--bpa-color-success: forestgreen;
--bpa-color-warning: darkorange;
--bpa-color-error: red;
--bpa-color-helpbox: aliceblue;
--bpa-color-content-background: ghostwhite;
}
```
# How do I create a new form for the account area?
To create a form you need to create a class that extends the `AccountAreaForm`class.
The `$sections`array lists the views used to render the form.
The `method`method defines the method that the form will use (this should be `post`, `get`, `put`, or `delete`).
The `route`method should return the URL for the form. A `$data`variable is accessible in case the route requires parameters that are available in the data.
```
'account-area::partials.email-input',
'password' => 'account-area::partials.password-input',
'forgot-password' => 'account-area::partials.login-forgot-password-link',
'submit' => 'account-area::partials.login-button',
];
protected function method(): string
{
return 'post';
}
protected function route($data): string
{
return route('login');
}
}
```
## Registering a form
Any form you wish to use in the account area should be registered in your service provider.
```
with('shippingAddress.country')->whereHas('shippingAddress')
->whereBetween('ordered_at', [$date['start'], $date['end']])->get()
->groupBy('shippingAddress.country.name')
->map(function ($group, $key) {
return [
'name' => $key,
'count' => $group->count(),
'percentage' => 0,
];
})->sortByDesc('count')->take(5);
$total = $countries->reduce(function ($count, $country) {
return $count + $country['count'];
}, 0);
$countries->transform(function ($country) use ($total) {
$country['value'] = number_format(($country['count'] / $total) * 100, 2);
$country['text'] = $country['count'].' '.Str::plural('order', $country['count']);
$country['percentage'] = $country['value'].'%';
return $country;
});
return response()->json([
'items' => $countries,
]);
}
}
```
# How do I use a custom view for my dashboard lens?
You can optionally make your dashboard lens use a custom view. To do this you need to set the protected `$view`string on your lens to the view you would like to use.
```
json([]);
}
}
```
Your view will have access to Blade and Vue as it is rendered as a slot. You will have access to the following variables:
****************
| Variable | Type | Description |
| --------------------------- | ----- | ------------------------------------------------------------------------------------------------------------------------------------------------------------------------------------------------------ |
| lens.data | Vue | This is an object that holds the response from the data method of your admin lens. You can effectively pass any data you want in the json response and have access to it in Vue through this variable. |
| lens.date | Vue | This is an object that has start, end and compare keys. |
| lens.loading | Vue | This is a boolean that is true while the lens is making an API call to get its data. |
| lens.notLoading | Vue | This is a boolean that is false unless the lens is making an API call. |
| lens.noData | Vue | This is a boolean that is true if the store has no orders. |
| lens.hasData | Vue | This is a boolean that is true if the store has orders. |
| lens.renderDateGetVariables | Vue | This returns an empty string or the selected date formatted as the $dateGetVariables property on the lens class describes. |
| $title | Blade | This is the value of the $title property on your lens class. |
| $link | Blade | This is the value of the link() function on your lens class. |
| $noTextData | Blade | This is the value of the $noDataText property on your lens class. |
Here is the code for our default lens view:
```
```
### Adding Permissions to your Dashboard Lens
You can optionally make your dashboard lens require a permission (if the user doesn’t have the permission then the lens will not be rendered). To do this you need to set the protected static $permission string on your lens class to the permission you would like to use.
```
json([]);
}
}
```
# How do I add a custom dashboard lens to the dashboard?
To add your custom dashboard lens to the dashboard you need to register it with the admin and the admin dashboard.
To register your dashboard lens with the admin you need to call the **Aero\Admin\Facades\Admin**facade **registerLens**method and pass in your dashboard lens class.
```
getLenses()->keys());
});
}
}
```
```
addLensBefore('revenue-lens', RevenueLens::class, 'average-order-value-lens');
});
}
}
```
# How do I remove a dashboard lens from the dashboard?
You are able to extend **Aero\Admin\Http\Responses\AdminDashboardPage**and use the **removeLens**method. You will need to pass in the key of the lens that you want to remove.
```
removeLens('revenue-lens');
});
}
}
```
# Admin Filters
Admin Filters
# What is an admin filter?
Admin filters are the filters that populate the sidebars of reports and resource lists. As the name suggests, they allow users to filter the data they’re seeing through the report or resource list.
All admin filters ultimately extend **Aero\Admin\Filters\AdminFilter**and therefore all have these common methods that you can optionally override:
### title Method
This is a public method that returns the title for the filter. This title is displayed on the frontend. By default the title is generated from the class name.
### key Method
This is a public method that returns the key for the filter. The key is used for the request parameter for the filter. By default the key is generated from the class name.
You can read about the other methods in the "[How do I create a custom Admin Filter?](https://support.aerocommerce.com/link/151)
# How do I create a custom admin filter?
To create a custom admin filter you need to create a class that extends **Aero\Admin\Filters\AdminFilter**and implements the handle method.
### handle Method
This method is executed on every request made to a report or resource list with your filter and accepts 2 parameters. The first parameter is a **Symfony\Component\HttpFoundation\ParameterBag**, and the second parameter is the query.
### render Method
This method defines how the filter is rendered. By default it will return a view (that you can set with the protected **$view**property) and pass in the **options()**and **viewData()**arrays.
### stateFields Method
This method returns an array of names for the parameters this filter uses in the request. It’s important that if you use any parameters outside of the default parameter (which uses the **$this->key()**for the name) that you override this method and return them in the array. This method is used to gather all of the fields that should be reset to remove your filter.
### options Method
This method returns an array of data that is passed to the view by the render method. If you’re creating a new filter that may be used by many classes it is a good idea to use this method instead of the viewData method so that classes that extend your class can use the viewData method if required.
### viewData Method
This method returns an array of data that is passed to the view by the render method.
Here is the code for our date range admin filter implementation:
```
input($this->key());
}
protected function options(): array
{
return [
'title' => $this->title(),
'key' => $this->key(),
'options' => $this->dropdowns(),
'selected' => $this->selectedOption(),
];
}
public function handle(ParameterBag $parameters, $query)
{
if (($selected = $parameters->get($this->key())) && $selected != '') {
$this->handleDropdown($selected, $query);
}
}
abstract protected function handleDropdown($selected, $query);
abstract protected function dropdowns(): array;
}
```
# How do I create a checkbox list admin filter?
To create a checkbox list admin filter you need to create a class that extends **Aero\Admin\Filters\CheckboxListAdminFilter**and implements the **handleCheckboxList**and **checkboxes**methods.
### handleCheckboxList Method
This method is executed when any checkboxes are checked and accepts two parameters. The first parameter is an array of the selected items and the second parameter is the query.
### checkboxes Method
This method provides the results shown in the rendered checkbox list on the frontend. It needs to return an array that has id, name, and url as keys. The url key should use the **$this->getUrlFor()**helper method to create a url for the id.
```
whereIn('state', $selected);
}
protected function checkboxes(): array
{
return OrderStatus::query()->distinct('state')->get()->map(function ($status) {
return [
'id' => $status->state,
'name' => ucwords(implode(' ', explode('_', $status->state))),
'url' => $this->getUrlFor($status->state),
];
})->toArray();
}
}
```
# How do I create an options date range admin filter?
The options date range admin filter works in the same way as the date range admin filter but displays some dynamic options to the user on the frontend. These dynamic options are especially useful when users save their applied filters.
To create an options date range admin filter you need to create a class that extends **Aero\Admin\Filters\OptionsDateRangeAdminFilter**and implements the **handleDateRange**method.
### handleDateRange Method
This method is executed when a date is set and accepts 3 parameters. The first parameter is a Carbon object for the selected start date, the second parameter is a Carbon object for the selected end date, and the third parameter is the query.
You can switch this filter to not use past options (such as yesterday, last 7 days, last 30 days) by setting the **$lastMode**property to false. If this property is false the options will become future options (such as tomorrow, next 7 days, next 30 days).
```
whereBetween('deliver_on', [$startDate, $endDate]);
}
}
```
# How do I create a dropdown admin filter?
To create an options date range admin filter you need to create a class that extends Aero\Admin\Filters\DropdownAdminFilter and implements the handleDropdown and dropdowns methods.
### handleDropdown Method
This method is executed when a dropdown option is set and accepts 2 parameters. The first parameter is the value selected and the second parameter is the query.
### dropdowns Method
This method provides the results shown in the rendered dropdown on the frontend. It needs to return an array that has name and value as keys. If you use an empty string for a value then your handleDropdown method will not be called when that option is selected. This is useful for allowing users to effectively turn your filter off.
```
where('layout', 'system');
break;
case 'customer':
$query->where('layout', 'customer');
break;
}
}
protected function dropdowns(): array
{
return [
[
'value' => '',
'name' => 'View All',
],
[
'value' => 'customer',
'name' => 'Customer',
],
[
'value' => 'system',
'name' => 'System',
],
];
}
}
```
# How do I create a date range admin filter?
To create a date range admin filter you need to create a class that extends **Aero\Admin\Filters\DateRangeAdminFilter**and implements the **handleDateRange**method.
### handleDateRange Method
This method is executed when a date is set and accepts 3 parameters. The first parameter is a Carbon object for the selected start date, the second parameter is a Carbon object for the selected end date, and the third parameter is the query.
```
whereBetween('created_at', [$startDate, $endDate]);
}
}
```
# How do I create a searchable select admin filter?
To create an options date range admin filter you need to create a class that extends Aero\Admin\Filters\SearchableSelectAdminFilter and implements the handleSearchableSelect, model, modelName, and searchRoute methods.
### handleSearchableSelect Method
This method is executed when an option has been selected and accepts 2 parameters. The first parameter is an array of selected values and the second parameter is the query.
### model Method
This method needs to return an instance of the model that will be used for searching. This will be used to automatically fetch the selected data.
### modelName Method
This method defines the name that should be used in the searchable select for the selected options.
### searchRoute Method
This method defines the route that will be used by the searchable select component to fetch data.
```
where(function ($query) use ($selected) {
$query->whereHas('discounts', static function ($query) use ($selected) {
$query->whereIn('id', $selected);
});
});
}
protected function model(): Model
{
return new Discount();
}
protected function modelName(Model $model)
{
return $model->code ?? ($model->name ?? 'Discount #'.$model->id);
}
protected function searchRoute(): string
{
return route('admin.discounts.search');
}
}
```
# Admin Product Picker Component
Admin Product Picker Component
# How do I use the product picker in my custom module?
The Product Picker provides a modal that lets users select a single or many products/variants with quantities. Parts of the admin use this such as the Price Lists and Create Order form. Modules such as **aerocargo/upsells**also make use of the Product Picker.
You can use the ``Vue component from any admin view inside of your module that extends the official admin layout (`admin::layouts.main`). When using the Product Picker you need to provide a url for the get-products-url prop (this value is usually always the `admin.catalog.products.picker`route) and you need to provide a slot for the button that will be used to open the picker.
```
@extends('admin::layouts.main')
@section('content')
@endsection
```
# What are the available props for the product picker?
********
****
****
********
********
********
********
********
********
********
********
********
| Prop | Type | Description |
| ------------------------- | ------- | -------------------------------------------------------------------------------------------------------------------------------------------------------------------- |
| get-products-url | String | This is the only required prop. This is the URL for the API to get the products from. It’s common to set this value to {{ route('admin.catalog.products.picker') }}. |
| image-url-prefix | String | This is the image factory prefix to use for the product image URLs. This is set by default to use {{ image_factory(60, 60)->contain() }}. |
| no-image-url | String | This is the image URL to use when a product doesn’t have an image. This is set by default to use {{ asset('modules/aerocommerce/admin/no-image.svg') }}. |
| action-name | String | This is the button text shown on the confirm button of the product picker modal (bottom right). This is set by default to “Add Products”. |
| clear-selected-after-emit | Boolean | |
| pick-product | Boolean | This is a boolean that defaults to false. When true, products will be allowed to be selected as well as variants. |
| product-only | Boolean | This is a boolean that defaults to false. When true, variants will not be listed and not selectable. |
| pick-only | Boolean | This is a boolean that defaults to false. When true, variants will not need to be in stock to be selectable. |
| needs-quantity | Boolean | This is a boolean that defaults to true. When false, a quantity will not be able to be set for the selected variants/products. |
| emit-image | Boolean | This is a boolean that defaults to false. When true, the products/variants image will be emitted when selected. |
| emit-sku | Boolean | This is a boolean that defaults to false. When true, the products/variants sku will be emitted when selected. |
| emit-model | Boolean | This is a boolean that defaults to false. When true, the products/variants model will be emitted when selected. |
| emit-name | Boolean | This is a boolean that defaults to false. When true, the products/variants name will be emitted when selected. |
| emit-price | Boolean | This is a boolean that defaults to false. When true, the products/variants price will be emitted when selected. |
## Example
You can make use of the props like you usually would with a [Vue component](https://vuejs.org/v2/guide/components-props.html)
```
@extends('admin::layouts.main')
@section('content')
@endsection
```
# What are the available events for the product picker?
| Event | Description |
| ----------------- | ------------------------------------------------------------------------------------------------------------------------------------------------------------------------------------------ |
| products-selected | This event emits when the action button is clicked (bottom right of the modal) and provides an array of all of the selected product(s)/variant(s). |
| selected | This event emits when the action button is clicked (bottom right of the modal) and is emitted for each product/variant that has been selected - only a single product/variant is provided. |
## Example
The usual use-case for the Product Picker is to allow users to select products and/or variants to be added to a list. This example code is a Blade view that allows the user to select up to 5 products or variants and then displays them in a list with a custom message. It also allows the user to remove the selected products/variants. The next steps to make this code fully functional would be to wrap the table in a form and to add a submit button that saves the products/variants.
```
@extends('admin::layouts.main')
@section('content')
@endsection
@push('scripts')
@endpush
```
# Admin Reports
Admin Reports
# How do I create a custom report?
To create and register a custom report you need to use the **Aero\Admin\AdminReport**facade inside of your app service providers boot method or module service providers setup method.
The facade requires a class that extends **Aero\Admin\Reports\Report**. Additionally, you can provide a title and summary (shown in the reports list in the admin) and any permissions required to use the report.
```
title('Simple Orders Report')
->summary('View a simple report for your orders')
->permissions('orders.view');
}
}
```
Your report class must implement a **newQuery**method that must return a **Illuminate\Database\Eloquent\Builder**. This method provides the query your report will run from.
```
query->count();
}
}
```
You can optionally override the **render**method to change the view that your lens uses. The default **render**method:
```
public function render()
{
return view('admin::reports.lens', ['title' => $this->title(), 'content' => $this->value()]);
}
```
You can also additionally override the **title**method to change the title shown on the frontend. By default this method returns a title that is generated from the lens class name.
#### Registering a Lens with your Report
To register your newly created lens with your report you need to ensure the report uses the **Aero\Admin\Reports\Traits\HasLens**trait and that your lens class is in the reports protected static $lenses array.
```
ordered_at) {
return $row->ordered_at->format('D jS M, H:i');
}
return view('admin::reports.partials.muted-created-at', compact('row'));
}),
ReportTableColumn::create('Order', function ($row) {
return $row->reference;
}),
];
}
}
```
#### Making your Column Searchable
You can use the **setSearchAction**method to define how your column is searched.
| Type | Description |
| ----------- | ------------------------------------------------------------------------------------------------------------------------------------------------------------------------------------------- |
| Closure | The first parameter is a closure that is called when your column is being used for a search. The closure is passed the query and search term. |
| String|Null | The second parameter is an optional string that’s used on the frontend to reference the column in the columns dropdown. If you do not provide a value the value will be the columns header. |
```
ReportTableColumn::create('Order', function ($row) {
return $row->reference;
})
->setSearchAction(function ($query, $term) {
$term = ltrim($term, '#');
$query->whereLower('reference', 'like', "%{$term}%");
}, 'Order Reference')
```
#### Making your Column Not Exportable
To make your column not exportable you can use the **notExportable**method.
```
ReportTableColumn::create('Order', function ($row) {
return $row->reference;
})
->notExportable()
```
#### Setting your Columns Export Content
You can use the **setExportContent**method to define how your column should return data when exporting. This is useful for times where instead of returning a view on the Aero Admin you want your column to return raw data.
The **setExportContent**method accepts a closure that is passed the row.
```
ReportTableColumn::create('Date', function ($row) {
if ($row->ordered_at) {
return $row->ordered_at->format('D jS M, H:i');
}
return view('admin::reports.partials.muted-created-at', compact('row'));
})
->setExportContent(function ($row) {
if ($row->ordered_at) {
return $row->ordered_at->format('D jS M, H:i');
}
return $row->created_at->format('D jS M, H:i');
})
```
#### Making your Column Invisible
You can use the invisible method to make your column invisible. Do note that your column will still be visible in an export.
```
ReportTableColumn::create('Order', function ($row) {
return $row->reference;
})
->invisible()
```
#### Setting your Columns Position
Columns are ordered by an Integer position value (lowest numbers go first). You can set a column's position using the position method. On the default Aero reports we increment each rows column.
```
ReportTableColumn::create('Order', function ($row) {
return $row->reference;
})
->position(1)
```
# How do I add exporters to my custom report?
To add an exporter to your report you need to ensure the report uses the **Aero\Admin\Reports\Traits\CanExport**trait and that the exporter class is in the reports protected static $exports array.
By default Aero provides a CSV, XML, and JSON exporter.
```
streamDownload(function () use ($columns, $rows) {
$file = fopen('php://output', 'wb');
fputcsv($file, $columns->map->header()->toArray());
$rows->chunk(100, function ($chunk) use ($file, $columns) {
foreach ($chunk as $row) {
$rowData = [];
foreach ($columns as $column) {
$rowData[] = $column->exportContent($row);
}
fputcsv($file, $rowData);
}
});
fclose($file);
}, $file,
ReportExporter::getHttpHeaders('text/csv', $file)
);
}
}
```
Now you need to add your newly created exporter to your report as shown at the start of this article.
# How do I extend existing reports?
Reports can be extended using a pipeline from your modules service providers setup method or your projects app service providers boot method. You can read more about pipelines here (link).
### Adding a Column
To add columns to a table you can use the **addColumn**, **addColumnBefore**, or **addColumnAfter**methods from within the pipeline. These methods return a usual report table column which allows you to chain on the other available column methods.
#### addColumn Method
This method accepts a column header and a closure that defines how the column will be rendered. A column added with this method will be added as the first column.
#### addColumnBefore Method
This method accepts the same parameters as the **addColumn**method but additionally accepts a third parameter, the key of the column this new column should be added before.
#### addColumnAfter Method
This method accepts the same parameters as the **addColumn**method but additionally accepts a third parameter, the key of the column this new column should be added after.
#### Finding the Current Column Keys
If you do not know the keys of the current columns you can use this code snippet to dump the current keys out when visiting the report.
```
table()->getColumns()->map->key());
});
}
}
```
```
table()->addColumn('My Column', function ($row) {
return 'example';
})
->setExportContent(function ($row) {
return 'export content';
});
$report->table()->addColumnBefore('Before SKU', function ($row) {
return $row->sku;
}, 'sku');
$report->table()->addColumnAfter('After Sku', function ($row) {
return $row->sku;
}, 'sku');
});
}
}
```
### Adding a Lens
To add a lens to a report you can use the **addLens**method from within the pipeline. This method expects you to pass a report lens class. You can create a report lens class as shown in the article "[How do I add Lenses to my custom Report?](https://support.aerocommerce.com/link/163)
```
addLens(TotalRevenueLens::class);
});
}
}
```
### Adding a Filter
To add a filter to a report you can use the addFilter method from within the pipeline. This method expects you to pass an admin filter class. You can create an admin filter class as shown in the article "[How do I add Admin Filters to my custom Report?](https://support.aerocommerce.com/link/167)
```
addFilter(OrderStatusAdminFilter::class);
});
}
}
```
# How do I add admin filters to my custom report?
You need to create an Admin Filter class as shown in the article "[How do I create a custom report?](../../admin-filters/4408595336593-how-do-i-create-a-custom-admin-filter/index.md)
To register your newly created admin filter with your report you need to ensure the report uses the **Aero\Admin\Reports\Traits\HasFilters**trait and that your admin filter class is in the reports protected static $filters array.
```
($product->id ?? 0) * 2,
];
});
}
}
```
## Casts
When the admin page fails validation and redirects back with the old data, the old data is casted to ensure it’s correct using the transformer. This is particularly important for booleans where a checkbox may set the value as 1 and it therefore should be casted to true to avoid problems.
### Available Cast Types
You can currently use the following casts: boolean, array, string, and integer.
#### Adding a Cast
To add a cast you need to use the static **addCast()**method on the relevant transformer. This method expects two parameters, the key of the field and the value that the field should be casted to.
This code example ensures the **customField**is casted as an **integer**.
```
($product->id ?? 0) * 2,
];
});
}
}
```
# Admin Vue
Admin Vue
# How do I add custom clips to the redactor editor
Clips is a [plugin for the Redactor editor](https://imperavi.com/redactor/plugins/clips) that allows you to create a list of frequently used code to be used in the editor.
In the following example we will add a label clip that will allow users to use a label in the Redactor editor that looks like this:
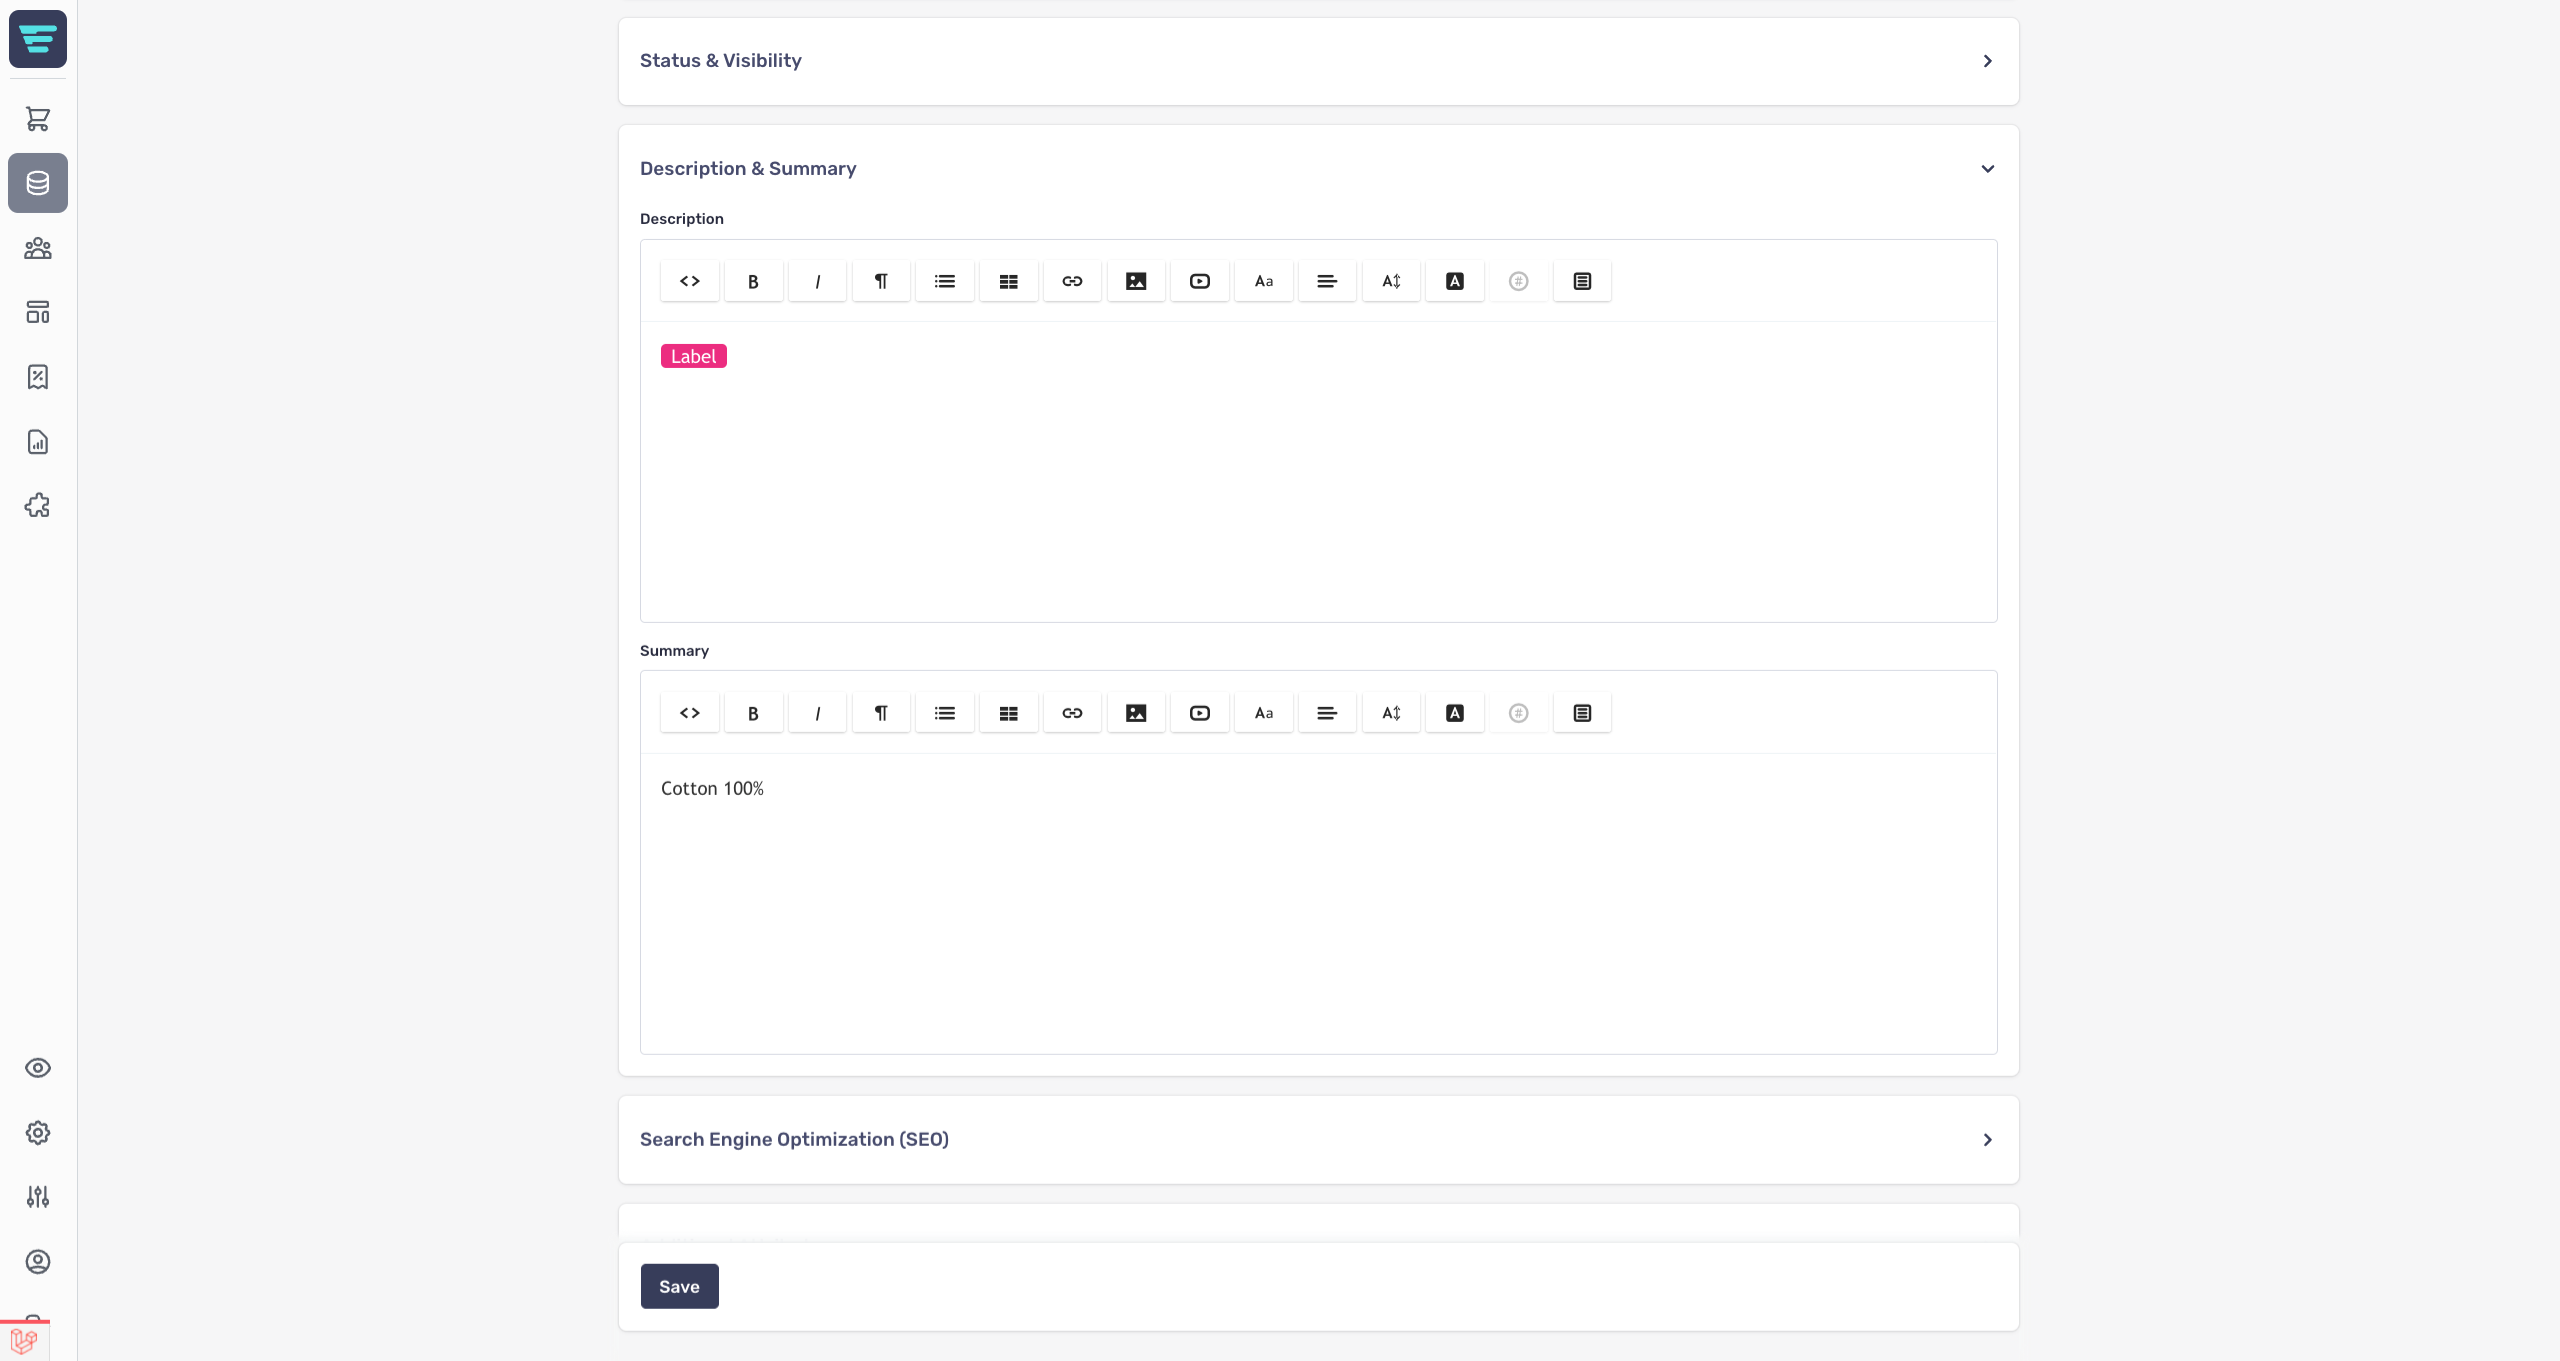
You need to use the **styles**and **scripts**slots to inject views across the whole admin that include the CSS for the clip (in this case the CSS for the label) and the JS for creating the clip. This can be done in a module service providers **setup**method or the app service providers **boot**method. If you use a module service provider, do not forget to register your views under your modules namespace using the **$this->loadViewsFrom**method.
```
loadViewsFrom(__DIR__.'/../resources/views', 'my-module');
AdminSlot::inject('styles', 'my-module::clips-styles');
AdminSlot::inject('scripts', 'my-module::clips-scripts');
}
}
```
The **my-module::clips-styles**view should contain a style tag with the CSS for the label. Any CSS for a clip should be scoped to the **.redactor-box**class in this view. You will also need to put this CSS in your themes CSS file so that it works on the storefront (this CSS doesn’t need to be scoped to the **.redactor-box**class).
```
```
The **my-module::clips-scripts**view should contain a script tag with the JS for the label. The first parameter is the text shown in the clips list and the second parameter is the code inserted when the clip is used.
```
```
Completing these steps will add a clips button to the top of the Redactor editor that when clicked will list your registered clips that can then be clicked to insert their code.
# How do I use Vue in the admin?
When in an admin's Blade view file you can use any Vue directive (such as `v-for`, `v-if`, `@click`etc).
## Putting Vue into Dev Mode
Putting Vue into dev mode allows you to use the Vue dev tools. You can put the Admin Vue into dev mode by putting this code snippet in your Blade view:
```
@push('scripts')
@endpush
```
## Extending Vue without a Custom Component
You can extend Vue without using a custom Vue component by using some of the `window.AeroAdmin`methods. Methods are provided for you to add **data**, **methods**, **computed methods**, **watchers**, and **listeners**.
### Adding Data
You can make data available in Vue through the `window.AeroAdmin.addData`method. This method expects two parameters, the variable name and the variable value. You can pass JSON as the values for complex data types such as arrays.
```
@push('scripts')
@endpush
```
### Adding a Method
You can make Vue methods using the `window.AeroAdmin.addMethod`method. This method expects two parameters, the method name and a closure defining the method. Inside of the closure you can use **this**to reference the Vue instance (this allows you to call other methods or interact with the data variables (anything you can do from within Vue).
```
@push('scripts')
@endpush
```
### Adding a Watcher
You can make a Vue watcher using the `window.AeroAdmin.addWatch`method. This method expects two parameters, the watcher name and a closure defining the watcher. Inside of the closure you can use **this**to reference the Vue instance (this allows you to call other methods or interact with the data variables (anything you can do from within Vue).
```
@push('scripts')
@endpush
```
### Adding a Computed Method
You can make Vue computed methods using the `window.AeroAdmin.addComputed`method. This method expects two parameters, the computed method name and a closure defining the computed method. Inside of the closure you can use **this**to reference the Vue instance (this allows you to call other methods or interact with the data variables (anything you can do from within Vue).
```
@push('scripts')
@endpush
```
### Adding a Listener
You can add a listener to Vue using the `window.AeroAdmin.addListener`method. This method expects two parameters, the event name to listener for and a closure defining what to do when the event is emitted. Inside of the closure you can use **this**to reference the Vue instance (this allows you to call other methods or interact with the data variables (anything you can do from within Vue).
```
@push('scripts')
@endpush
```
# How do I add a custom Vue component to the admin?
This repo ([https://github.com/aerocargo/admin-example-vue](https://github.com/aerocargo/admin-example-vue)
You need to add the `assetLinks`function to your modules service provider so that your modules assets are publicly linkable. An example module service provider can be found here in the repo ([https://github.com/aerocargo/admin-example-vue/blob/master/src/ServiceProvider.php](https://github.com/aerocargo/admin-example-vue/blob/master/src/ServiceProvider.php)
You also need to make your component `.vue`file(s) and your main `.js`file that will register all of the components. An example javascript structure can be found here in the repo ([https://github.com/aerocargo/admin-example-vue/tree/master/resources/js](https://github.com/aerocargo/admin-example-vue/tree/master/resources/js)
Once you’ve got your files setup and have built the javascript files (using npm - `npm run dev`or `npm run production`), you need to ensure that your module's components javascript file is loaded and the components are registered in the Blade view where you want to use the component(s). To do this you need to include the javascript file from your module and then register the components through the `window.AeroAdmin.vue.use`method.
```
@push('scripts')
@endpush
```
Once you have completed this you’ll be able to use your custom Vue component(s) anywhere in the Blade file where you have registered them.
# Blocks
Blocks
# How do I import content blocks?
In order to export content blocks, we will require an Aero package. To install this package, type the following command in the project root directory:
```
composer require aerocargo/blocks-import-export
```
After installing the package, we can navigate to the **admin**then **Content Management**and finally, **Blocks**. In the top right corner of this page, we now have a button for importing blocks.
The .zip file required by the importer can only be generated by the content blocks exporter. If we do have an exported .zip file we can simply upload it within the modal that appears on button click. After uploading the .zip file and letting the blocks import, they should appear in the list.
# How do I export content blocks?
In order to export content blocks, we require an Aero package. To install this package, type the following command in the project root directory:
```
composer require aerocargo/blocks-import-export
```
After the package has been installed successfully, we can navigate to the **admin**, then to **Content Management**, and lastly to the **Blocks**. We can now use the bulk action to select which blocks we wish to export, otherwise if we wish to export all of the content blocks we select the checkbox next to the name header field of the table.
Finally, we apply the “Export blocks” bulk action at which point the export will generate the necessary blocks and download them to the user’s browser.
# Introduction to blocks
Whilst the layout of the storefront is dictated by the theme, the displayed content is managed through blocks. This includes navigation (such as header and footer menus), promotional imagery, static text and HTML snippets. Each block can contain multiple items of different types, allowing for features like image carousels and mega menus.
# Configuration
Configuration
# How do I register new permissions?
```
// add a single permission
\Aero\Admin\Permissions::add('custom');
// add multiple permissions
\Aero\Admin\Permissions::add(['custom', 'custom.view', 'custom.manage']);
```
# How do I check for permissions?
When checking for permission, you should always be as explicit as you can. For example, checking a user has the `custom.view`or `custom.manage`permissions.
Guarding content in a Blade file:
```
@can('custom.view')
...
@endcan
@canany(['orders', 'custom'])
...
@endcan
```
Checking the admin user has permission to access an endpoint:
```
Route::get('/my-module', [MyModuleController::class, 'index'])
->name('admin.modules.my-module')
->middleware('can:custom.view');
Route::get('/my-module/manage', [MyModuleController::class, 'manage'])
->name('admin.modules.my-module.manage')
->middleware('can:custom.manage');
```
Guarding the execution of code in a Controller:
```
if ($this->can('custom')) {
// ...
}
if ($this->canAny(['orders', 'custom'])) {
// ...
}
```
# How do I change how order references are generated?
You can set an order reference generator to define how order references are generated. To do this you need to use the static **setReferenceGenerator**method on the **Aero\Cart\Models\Order**model.
The method accepts a closure that accepts the order as a parameter and expects you to return a string (the reference for the order passed into the closure).
If you do not set an order reference generator the default generator will be used that does the following:
```
getKey()}-{$random}";
});
}
}
```
# What is the robots file and how does it differ from normal?
The robots.txt file provides instructions for web crawlers and bots that index your store. Aero automatically registers core parts of the store that should avoid being indexed and visited by bots.
In order to extend this file and add modules or store specific restrictions, the robots.txt file is processed as a pipeline, where the content (the text) is made available and can be manipulated.
For ease of access, the **$content**passed through the pipeline is an **Illuminate\Support\Collection**, grouped by the user agent.
```
\Aero\Store\Pipelines\RobotsTxt::extend(static function ($content) {
if ($agent = $content->get('User-agent: *')) {
$agent->push('Disallow: /my_module/');
}
});
```
# How do I store product images on S3
You need to configure and set up your Laravel project for the S3 storage driver. You can read more about this in the [laravel documentation](https://laravel.com/docs/6.x/filesystem#driver-prerequisites)**AWS_ACCESS_KEY_ID**, **AWS_SECRET_ACCESS_KEY**, **AWS_DEFAULT_REGION**, and **AWS_BUCKET**) and installing a composer package (league/flysystem-aws-s3-v3 ~1.0) that lets Laravel support S3.
Once your project is configured you should set **STORE_FILE_DRIVER**and **STORE_LOCAL_FILE_DRIVER**to your S3 driver. If you have followed the Laravel documentation steps above and are using the default S3 disk already created you will simply add this to your env file:
```
STORE_FILE_DRIVER=s3
STORE_LOCAL_FILE_DRIVER=s3
```
**STORE_FILE_DRIVER**
This by default is set as public and is the disk used by Aero when uploading files that should be publicly accessible.
**STORE_LOCAL_FILE_DRIVER**
This by default is set as local and is the disk used by Aero when uploading files that should not be publicly accessible directly.
# Customization
Customization
# How do I remove the manufacturers name from the order items name?
By default if a product name doesn’t contain the manufacturer name already, the manufacturer name is appended to the front of the product name when converting a cart item to an order item.
If you don’t want the manufacturer name appended to the product name you can set the static **Aero\Cart\Models\OrderItem::$nameContainsManufacturer**boolean to **false**.
```
[
UpdateDetails::class,
]
];
```
There is also an alternative, for events that should not be queued:
```
Event::listen(OrderPlaced::class, function ($event) {
$order = $event->order;
//...
});
```
## Extending ManagedListener
In order to use a **ManagedListener**, we have to have an event extending **ManagedEvent**. This can be accomplished like so:
```
use Aero\Events\ManagedHandler;
```
```
protected $listen = [
FormSubmitted::class => [
ManagedHandler::class,
],
];
```
# What are the events available?
## Account
- AddressCreated - AddressDeleted - AddessUpdated - CustomerManualylCreated - CustomerRegistered - CustomerUpdated - CustomerChanged - PasswordResetRequest
## Cart
- CartEmptied - CartItemAdded - CartItemRemoved - CartItemUpdated - OrderCanceled - OrderClosed - OrderComplete - OrderConfirmation - OrderDispatched - OrderItemBought - OrderOnHold - OrderPartiallyDispatched - OrderPartiallyReturned - OrderPlaced - OrderProcessing - OrderReturned - OrderStatusUpdated - OrderSuccessful - OrderUpdated
## Catalog
- AttributesDeleted - AttributesUpdated - CategoryDeleted - CategoryUpdated - ListingCreated - ListingsDeleted - ListingsUpdated - ListingUpdated - ManufacturerUpdated - ProductCreated - ProductDeleted - ProductUpdated - TagsUpdated
## Content
- BlockCreated - BlockDeleted - BlockUpdated
## Fulfillment
- FulfillmentDispatched
## Payment
- PaymentCanceled - PaymentCaptured - PaymentFailed - PaymentRefunded
## Redirector
- RedirectHit - RedirectNotFound
## Store
- FormSubmitted
## Subscription
- SubscriptionCanceled - SubscriptionCardExpired - SubscriptionCreated - SubscriptionFailed - SubscriptionOrderFailed - SubscriptionPaused - SubscriptionPaymentFailed - SubscriptionPaymentSuccess - SubscriptionShippingFailed - SubscriptionSuccessful - SubscriptionSuccessful - SubscriptionUnpaused - SubscriptionUpcoming
# How do I add a custom event to a Service Provider?
[Laravel events](https://laravel.com/docs/8.x/events) provide an observer implementation, allowing you to listen and observe for specific tasks happening in your application. Adding a custom event to a **ServiceProvider**means that the application will listen to it as soon as it occurs. In terms of choosing the right **ServiceProvider**for the job, it breaks down into two options: a Module **ServiceProvider**, or any of the Providers listed under **app/Providers**of our shop’s root directory.
Event directory:
```
app/Events
```
Listener directory:
```
app/Listeners
```
The **ServiceProvider**class has a **$listen**property, to which we simply add on the Event that we wish to add, alongside its listener.
# What are event listeners?
Event listeners, as the name suggests, listen to events that have been assigned to them. This means that listeners have to first be manually mapped for which events they should listen to.
Mappings for **Event Listeners**are declared in the appropriate **Service Provider**, depending on what part of the platform it affects - for example, it could be a **Module Service Provider**or the **EventServiceProvider**in the app directory of Aero.
## How do I add a listener to an event?
```
[
SendEmailVerificationNotification::class,
],
];
/**
* Register any events for your application.
*
* @return void
*/
public function boot()
{
parent::boot();
//
}
}
```
The listener is always nested within the event which it affects so that it can pass on the event to the listener’s handle method. Remember that the listener always goes within the array instantiating from the event class.
# How do I create a new event?
To create a new event, we first have to scaffold the class using Artisan in the project root directory:
```
php artisan make:event Registered
```
The above command scaffolds a class into the **app/Events**and we can modify it accordingly to our needs.
After applying all the necessary functionality to the event, we have to also create a listener to listen to an event happening. In order for Aero to recognize the event, we have to specify it in a **Service Provider**of choice, for example, a module **Service Provider**:
```
protected $listen = [
Registered::class => [
// insert your listener here
]
];
```
## Extending ManagedEvent
Aero’s **ManagedEvent**is an **optional class**made specifically for Aero events and is used mainly for mailing events. These are a special type of event as all the events that extend **ManagedEvent**are actions.
It’s important to note that the listener that listens to an event extending **ManagedEvent**, must also extend the **ManagedListener**class.
### Variables
With **ManagedEvent**, we can create variables that can then be accessible in a mailing template. In essence, variables create helper text and allow the user to use data from the event itself. To define some variables, we have to create a property ‘variables’ in our event:
#### Adding variables
```
public static $variables = [
'product.slug',
'product.name',
'product.model',
'product.summary',
'product.description',
'product.thumbnail',
'product.heading',
'product.url',
'product.categories.*.name',
'product.categories.*.has_featured_image',
'product.categories.*.featured_image_file',
'product.manufacturer.name',
'product.manufacturer.has_logo',
'product.manufacturer.logo_file',
'product.attributes.*.name',
'product.attributes.*.image_file',
'product.images.*.image_file',
'product.all_images.*.image_file',
'product.variants.*.sku',
'product.variants.*.has_stock',
'product.highest_price',
'product.lowest_price',
'product.has_reductions',
];
```
The above variables will then be accessible in our mail template.
An alternative method of adding variables:
```
EventClass::addVariable(‘product.lowest_price’)
```
Or multiple, as an array:
```
EventClass::addVariables([‘product.manufacturer.name’, ‘product.lowest_price’])
```
# How do I make custom mail notification events?
To create an event that shows up in the Mail Notifications part of the admin your event needs to extend **Aero\Events\ManagedEvent**and have **Aero\Events\ManagedHandler**as a registered listener.
To create an event you need to create a class that extends **Aero\Events\ManagedEvent**.
```
[
ManagedHandler::class,
],
];
public function setup()
{
//
}
}
```
# Extending Core Functionality
Extending Core Functionality
# What are models and how do I use them?
All models provided as part of the Aero core platform are [Eloquent models](https://laravel.com/docs/eloquent)
For example, if a module provided `reviews`for products, the `reviews`method can be added to the Product model using a `macro`:
```
\Aero\Catalog\Models\Product::macro('reviews', function () {
return $this->hasMany(\Acme\MyModule\Models\Review::class);
});
```
The relationship query builder can be accessed by referencing the method:
```
$approvedReviewCount = $product->reviews()->where('approved', true)->count();
```
Just like a typical Eloquent relationship on a model, the resulting `Collection`of reviews can be accessed through the magic property:
```
$reviews = $product->reviews;
```
```
{% for review in product.reviews %}
...
{% endfor %}
```
# How do I add a custom field to the new and edit product page?
In this mini tutorial we will add a notes field to the product new and edit page for the product and each variant.
This mini tutorial assumes that you have a module setup or you’re happy working from the app service provider (using the boot method). You can see how to set up a module here (link).
## Adding the Database Migration
To get started we will add a migration file that will update the products and variants tables to have a notes column. To do this we’ll need to create the migration file and load them from within the modules service provider.
```
string('notes')->nullable()->after('description');
});
Schema::table('variants', function (Blueprint $table) {
$table->string('notes')->nullable()->after('name');
});
}
/**
* Reverse the migrations.
*
* @return void
*/
public function down()
{
Schema::table('products', function (Blueprint $table) {
$table->dropColumn('notes');
});
Schema::table('variants', function (Blueprint $table) {
$table->dropColumn('notes');
});
}
}
```
## Adding the Slot View
Now we’ll create two views, one that will be injected for the product and one that will be injected for the variants. These views will have a text area in them for the notes input.
**product-notes-field.blade.php**
```
```
**variant-notes-field.blade.php**
```
```
After creating the views we will load them in the module service provider using the `$this->loadViewsFrom`method and inject them into the relevant slots using the `Aero\Admin\AdminSlot::inject`method.
```
app->runningInConsole()) {
$this->loadMigrationsFrom(__DIR__.'/../database/migrations');
}
$this->loadViewsFrom(__DIR__.'/../resources/views', 'my-module');
AdminSlot::inject('catalog.product.new.cards', 'my-module::product-notes-field');
AdminSlot::inject('catalog.product.edit.cards', 'my-module::product-notes-field');
AdminSlot::inject('catalog.product.new.variant', 'my-module::variant-notes-field');
AdminSlot::inject('catalog.product.edit.variant', 'my-module::variant-notes-field');
}
}
```
## Making the Notes Save
### Adding Notes as a Fillable
We need to make the notes fillable as Laravel will only mass assign [fillable attributes](https://laravel.com/docs/6.x/eloquent#mass-assignment)`Aero\Catalog\Models\Product and Aero\Catalog\Models\Variant`).
```
app->runningInConsole()) {
$this->loadMigrationsFrom(__DIR__.'/../database/migrations');
}
$this->loadViewsFrom(__DIR__.'/../resources/views', 'my-module');
AdminSlot::inject('catalog.product.new.cards', 'my-module::product-notes-field');
AdminSlot::inject('catalog.product.edit.cards', 'my-module::product-notes-field');
AdminSlot::inject('catalog.product.new.variant', 'my-module::variant-notes-field');
AdminSlot::inject('catalog.product.edit.variant', 'my-module::variant-notes-field');
Product::makeFillable('notes');
Variant::makeFillable('notes');
}
}
```
### Adding Notes to the Validators
To let the notes input data get through validation it needs to be added to the `Aero\Admin\Http\Requests\Catalog\CreateProductRequest`and `Aero\Admin\Http\Requests\Catalog\UpdateProductRequest`validators. To do this we need to use the `expects`method on the two validators and pass in the notes field and its rules.
```
app->runningInConsole()) {
$this->loadMigrationsFrom(__DIR__.'/../database/migrations');
}
$this->loadViewsFrom(__DIR__.'/../resources/views', 'my-module');
AdminSlot::inject('catalog.product.new.cards', 'my-module::product-notes-field');
AdminSlot::inject('catalog.product.edit.cards', 'my-module::product-notes-field');
AdminSlot::inject('catalog.product.new.variant', 'my-module::variant-notes-field');
AdminSlot::inject('catalog.product.edit.variant', 'my-module::variant-notes-field');
Product::makeFillable('notes');
Variant::makeFillable('notes');
CreateProductRequest::expects('notes', 'nullable|string');
UpdateProductRequest::expects('notes', 'nullable|string');
}
}
```
### Adding Notes to the Transformers
Adding notes to the transformers will ensure that it’s available in our views through Vue. We need to use the add method on the `Aero\Admin\Transformers\BaseVariantTransformer`, `Aero\Admin\Transformers\ProductTransformer`, and `Aero\Admin\Transformers\VariantTransformer`transformers.
```
app->runningInConsole()) {
$this->loadMigrationsFrom(__DIR__.'/../database/migrations');
}
$this->loadViewsFrom(__DIR__.'/../resources/views', 'my-module');
AdminSlot::inject('catalog.product.new.cards', 'my-module::product-notes-field');
AdminSlot::inject('catalog.product.edit.cards', 'my-module::product-notes-field');
AdminSlot::inject('catalog.product.new.variant', 'my-module::variant-notes-field');
AdminSlot::inject('catalog.product.edit.variant', 'my-module::variant-notes-field');
Product::makeFillable('notes');
Variant::makeFillable('notes');
CreateProductRequest::expects('notes', 'nullable|string');
UpdateProductRequest::expects('notes', 'nullable|string');
ProductTransformer::add(function ($data) {
return [
'notes' => $data['product']->notes ?? '',
];
});
VariantTransformer::add(function ($data) {
return [
'notes' => $data['variant']->notes ?? '',
];
});
BaseVariantTransformer::add(function ($data) {
return [
'notes' => '',
];
});
}
}
```
# What are the available commands?
**php artisan make:module**
This command scaffolds a module for you (you need to provide a valid name for the module such as **aerocargo/my-module**). This involves setting up composer and publishing some default module stubs.
**php artisan aero:configure**
This command walks you through configuring your store. This includes things such as setting the store's name, database connection, and Elasticsearch connection.
**php artisan aero:install**
This command runs you through the installation process for your store. This includes completing migrations, configuring Elasticsearch, linking storage, seeding data, and clearing the applications cache.
**php artisan aero:link**
This command calls the patch command, links theme/module assets, clears the Twig views cache, and clears the Laravel views cache.
**php artisan module:install**
This command will install a specific module after you have composer required the module. This command seeds any data for the module, optionally clears the application cache, and links the module assets. You should note that this command doesn’t have to be used and is automatically run when composer requiring a module.
**php artisan aero:patch**
This command patches your store's database. This command is run automatically when updating and ensures that your database is kept up to date with Aeros latest updates.
**php artisan aero:search:install**
This command sets up the necessary environment for your search driver. By default when using Elasticsearch this command will create the required indexes.
**php artisan aero:search:rebuild**
This command resets up and reindexes your search by running the search install and reindex commands.
**php artisan aero:search:reindex**
This command will reindex your database data into your searches index. By default when using Elasticsearch this command will clear the index and then index your database data.
**php artisan aero:seed:emails**
This command will seed some default email templates to your mail notifications.
**php artisan aero:sitemap:cms**
This command will generate the pages-sitemap.xml sitemap file in your public storage directory. This sitemap covers any pages you create through the admin.
**php artisan aero:sitemap:combinations**
This command will generate the combinations-sitemap.xml file in your public storage directory. This sitemap covers any combinations you create through the admin.
**php artisan aero:sitemap:generate**
This command will generate a complete sitemap for your store. This generates a sitemap.xml file in your public storage directory that references individual sitemap files for products, combinations, and pages.
**php artisan aero:sitemap:products**
This command will generate the products-sitemap.xml sitemap file in your public storage directory. This sitemap covers any products you create through the admin.
**php artisan aero:subscriptions:alert-upcoming**
This command will look for upcoming subscriptions and emit the **Aero\Subscription\Events\SubscriptionUpcoming **event for them.
**php artisan aero:subscriptions:check-cards**
This command will look for expired cards on subscriptions and then cancel the subscription and emit the **Aero\Subscription\Events\SubscriptionCardExpired**event for them.
**php artisan aero:subscriptions:process**
This command will process any subscriptions that need processing.
# How to add a custom field to the address forms?
This short tutorial will walk you through adding an address line 3 field to all of the address forms (found in the admin, account-area, and checkout).
## Migrations
The first step is to add your field to all of the address tables so that it can be stored. To do this we’ll create and register a migration that adds a `line_3`field to the `addresses`, `order_addresses`, and `fulfillment_addresses`tables.
### Migration Code
```
string('line_3')->nullable()->after('line_2');
});
Schema::table('order_addresses', function (Blueprint $table) {
$table->string('line_3')->nullable()->after('line_2');
});
Schema::table('fulfillment_addresses', function (Blueprint $table) {
$table->string('line_3')->nullable()->after('line_2');
});
}
/**
* Reverse the migrations.
*
* @return void
*/
public function down()
{
Schema::table('fulfillment_addresses', function (Blueprint $table) {
$table->dropColumn('line_3');
});
Schema::table('order_addresses', function (Blueprint $table) {
$table->dropColumn('line_3');
});
Schema::table('addresses', function (Blueprint $table) {
$table->dropColumn('line_3');
});
}
}
```
### Service Provider Code
```
app->runningInConsole()) {
$this->loadMigrationsFrom(__DIR__.'/../database/migrations');
}
}
}
```
## Views
The next step is to create a view for the line 3 field. To achieve this we’ll create and register a Twig view for the field. The view will include the `forms::components.input`view to get a simple input field.
### View Code
```
{% include "forms::components.input" with {
type: 'text',
error: errors.first((inputName ?? group) ~ '.line_3'),
half: false,
label: 'Address Line 3 (Optional)',
class: (inputName ?? group) ~ '-' ~ 'line-3',
name: (inputName ?? group) ~ '[line_3]',
value: old((inputName ?? group) ~ '.line_3', address.line_3),
autocomplete: type ? type ~ ' line_3' : 'line_3',
required: true
} only %}
```
### Service Provider Code
```
app->runningInConsole()) {
$this->loadMigrationsFrom(__DIR__.'/../database/migrations');
}
$this->loadViewsFrom(__DIR__.'/../resources/views', 'my-module');
}
}
```
## Adding the Field to the Forms
Now we need to add the field to the address forms. To do this we’ll make the field fillable and add it to the validation requests using the `Aero\Common\Helpers\Address::addField()`helper method. After that we’ll extend `Aero\Forms\AddressForm`to add the field to the frontend address forms (checkout and account-area) and `Aero\Admin\Http\Forms\AdminAddressForm`to add the field to the admin address forms.
```
app->runningInConsole()) {
$this->loadMigrationsFrom(__DIR__.'/../database/migrations');
}
$this->loadViewsFrom(__DIR__.'/../resources/views', 'my-module');
Address::addField('line_3');
AddressForm::extend(function ($form) {
$form->addSectionAfter('line3', 'my-module::line-3-field', 'line2');
});
AdminAddressForm::extend(function ($form) {
$form->addSectionAfter('line3', 'my-module::line-3-field', 'line2');
});
}
}
```
## Adding the Field to the Rendered Addresses
This step is optional and will add the line 3 field to the address when it’s rendered (such as when viewing an order or viewing your addresses in the account area). To do this we’ll extend `Aero\Address\Pipelines\AddressFormatter`and `Aero\Address\Pipelines\AddressStringFormatter`.
```
app->runningInConsole()) {
$this->loadMigrationsFrom(__DIR__.'/../database/migrations');
}
$this->loadViewsFrom(__DIR__.'/../resources/views', 'my-module');
Address::addField('line_3');
AddressForm::extend(function ($form) {
$form->addSectionAfter('line3', 'my-module::line-3-field', 'line2');
});
AdminAddressForm::extend(function ($form) {
$form->addSectionAfter('line3', 'my-module::line-3-field', 'line2');
});
AddressFormatter::extend(function ($formatter) {
$formatter->putAfter('line3', $formatter->fields['line_3'], 'line2');
});
AddressStringFormatter::extend(function ($formatter) {
$formatter->putAfter('line3', $formatter->fields['line_3'], 'line2');
});
}
}
```
# How do I extend the address forms?
Aero has address forms in the checkout, account-area, and admin that can be extended.
## Storefront Address Forms
The storefront address forms are address forms found on your storefront (the checkout and the account-area). These forms are customer facing and all extend `Aero\Forms\AddressForm`.
### Structure
In all of the address forms there’s a `top_sections`, `sections`, and `bottom_sections`section (some forms have an additional section). These sections build up the form. The reason that there are sections is so when the form is in lookup mode, the address fields can be hidden as they’re all in the `sections`section.
#### Top Sections
****
****
| Key | View |
| ---------- | -------------------------------- |
| first_name | forms::address.fields.first-name |
| last_name | forms::address.fields.last-name |
| lookup | forms::address.lookup |
#### Sections
****
****
| Key | View |
| -------- | ------------------------------ |
| company | forms::address.fields.company |
| line1 | forms::address.fields.line1 |
| line2 | forms::address.fields.line2 |
| city | forms::address.fields.city |
| zone | forms::address.fields.zone |
| postcode | forms::address.fields.postcode |
| country | forms::address.fields.country |
#### Bottom Sections
****
****
| Key | View |
| ----- | --------------------------- |
| phone | forms::address.fields.phone |
#### Additional Sections
Some storefront address forms have some additional sections on top of the ones above. To adjust these sections you’d have to specifically extend the specific form class instead of the generic **Aero\Forms\AddressForm**class.
**Aero\Checkout\Http\Forms\CustomerAddressForm**
This address form has additional customer sections.
****
****
| Key | View |
| -------- | --------------------------------------- |
| customer | account-area::forms.fields.address.name |
**Aero\AccountArea\Http\Forms\AccountAddressForm**
This address form is extended by all of the other account area address forms. This form injects 2 additional things to the top and bottom sections.
The top sections has this injected right at the top of all of the top sections:
****
****
| Key | View |
| ------------ | --------------------------- |
| address_name | checkout::sections.customer |
The bottom sections has this injected right at the bottom of all of the bottom sections:
****
****
| Key | View |
| ---------- | --------------------------------------------- |
| is_default | account-area::forms.fields.address.is_default |
## Admin Address Forms
The admin address forms are address forms found on your admin. These forms all extend **Aero\Admin\Http\Forms\AdminAddressForm**.
###
### Structure
The structure for the admin forms is the same as the structure for the storefront forms but the views are different.
#### Top Sections
****
****
| Key | View |
| ---------- | -------------------------------------- |
| first_name | admin::forms.fields.address.first-name |
| last_name | admin::forms.fields.address.last-name |
| lookup | admin::forms.partials.address-lookup |
#### Sections
****
****
| Key | View |
| -------- | ------------------------------------ |
| company | admin::forms.fields.address.company |
| line1 | admin::forms.fields.address.line1 |
| line2 | admin::forms.fields.address.line2 |
| city | admin::forms.fields.address.city |
| zone | admin::forms.fields.address.zone |
| postcode | admin::forms.fields.address.postcode |
| country | admin::forms.fields.address.country |
#### Bottom Sections
****
****
| Key | View |
| ----- | --------------------------------- |
| phone | admin::forms.fields.address.phone |
##
## Address Form Validation
All address forms take validation from **Aero\Forms\Validation\AddressRules**. Instead of adding rules to this class through the **extends**static method you should make use of the **Aero\Common\Helpers\Address::addField()**method. This method accepts the same parameters as if you were extending a validator (you can learn more about that here, link). The difference is that it adds the rules but also makes your field fillable on all of the address models. These models are **Aero\Account\Models\Address**, **Aero\Cart\Models\OrderAddress**, and **Aero\Fulfillment\Models\FulfillmentAddress**.
# How do I add settings to my model?
This tutorial will explain the steps required to add settings to your model and assumes you have your model setup with create and edit pages.
## Adding a Trait to your Model
The first step is to add the `Aero\Common\Traits\CanHaveSettings`trait to your model.
```
encrypted('password');
$group->boolean('require_password_to_view')->default(false);
});
}
}
```
## Adding the Settings Fields to your Create/Edit Pages
Now that you have defined the settings for your model you can update your models create/edit pages to let users update the settings.
To add a card that lets user edit the models settings to your create/edit pages you need to include the `admin::settings.model-settings`view and pass in your model, like this:
```
@include('admin::settings.model-settings', ['model' => $myModel])
```
If you don’t have a model to pass in (because you’re on a create page so the model hasn’t been created yet), pass in a fresh instance of your model, like this:
```
@include('admin::settings.model-settings', ['model' => new \Acme\MyModule\Models\MyModel()])
```
It’s important to ensure that the include is inside of your form. A more “complete” example may look something like this:
```
@extends('admin::layouts.main')
@section('content')
@endsection
```
## Adding the Settings Validation to your Create/Edit Requests
You need to update your request validators so that the settings data will be correctly validated and formatted.
### Adding the Rules
You need to update your validators `rules`method to merge in the settings rules with your current rules. To do this you need to `array_merge`your rules with the array of rules returned by the `Aero\Admin\Utils\SettingHelpers::getRulesForModel`method. The `Aero\Admin\Utils\SettingHelpers::getRulesForModel `method expects you to pass the class string of your model.
```
'required|max:255', // You can add your models settings here
], SettingHelpers::getRulesForModel(MyModel::class));
}
}
```
### Adding the Attributes
You need to do the same thing for the attributes.
```
'required|max:255', // You can add your models settings here
], SettingHelpers::getRulesForModel(MyModel::class));
}
}
```
### Formatting the Data for Validation
You need to add a `prepareForValidation`method to your validator and ensure it calls the `SettingHelpers::formatRequestDataForModel `method like shown below. This method will format the incoming settings request data so that it is ready to be validated.
```
replace(
SettingHelpers::formatRequestDataForModel(MyModel::class, $this->all())
);
}
public function attributes(): array
{
return array_merge([], SettingHelpers::getRuleAttributesForModel(MyModel::class));
}
public function rules(): array
{
return array_merge([
'name' => 'required|max:255', // You can add your models settings here
], SettingHelpers::getRulesForModel(MyModel::class));
}
}
```
## Saving the Validated Settings for your Model
To save the settings you need to pass your model and data into the `Aero\Admin\Utils\SettingHelpers::saveForModel`method, like this:
```
update($data = $request->validated());
SettingHelpers::saveForModel($model, $request->validated()['settings'] ?? []);
return redirect(route('my-model.index'))->with([
'message' => __('Your changes have been saved'),
]);
}
}
```
# How do I add a custom price to a product with a module?
In this mini tutorial we will add some checkboxes to the product page that when checked add an additional charge to the product. The additional charge will be shown dynamically on the product page as it changes or the product's price changes (due to different variants being selected).
This mini tutorial assumes that you have a module setup or you’re happy working from the app service provider (using the boot method). You can see how to set up a module here (link).
## Adding the Prices Data
To get started we will add a `$prices`array to our module service provider that will be the source of truth for our extra prices. We are using a simple array instead of database data due to this being a mini tutorial. The `$prices`array will have id, name, and price (this will also have inc and ex values and be in pence) keys.
```
1,
'name' => 'Pay £1 more',
'price' => [
'inc' => 100,
'ex' => 83.33,
],
],
[
'id' => 2,
'name' => 'Pay £5 more',
'price' => [
'inc' => 500,
'ex' => 416.6,
],
],
[
'id' => 3,
'name' => 'Pay £10 more',
'price' => [
'inc' => 1000,
'ex' => 833.33,
],
],
];
public function setup()
{
//
}
}
```
## Creating a Javascript View and Adding the Prices Data and Javascript to the Product Page
Now we’re going to create a Twig file called javascript where we will put the frontend javascript that will be used on the product page. This view is registered using the `$this->loadViewsFrom`method in the module service providers `setup`method.
Next we’re going to use the `Aero\Store\Http\Responses\ProductPage`[response builder](../../introduction/4409594184721-introduction-to-response-builders/index.md) to extend the product page. We will inject the $prices data using the setData method and then we’ll use the `Aero\Store\Pipelines\ContentForBody`[pipeline](../../introduction/4409548756369-introduction-to-pipelines/index.md) to add our javascript view to the product page.
```
1,
'name' => 'Pay £1 more',
'price' => [
'inc' => 100,
'ex' => 83.33,
],
],
[
'id' => 2,
'name' => 'Pay £5 more',
'price' => [
'inc' => 500,
'ex' => 416.6,
],
],
[
'id' => 3,
'name' => 'Pay £10 more',
'price' => [
'inc' => 1000,
'ex' => 833.33,
],
],
];
public function setup()
{
$this->loadViewsFrom(__DIR__.'/../resources/views', 'my-module');
ProductPage::extend(function (ProductPage $page) {
$page->setData('extra_prices', $this->prices);
ContentForBody::extend(function (&$content) {
$content .= view('my-module::javascript');
});
});
}
}
```
## Adding the Extra Prices to the Product Page
In the `product.twig`file we’re going to add some Vue code to show the total price and the total extra price. Then we’ll add some Twig code to loop over the `extra_prices`variable that we injected into the product page earlier. This loop will display the name as a label and then add a checkbox with a value of the extra price id and some data attributes for the price inc and ex values.
```
Total Price
Total Extra Price
{% for extra in extra_prices %}
{% endfor %}
```
## Coding the Javascript for the Product Page
Now we’re going to add javascript code to the javascript twig view we previously created. This javascript code will be responsible for setting the additional price when the checkboxes are checked and sending any checked extra prices to the server when the product is added to the cart.
To update the additional price when the checkboxes are checked we’ll set some code to be executed on the `product.loaded`Aero Event. This code will loop over all input checkbox elements that have the `data-extra-price-inc`attribute and add an input event listener. We’ll add a `updateAndSetAdditionalPrices`function that will be executed when the input changes and also initially once the product has loaded (in case you have some extra prices that are checked by default). This function loops over all input checked checkboxes that have the `data-extra-price-inc`attribute and adds up their inc and ex prices. Then it runs the product.set-additional-price Aero Event to tell Aero the new total additional price.
To send the checked extra prices to the server we’ll set some code to be executed on the `product.add-to-cart`Aero Event. This code loops over all input checked checkboxes that have the `data-extra-price-inc`attribute and adds their values (the extra price id) to an array. This array is then added to the payload that will be sent to the server.
```
```
## Adding any Selected Extra Prices to the Cart Item
We’ll add some code in the module service provider below the current code that extends the `Aero\Store\Pipelines\CartItemBuilder`and gets the extra price ids from the request, maps them to the relevant extra price, filters out any that are null (because they were not valid extra price ids), and then adds a `Aero\Cart\CartItemOption`to the `Aero\Cart\CartItem`with the extra price details.
```
1,
'name' => 'Pay £1 more',
'price' => [
'inc' => 100,
'ex' => 83.33,
],
],
[
'id' => 2,
'name' => 'Pay £5 more',
'price' => [
'inc' => 500,
'ex' => 416.6,
],
],
[
'id' => 3,
'name' => 'Pay £10 more',
'price' => [
'inc' => 1000,
'ex' => 833.33,
],
],
];
public function setup()
{
$this->loadViewsFrom(__DIR__.'/../resources/views', 'my-module');
ProductPage::extend(function (ProductPage $page) {
$page->setData('extra_prices', $this->prices);
ContentForBody::extend(function (&$content) {
$content .= view('my-module::javascript');
});
});
CartItemBuilder::extend(function (CartItem $item) {
collect(request()->input('extras', []))->map(function ($extra) {
return collect($this->prices)->firstWhere('id', $extra);
})->filter()->each(function ($extra) use ($item) {
$option = CartItemOption::create($extra['name']);
$option->setPriceInc($extra['price']['inc']);
$item->addOption($option);
});
});
}
}
```
# General
General
# How do I set up a slug validator?
You can control if a collection of slugs is valid or not by setting your own validator:
```
\Aero\Store\Routing\Slugs::setValidator(function ($slugs, $resolver) {
if ($resolver !== 'listings') return true;
if ($slugs->count() < 3 && $slugs->where('model_type', 'tag')->count()) return false;
return true;
});
```
# How do I add a route to the CSRF exception list?
If you do not want your route to require a valid [CSRF token](https://laravel.com/docs/6.x/csrf)
## Code
To add a route to the exceptions list through code you need to add to the static **VerifyCsrfToken::$exceptions**array.
```
= 7.2) with BCMath, Ctype, JSON, Mbstring, OpenSSL, PDO, Tokenizer, XML, cURL,GD/ImageMagick
-
[Composer](https://getcomposer.org/)
-
[Nginx](https://www.nginx.com/) or [Apache](https://httpd.apache.org/)
-
[Node.js](https://nodejs.org/en) (>= 8.10)
-
[MySQL](https://www.mysql.com/) (>= 5.7)
-
[Elasticsearch](https://www.elastic.co/products/elasticsearch) (6.*)
# Introduction
Introduction
# Introduction to backend admin slots
Slots allow for a module to include its own view on existing admin pages.
See our [section on backend admin slots](https://support.aerocommerce.com/hc/en-us/sections/4409325494161-Admin-Slots) for more information.
# Introduction to collections for developers
Collections are not what the developer might associate with Laravel’s immutable structure, but a collection of rules being applied to the listing on the store’s frontend.
Aero has a variety of collection rules which can alter the filters, more specifically, the search filters that usually would be modified by the customer where products are listed. These include:
## Collection rules
- Which tags to filter by - Which manufacturer to filter by - Which price range to filter by (from-to) - Which price status to filter by (e.g. Reduced price items only) - Which DateTime range to filter by (range from-to or by days)
For more information about collections please see our admin [documentation for collections](https://support.aerocommerce.com/hc/en-us/sections/4409024651793-Collections)
# Introduction to permissions for developers
As an agency, you will likely need to restrict the information and actions of admin accounts belonging to the retailer.
This is easily set up using our user configuration page. For more information please see "How do I set permissions for users?"
As a developer you can expand on these permissions in order to add anything else you may need;
- [How do I register new permissions?](../../configuration/4409400889873-how-do-i-register-new-permissions/index.md) - [How do I check for permissions?](../../configuration/4409400975889-how-do-i-check-for-permissions/index.md)
# Introduction to transformers
Transformers are used by the admin on some edit pages to transform data from PHP into an json encoded array that can be passed to Vue.
See our [section on admin transformers](https://support.aerocommerce.com/hc/en-us/sections/4409660230033-Admin-Transformers) for more information.
# Introduction to events for developers
Events are a method of notifying different parts of Aero of tasks that have either been completed or need completing right after something has occurred. Events are only fired when a specified listener has been assigned to it and appropriately notified.
The events are always declared first in any **Service Provider**, while the listeners are wrapped within the event class. This is because we might need a number of listeners for a given event, each responsible for carrying out different tasks.
See our [section on events](https://support.aerocommerce.com/hc/en-us/sections/4409413119505-Events) for more information.
Example of an event:
```
customer = $customer;
$this->customerName = $customer->name;
$this->customerEmail = $customer->email;
}
public function getNotifiable()
{
return $this->customer;
}
}
```
# Introduction to pipelines
Pipelines provide a convenient way to manipulate a given payload. This payload can be an object or a simple string.
See our [section on pipelines](https://support.aerocommerce.com/hc/en-us/sections/4409659194001-Pipelines) for more information
# Introduction to the account area
The account area provides an extendable area where your customers can view their orders and manage their accounts.
See our [section on the account area](https://support.aerocommerce.com/hc/en-us/sections/4409544309265-Account-Area) for more information.
# Introduction to response builders
Response builders are Aero's unique solution to serving storefront pages. Based on the concept of pipelines used in [Laravel middleware](https://laravel.com/docs/8.x/middleware)
See our [section on response builders](https://support.aerocommerce.com/hc/en-us/sections/4409659636753-Response-Builders) for more information.
# Introduction to listings and search
Aero offers out-of-the-box listings and search system which is powered by [Elasticsearch](https://www.elastic.co/elasticsearch/)
Please note the Elasticsearch version is 6.8.
See our [section on listings and search](https://support.aerocommerce.com/hc/en-us/sections/4409603685393-Listings-and-Search) for more information.
# Introduction to payment drivers
A payment driver is the brain behind the payment method and serves as a bridge to the payment gateway. Whilst there are several integrations that are maintained by the Aero team, a store may require a bespoke integration in order to meet the requirements of a retailer.
See our [section on payment drivers](https://support.aerocommerce.com/hc/en-us/sections/4410587927057-Payment-drivers) for more information.
# What is an Aero Commerce Agora account and why do I need it?
To get started you'll need an Agora account.
Your Agora account is used to download the platform and create projects. You can [register for an account here](https://agora.aerocommerce.com/register)
Projects are assigned unique credentials which allows them to purchase themes and modules. These credentials must not be shared between projects as doing so will invalidate them.
Without valid credentials, a project cannot receive platform updates and security fixes.
# How do I obtain package repository credentials?
Once logged in to Agora, head over to the projects section and click the New project button. You'll need to give the project a name, for example, the website name or your client's company. In the example below, we've used a fictional company of "Acme Inc".
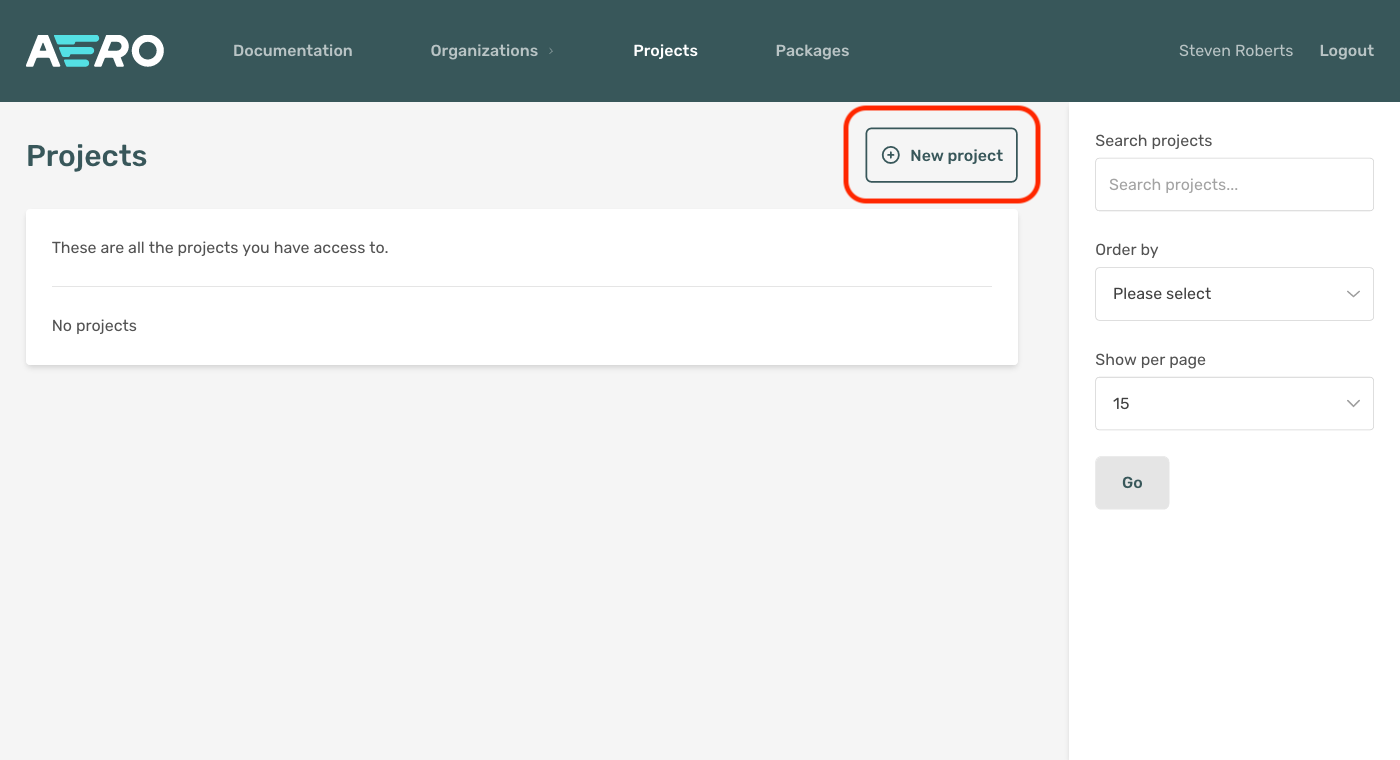
A domain is optional at this point; you can enter this later when the project is ready to go live. Click the "create new project" button to create the project.
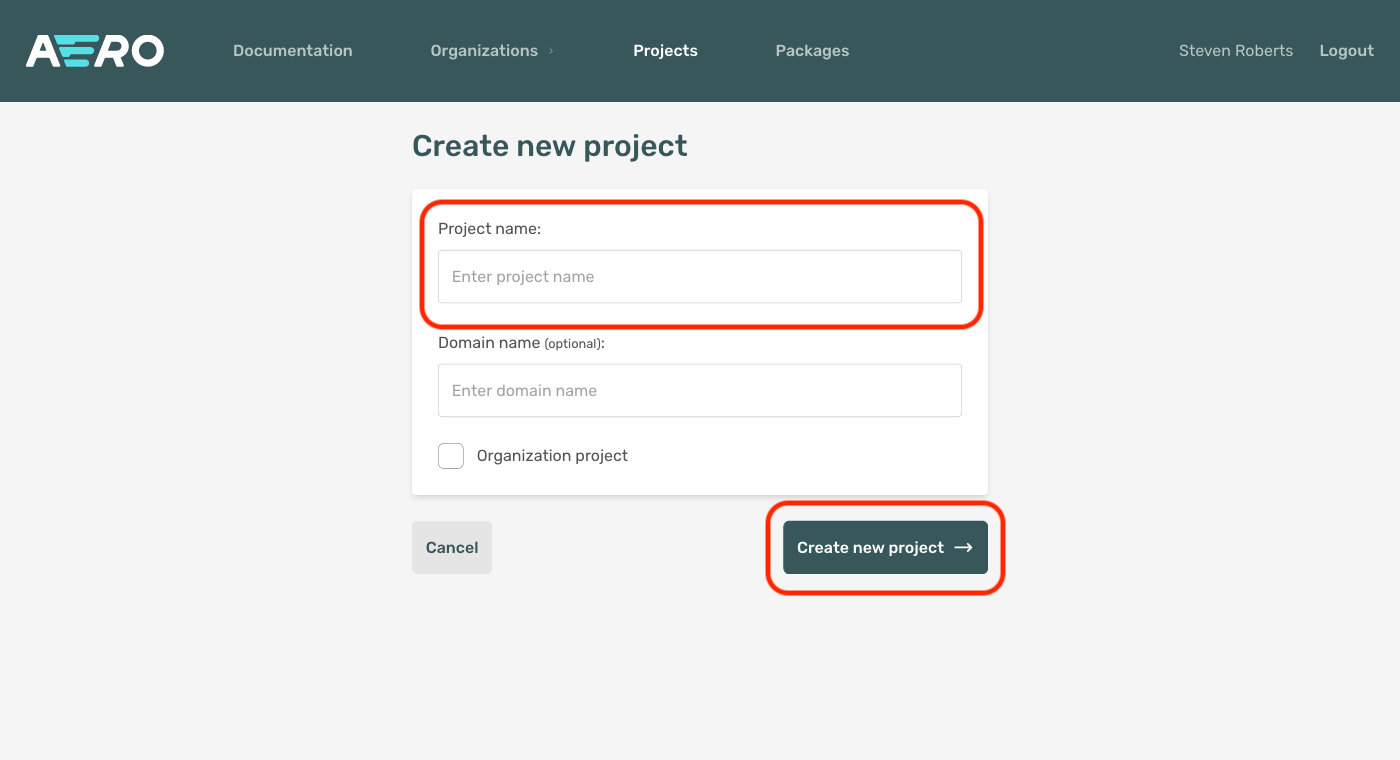
Your new project now appears in the list of projects along with the package repository credentials.
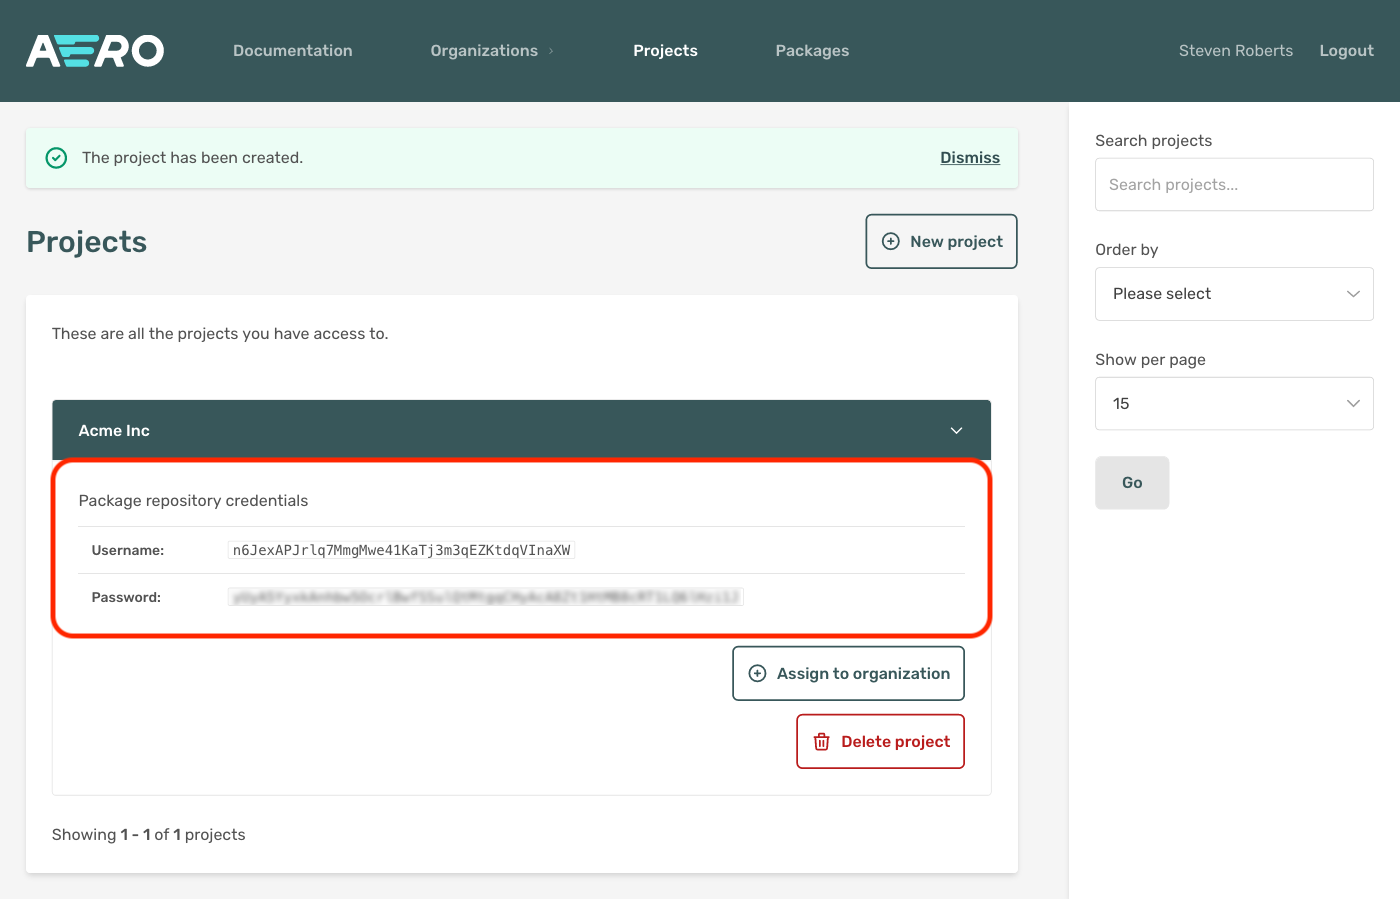
# Introduction to the admin
The backend admin (the "admin") is the password-protected back office where administrative tasks can be performed. This includes managing the store's catalog (products, categories, manufacturers, etc.), viewing and processing orders, managing discounts, viewing reports, editing the content of the storefront (promotional imagery, menus and SEO content, etc.), and much more.
# Introduction to resource lists
Resource lists allow a table to be extended through additional columns, filters, or sort bys and for bulk actions to be applied.
Please see our [section on resource lists](https://support.aerocommerce.com/hc/en-us/sections/4408596383633-Resource-Lists) for more information.
# Introduction to Laravel PHP Framework
The Aero platform is built using the [Laravel PHP framework](https://laravel.com/)
Before developing with Aero, we recommend that you become acquainted with the core concepts of Laravel. We recommend the following resources:
The official [Laravel documentation](https://laravel.com/docs) is a great place to start.
[Laracasts](https://laracasts.com/) offer an on‑demand library of screencast video tutorials.
# Listings And Search
Listings And Search
# How do I create a custom sort order for the listings pages?
When you set the sort get parameter in a listing pages url (e.g. ?sort=name-az), a method is called on the **\Aero\Search\Elastic\Query\Builder**class (for name-az the method **sortByNameAz**is called). You can find the default sort by methods in the **Aero\Search\Elastic\Concerns\CanBeSorted**trait.
To add a custom sort to the listings page you therefore just need to macro a method to the **\Aero\Search\Elastic\Query\Builder**class using the correct naming convention.
This example adds an ascending and descending sort by for the summary (to use it you need to add ?sort=summary-az or ?sort=summary-za to the listing page url):
```
query->addSort([
'string-sort.summary' => [
'order' => 'asc',
],
]);
});
\Aero\Search\Elastic\Query\Builder::macro('sortBySummaryZa', function () {
$this->query->addSort([
'string-sort.summary' => [
'order' => 'desc',
],
]);
});
}
}
```
If you try the above code you will notice that it throws an **Elastica\Exception\ResponseException**error. This is because the **string-sort.summary**field used in the Elasticsearch sort by query does not exist.
To add **summary**as a field to the **string-sort**key you need to use the **\Aero\Search\Elastic\Documents\ListingDocument::add()**method to define a closure that will return an array of data to merge into the document structure. It’s important to know that when you change the document structure you need to reindex. You can reindex using the **php artisan aero:search:reindex**command.
```
$document->getModel()->product->getTranslation('summary', request()->store()->language),
];
});
\Aero\Search\Elastic\Query\Builder::macro('sortBySummaryAz', function () {
$this->query->addSort([
'string-sort.summary' => [
'order' => 'asc',
],
]);
});
\Aero\Search\Elastic\Query\Builder::macro('sortBySummaryZa', function () {
$this->query->addSort([
'string-sort.summary' => [
'order' => 'desc',
],
]);
});
}
}
```
## Advanced Query
It’s possible to do a more advanced query for your Elasticsearch sort by. You can make use of [Elasticsearch’s Painless scripting language](https://www.elastic.co/guide/en/elasticsearch/reference/master/modules-scripting-painless.html)
This example code shows how to add a rand sort that will execute a Java script to sort the listings.
```
query->addSort([
'_script' => [
'type' => 'number',
'script' => [
'lang' => Script::LANG_PAINLESS,
'source' => $this->loadJavaFile(__DIR__.'/../scripts/random-sort.java'),
'params' => $this->parameters,
],
'order' => 'asc',
],
]);
});
}
}
```
This Java file is located in a scripts folder outside of the src folder:
```
def sorts = new ArrayList();
Random rand = new Random();
sorts.add(rand.nextInt(1000000));
if (sorts.size() === 0) {
sorts.add(0);
}
Collections.min(sorts.stream().map(Double::doubleToRawLongBits).collect(Collectors.toList()));
```
# What are the available documents for listings and search?
There are 2 documents available:
```
Aero\Search\Elastic\Documents\ListingsDocument
```
This document is used to hold information about the listings that are shown on the storefront.
```
Aero\Search\Elastic\Documents\ProductDocument
```
This document is used to hold information about the products within the store’s catalog. It is generally used in the backend admin, to allow for quick access when managing products.
# How do I re-index listing and search documents?
Aero automatically manages indexing changes to documents. For example, if a product's stock level changes the document is updated to reflect the current version. Adding and removing documents is also taken care of for you, sparing the need to schedule in daily tasks to update the store's entire catalog. However, in cases where a large amount of data has been manually changed, or an addition to the document structure has been made, a re-index of all documents can be carried out using the following command:
```
php artisan aero:search:reindex
```
If there have only been modifications to a certain document (for example, only the listing document structure has been extended) then the document **type**can be passed as an option, which will only re-index the documents with the provided type. The available types correspond to the names of the elastic documents, **listing**, and **product**.
```
php artisan aero:search:reindex --type=listing
```
# How do I add custom facets to listing and search?
Faceted navigation in eCommerce allows customers the ability to refine down a catalog of products based on their filter criteria.
In order to define facets against a document, you must first register the facet group. This should be done within the **boot()**method of a **ServiceProvider**or the **setup()**method of a module **ServiceProvider**.
```
\Aero\Search\FacetSettings::registerFacet('stock', 'Stock Status');
```
The document structure can then be extended to add the facet to the document’s data.
```
\Aero\Search\Elastic\Documents\ListingDocument::add('string-facets', function ($document) {
$stock = $document->getModel()->availableStock() > 0;
return [
\Aero\Search\Elastic\Facet::create('stock', 'Stock Status', (int) $stock, $stock ? 'In-stock' : 'Out of stock'),
];
});
```
Re-index the documents after any modifications to the document structure.
# How do I setup the search index?
Firstly, you should ensure that the Elasticsearch host information is defined in the store's .env. If you're running the service directly on your machine (either natively or through Docker), you'll most likely use the following details:
```
ELASTICSEARCH_HOST=localhost
ELASTICSEARCH_PORT=9200
```
When using a remote connection, ensure the host does not contain the port and URI scheme.
It is also important to ensure the **STORE_IDENTIFIER**is defined. This value is automatically added to the project's **.env**when using the Aero CLI tool to install and configure a store.
To create the Elasticsearch index and apply the mappings, run the following command within the root directory of your project:
```
php artisan aero:search:install
```
# How do I re-build the listings and search index?
At times (especially during the development phase of a store build), it may be necessary to delete and documents and freshly index them. This process can be achieved using the following command:
```
php artisan aero:search:rebuild
```
Be careful running the re-build command on a production store.
Due to the nature of how this process runs, there will be a temporary period where there are no listings or products shown.
# How do I extend the document structure for listings and seach?
One of the most useful features of the listings and search system is the ability to add custom data into the document. Typically, this will be data to be consumed in the code that forms the storefront listings page.
To extend a document, use the **add()**method, to define a closure that will return an **array**of data to merge into the document structure. This is typically done from within a **ServiceProvider**. If the code is unique to a particular store it could be placed in the boot method of the **AppServiceProvider**. If it is to be included as part of a module, then it can be added in the setup method of the module's **ServiceProvider**.
```
\Aero\Search\Elastic\Documents\ListingDocument::add('search-result', function ($document) {
$colors = $document->getModel()->visibleVariants()->pluck('attributes')->flatten()->filter(function ($attribute) {
return strpos(strtolower($attribute->group->name), 'color') !== false;
})->pluck('name')->unique()->values()->all();
return [
'colors' => $colors,
];
});
```
The available section of the document that can be extended are:
- search-result - search-data
# How do I filter listings?
There may be occasions where you need to pre-filter listings. For example, you may want to ensure that all listings are connected to a certain sub-store or Dropship provider, or all share a tag that is set by your application rather than applied by the customer. Below is an example that extends the Elasticsearch listings query to scope the results to only those that have stock:
```
\Aero\Search\Elastic\Repositories\ElasticListings::extend(function ($listings) {
$filter = new \Elastica\Query\Term(['number-sort.has-stock' => ['value' => 1]]);
$listings->base()->getQuery()->addFilter($filter);
});
```
# How to Extend the Elastic Search Listing Model
The `Aero\Search\Elastic\Models\Listing`model is built up from an array of data returned from elastic search. You can modify the model's attributes through the `Aero\Search\Elastic\Pipelines\ListingAttributes`pipeline.
For example you can change every listing’s name to be “Example”.
It’s important to note that this pipeline is run for every listing that is loaded, everytime. If you use this approach to add a resource intensive calculation it’s important to take steps such as caching so performance isn’t impacted.
```
__DIR__ . '/../public',
];
}
```
Bear in mind this is the exact path we have to supply when loading components into a view.
### Initialize components
```
import NewComponent from './components/NewComponent
window.newModule = {
install(Vue) {
Vue.component(‘new-component', NewComponent)
},
}
```
The above code gives us access to the ``tag, provided we’ve loaded the components into a view.
### Loading components into a view
```
@push('scripts')
@endpush
```
Provided all of the namespacing in the two files matches correctly, the Vue components that we have declared will now be accessible in our view.
If there is a problem with the mix of our assets, remember to run `php artisan aero:link`in the **root directory**of your Aero store.
### Enabling Vue devtools
In order to enable Vue devtools for our module, we simply add the following line of code into the file where we initialize our components:
```
import NewComponent from './components/NewComponent
window.new-module = {
install(Vue) {
Vue.config.devtools = true;
Vue.component(‘new-component', NewComponent)
},
}
```
# Anatomy of a custom module
```
└─ module
└─ database
└─ migrations
└─ public
└─ resources
└─ css
└─ js
└─ views
└─ admin
└─ store
└─ routes
└─ src
└─ Http
└─ Controllers
└─ Responses
└─ Steps
└─ Requests
└─ Models
ServiceProvider.php
.gitignore
composer.json
README.md
```
### Database
The database folder is only required for purposes of migrating, seeding, or storing data in formats such as JSON.
#### Migrations
Migrations is a folder within the database directory structure used for storing migration files which allow for populating the database with missing tables, or updating them.
Running `php artisan migrate`in the **root project directory**after installing a module detects migrations from all modules installed on Aero, which have not yet been migrated, and migrates them into Aero.
### Public
All files within the public directory of a module can be published, to then be accessed anywhere in Aero. Some modules might require the public folder published before it can be used.
This might include images or files used to instantiate a JavaScript file for the use of Vue or any other JS framework.
### Resources
The resources are required by the module for rendering views and storing custom CSS and JS files. Separating views into sub-folders allows for more readability and clarity on where particular views are used.
For example, the **admin**and **store**sub-folders of `resources/views`can be used for separating the different routing the module has.
### Routes
Modules can have custom routes which are then served to the rest of the app. These might serve as callback URLs for APIs in the module or rendering views.
Example:
```
'csv'], function ($route) {
$route->get('/', [CsvController::class, 'index'])->name('admin.csv.import');
$route->get('/mapping/{hash?}', [CsvController::class, 'mapping'])->name('admin.csv.mapping');
$route->get('/search', [CsvController::class, 'aeroFieldsSearch'])->name('admin.csv.search.aero');
$route->get('/search-csv', [CsvController::class, 'csvFieldsSearch'])->name('admin.csv.search.csv');
$route->get('/processing', [CsvController::class, 'processing'])->name('admin.csv.processing');
$route->post('/importing', [CsvController::class, 'importing'])->name('admin.csv.importing');
$route->post('/process', [CsvController::class, 'process'])->name('admin.csv.process');
$route->post('/import', [CsvController::class, 'import'])->name('admin.csv.process.import');
$route->post('/ping-import', [CsvController::class, 'pingImport'])->name('admin.csv.process.ping');
$route->post('/get-mapping/{id?}', [CsvController::class, 'getMappingData'])->name('admin.csv.get.mapping');
});
```
### Source (src)
The source folder contains all of the backend serving the entire module, whether it is controllers, models, or traits.
### Service Provider
The module **Service Provider**is used to instantiate the module, and usually contains configuration for the resources the module uses. This could range from routes, views to being able to display the module and its UI within the Modules section of Aero.
The scaffolded Service Provider has several functions that are hidden from view.
These include:
- **setup()**- **assetLinks()**- **boot()**- **seed()**- **getSeeds()**
#### setup()
Every scaffolded Service Provider will include the setup() function, which has to be configured to include all necessary resources.
Example:
```
public function setup()
{
AdminSlot::inject('catalog.products.index.header.buttons', function () {
return view('csv::buttons.import');
});
Router::addAdminRoutes(__DIR__.'/../routes/admin.php');
$this->loadMigrationsFrom(__DIR__.'/../database/migrations');
$this->loadViewsFrom(__DIR__.'/../resources/views', 'csv');
BulkAction::create(ExportProducts::class, ProductsResourceList::class)
->notRunnable()
->permissions('products.export')
->title('Export products');
}
```
#### assetLinks()
Asset links are used to publish the resources included in the [public folder](#public) of the module so that they can be used anywhere on the Aero platform.
Example:
```
public function assetLinks()
{
return [
'vendor/module-name' => __DIR__ . '/../public',
];
}
```
#### boot()
The boot() method is run in the background if the setup() method is present within the Service Provider. This is also the case for the booted() method.
#### seed()
With the **seed()**method, it is possible to add a seed to a collection of seeds for the module.
#### getSeeds()
Returns a unique collection of seeds that have been added to the module.
If we require our module to listen to certain events, they can be added into an array property of the class:
#### Listen property
The listen property is an array of events for each given module. The syntax for adding a listener to an event looks like so:
```
protected $listen = [
\Aero\Cart\Events\OrderSuccessful::class => [
\Aerocargo\Testing\Listeners\ExportOrder::class,
],
];
```
### Custom directories
It is possible to create custom directories for different types of classes, for example, **Traits**, **Jobs**, or **Helpers**.
# How do I create a custom module?
When interacting with the admin, especially when making a custom module, it is important to require `aerocommerce/admin`in the modules’ `composer.json`file.
### Scaffolding modules
Modules can be created using artisan, a command line interface supplied with Laravel. The easiest way to create a new module is to open the terminal, navigate to the root folder of the project and paste in:
```
php artisan make:module vendor/module-name
```
It is important to stick to module **naming conventions**and include the **vendor**(such as aerocommerce or aerocargo) and the **module name**, with dashes replacing any space in the name.
Running the above command in the terminal results in a couple of brief messages, reporting on the status of the creation and installation process of our module. After all is complete, the module can be accessed in the root directory of Aero under “modules”.
### Configuring modules
As mentioned above, each module that interacts with the admin needs to require `aerocommerce/admin`in the modules’ `composer.json`file.
#### Composer.json
```
{
"name": "aerocargo/new-module",
"description": "",
"require": {
"php": "^7.2|^8.0",
"aerocommerce/core": "^0",
"aerocommerce/admin": "^0"
},
"autoload": {
"psr-4": {
"Aerocargo\\NewModule\\": "src/"
}
},
"extra": {
"laravel": {
"providers": [
"Aerocargo\\NewModule\\ServiceProvider"
]
}
}
}
```
#### Service Provider
The module **Service Provider**ensures that our modules are connected to the rest of the platform through the **setup()**method that is automatically scaffolded into the class.
#### Adding modules to a visible list in the admin
Some modules might not require any interaction with the admin in terms of UI, so they don’t need to necessarily be listed in the modules section of the admin. If we wish to give our module an interface and allow users to access the module through the admin interface, we have to add the following code to our **Service Provider’s setup()**function:
```
AdminModule::create(‘new-module’)
->title('New Aero Module')
->summary('A brand new Aero module.')
->routes(__DIR__.'/../routes/admin.php')
->route('admin.new-module.index');
```
This module should now be listed in the admin.
#### Loading migrations
In order for the module to be able to detect all the migrations that a module has, it has to have a specified path in the modules’ **Service Provider setup()**function.
If the migration folder follows the original anatomy of module structure, all we have to do is paste the following code into the **Service Provider setup()**function:
```
$this->loadMigrationsFrom(__DIR__.'/../database/migrations');
```
You should now be able to call `php artisan migrate`in the root Aero directory to migrate data from the module.
#### Loading views
Loading views works the same way as loading migrations, all we have to do it to specify the path to our views and also a namespace.
```
$this->loadViewsFrom(__DIR__.'/../resources/views', 'new-module');
```
The second parameter in the above function is the namespace assigned to all of the module views. This is extra useful as we can then use that namespace to render views in the controller:
```
return view(‘new-module::index’);
```
#### Loading routes
There are two different types of routes that the module has access to. One of them is the **admin routes**which only give access to routes provided the user is an administrator. The other is the **store routes**which affect the store/frontend side of the system.
#### Admin routes
There are two ways of setting up**admin routes**, depending on whether we choose to use the AdminModule facade and load the module into the admin interface.
If we do choose to add our module to a list in the admin, apply the following chained function to the AdminModule facade in the **setup()**function in the **Service Provider**:
```
AdminModule::create('new-module')
->title('New Aero Module')
->summary('A brand new Aero module.')
->routes(__DIR__.'/../routes/admin.php');
```
This allows us to create the necessary admin routes, for navigating the module in the admin.
If we don’t choose to add our module to a list in the admin, we simply add the following piece of code to the **setup()**function in the module **Service Provider**:
```
Router::addAdminRoutes(__DIR__.'/../routes/admin.php');
```
#### Store routes
In order to add store (frontend) routes to the module, we simply add a piece of code to the **setup()**function of the module **Service Provider**:
```
Router::addStoreRoutes(__DIR__.’/../routes/store.php');
```
#### Asset Linking
In order to publish any resources from our module to the rest of Aero, we have to specify the path for those resources in a special function. This function is added to the module **Service Provider**:
```
public function assetLinks()
{
return [
'aerocargo/new-module' => __DIR__.'/../public',
];
}
```
After defining any asset paths to link, you'll need to run the command:
```
php artisan aero:link
```
# How do I setup routes for my custom module?
There are a few necessary steps to create and properly configure module routing.
## Creating routes
The first step to creating module routes is to create a directory named **routes**on the same level as the **src**directory – for more information refer to "[Anatomy of a custom module](https://support.aerocommerce.com/link/255)**.php**file in the **routes**directory. If my module only requires admin routes, I’ll create a file called admin.php in the routes directory:
```
└─ module
└─ database
└─ migrations
└─ public
└─ resources
└─ css
└─ js
└─ views
└─ admin
└─ store
└─ routes
└─ admin.php
└─ src
└─ Http
└─ Controllers
└─ Responses
└─ Steps
└─ Requests
└─ Models
ServiceProvider.php
.gitignore
composer.json
README.md
```
The contents of the file become:
```
loadRoutesFrom(__DIR__.'/../routes/routes.php');
```
### Store routes
```
Router::addStoreRoutes(__DIR__ . '/../routes/web.php');
```
### Admin routes
```
Router::addAdminRoutes(__DIR__ . '/../routes/admin.php');
```
### Using AdminModule facade
Routes can also be added through the **AdminModule**facade which allows the chaining for both **route()**and **routes()**. This should only be used with modules that have an interface/access point in the admin modules section. It can be done like so:
```
AdminModule::create('csv')
->title('CSV Import & Export')
->summary('Used to import and export a variety of platform data.')
->routes(__DIR__.'/../routes/admin.php')
->route('admin.csv.index');
```
Where the **route()**accesses a declared route that returns a view or **routes()**, with the same principle as the above examples.
# Payment Drivers
Payment Drivers
# What is the payment driver interface in my payment driver?
All payment gateway drivers must implement the `Aero\Payment\Contracts\PaymentDriver`interface.
The `Aero\Payment\PaymentDriver`abstract class can be used as the starting point, which supports the `ECOM`operation mode by default.
It's important to register the payment driver with the payment processor, which is used by the checkout and admin modules. This should be done in a `ServiceProvider`using the following call:
```
\Aero\Payment\PaymentProcessor::registerDriver('my_gateway', \Acme\PaymentDriver::class);
```
# What are the capturing methods in my payment driver?
here are two types of capturing methods:
- **Automatic**– the payment is both authorised and captured when the customer clicks the pay button - **Manual**– the payment is authorised when the customer clicks the pay button, the funds are ring-fenced and captured at a later date
# How do I cancel a payment in my payment driver?
If capturing of the payment is done at a later stage to the initial authorisation, the payment gateway should support the ability to cancel the transaction. The driver should therefore implement a `cancel`method.
The `cancel`method should return a `Aero\Payment\Responses\PaymentResponse`instance.
```
public function cancel(Payment $payment)
{
$response = new \Aero\Payment\Responses\PaymentResponse();
// request to cancel the transaction using the 3rd party API
$capture = AcmePaymentsInc::cancelTransaction($payment->reference);
// check if the transaction status is "cancelled"
if ($capture->status !== AcmePaymentsInc::STATUS_CANCELLED) {
// set an error on the response
$response->setError('The transaction could not be cancelled.');
return $response;
}
// internally mark the aero payment as cancelled
$payment->cancel();
// mark the response as successful
$response->setSuccessful(true);
return $response;
}
```
# How do I capture a payment in my payment driver?
If the gateway provides the option to defer capturing the payment (authorising and capturing are performed at different times), the `capture`method should be implemented. This captured amount may be equal to or less than the authorised amount, and is always passed to the method in the lowest form of currency (pennies, cents, etc.).
The `capture`method should return a `Aero\Payment\Responses\PaymentResponse`instance.
```
public function capture(int $amount, Payment $payment)
{
$response = new \Aero\Payment\Responses\PaymentResponse();
// request to capture the transaction using the 3rd party API
$capture = AcmePaymentsInc::captureTransaction($payment->reference, $amount);
// check if the transaction status is "captured"
if ($capture->status !== AcmePaymentsInc::STATUS_CAPTURED) {
// update the status of the aero payment to "failed"
$payment->update([
'state' => \Aero\Payment\Models\Payment::FAILED,
]);
// set an error on the response
$response->setError('The transaction failed to be captured.');
return $response;
}
// internally capture the amount for the payment
$payment->capture([
'amount' => $amount,
]);
// mark the response as successful
$response->setSuccessful(true);
return $response;
}
```
Aero will attempt to auto-capture any authorised payments against an order when the order is marked as dispatched.
# How do I refund a payment in my payment driver?
If the payment gateway provides the ability to externally make refund requests, the payment driver can use the `Aero\Payment\SupportsRefunding`trait.
The `refund`method should then be implemented, which returns an instance of `Aero\Payment\Responses\PaymentResponse`.
```
public function refund(int $amount, Payment $payment)
{
$response = new \Aero\Payment\Responses\PaymentResponse();
// request to refund the transaction using the 3rd party API, with a given amount
$capture = AcmePaymentsInc::refundTransaction($payment->reference, $amount);
// check if the transaction status is "refunded"
if ($capture->status !== AcmePaymentsInc::STATUS_REFUNDED) {
// set an error on the response
$response->setError('The transaction could not be refunded.');
return $response;
}
// internally refund the amount for the aero payment
$payment->refund([
'amount' => $amount,
]);
// mark the response as successful
$response->setSuccessful(true);
return $response;
}
```
# What are operating modes in my payment driver?
There are two modes a gateway can operate:
- `ECOM`– a standard ecommerce online transaction, typically originating from the storefront - `MOTO`– a transaction that is taken via telephone or through the mail, typically originating from the backend admin
As the processing environment differs when the customer isn't present (i.e. no 3D-secure for telephone orders), stores may require different merchant credentials for each mode.
## ECOM mode
In order to indicate the gateway supports processing storefront orders, ensure the `Aero\Payment\SupportsEcomMode`trait is used.
## MOTO mode
In order to indicate the gateway supports processing telephone and mail orders, ensure the `Aero\Payment\SupportsMotoMode`trait is used.
# How do I support express checkout in my payment driver?
If the payment gateway stores customer information, this can be used to populate the contact information, billing and/or shipping address.
To specify that the payment gateway supports the express checkout flow, use the `Aero\Payment\OffersExpressCheckout`trait.
Since the express flow may not always be selected, the payment gateway must indicate if the customer is using the express checkout. This could be achieved by storing the status in their session:
```
public function isExpress(): bool
{
return session()->has('acme_using_express_checkout');
}
```
# Can I restricting availability of my payment driver?
It is likely that a payment gateway could have restrictions on when it can be used. For example, a finance based provider may require a certain order total amount, be restricted by geographical location or the items being purchased.
To determine if the gateway should be offered for the customer's session, use the `availableForCart`method within the payment driver:
```
public function availableForCart(Cart $cart): bool
{
$minAmount = setting('my_gateway.min_order_amount');
if ($minAmount !== null) {
return $cart->total()->inc()->value >= $minAmount;
}
return true;
}
```
# How do I return a payment response in my payment driver?
To unify all payment gateway driver communication, an `Aero\Payment\Responses\PaymentResponse`class is used. This common class must be returned from the `register`, `complete`, `capture`, `refund`and `cancel`methods.
## Setting the payment view
Many payment gateways use an iframe or JavaScript code to bridge the store with the gateway provider. In order to output this to the customer on the checkout, or telephone operator for MOTO payments, the `PaymentResponse`can define a view to output. To do so, pass the view to the `setView`method. If no view is set, a JSON response will be returned.
## Passing data to the payment view
If there is data to be passed to the view or JSON response, the `setData`method should be used.
## Marking as successful
To indicate that the action carried out in the method was successful, then the response should be flagged as successful calling the `setSuccessful`method on the `PaymentResponse`.
## Adding error messages
If an error occurred during the action, these messages can be passed to the `PaymentResponse`using the `setError`method.
## Redirecting the user
If further action is required where the user needs to be redirected to a different URL (to complete 3D-secure on the card issuers website for example), a redirect can be set using the `setRedirect`method.
# How do I register the transaction in my payment driver?
When a payment method is selected that uses the gateway driver, the `register`method is called. Within this method, the bootstrapping of the transaction should be carried out. This may involve connecting to the payment gateway's API to register the transaction. For example, the gateway may need to know the total amount to request from the customer's card, along with where to redirect the browser once the transaction has been processed.
The `register`method should return a `Aero\Payment\Responses\PaymentResponse`instance.
```
public function register()
{
// make an API call to create the transaction with Acme Payments (the fake 3rd party gateway company)
$request = AcmePaymentsInc::createTransaction([
'merchant_reference' => $this->order->reference,
'amount' => $this->order->total_rounded,
'currency' => $this->order->currency_code,
'billing_address' => [
'line_1' => $this->order->billingAddress->line_1,
'postcode' => $this->order->billingAddress->postcode,
'country' => $this->order->billingAddress->country_code,
],
'return_url' => route("payments-{$this->getMerchantMode()}.complete-payment"),
]);
$response = new \Aero\Payment\Responses\PaymentResponse();
// set the response as successful if the transaction status is "created"
$response->setSuccessful($request->status === AcmePaymentsInc::STATUS_CREATED);
// set the data to pass to the view
$response->setData([
'transaction_reference' => $request->reference,
]);
// set the view to use (this is typically an iframe or JavaScript)
$response->setView("acme-payments::{$this->getMerchantMode()}-form");
return $response;
}
```
The callback URL(s) may differ depending on the operating mode. If the driver supports both `ECOM`and `MOTO`modes, the `getMerchantMode`method can be used:
```
$request = AcmePaymentsInc::createTransaction([
// ...
'return_url' => route("payments-{$this->getMerchantMode()}.complete-payment"),
]);
```
# How do I complete the transaction in my payment driver?
Once the payment gateway has handled the customer inputting their secure details (such as card information), they will most likely be redirected back to the retailer's store. On doing so, the `complete`method is called on the payment driver, allowing for the transaction to be validated and capturing of the payment.
The `complete`method should return a `Aero\Payment\Responses\PaymentResponse`instance.
```
public function complete()
{
$reference = $this->request->input('reference');
// don't continue if a reference isn't provided
abort_unless($reference, 404);
$response = new \Aero\Payment\Responses\PaymentResponse();
// the order total
$amount = $this->order->total_rounded;
// obtain the transaction from the 3rd party API
$request = AcmePaymentsInc::getTransaction($reference);
// validate if the currency matches
if ($request->currency !== $this->order->currency_code) {
$response->setError('Currency does not match.');
return $response;
}
// validate if the amount matches
if ($request->amount !== $this->order->total_rounded) {
$response->setError('Total amount does not match.');
return $response;
}
// validate if the transaction status is "authorized"
if ($request->status !== AcmePaymentsInc::STATUS_AUTHORIZED) {
$response->setError('The transaction was not authorized.');
return $response;
}
// create the payment record in the aero database
$payment = $this->order->payments()->updateOrCreate([
'reference' => $reference,
], [
'id' => (string) \Illuminate\Support\Str::uuid(),
'payment_method_id' => $this->method->getKey(),
'state' => \Aero\Payment\Models\Payment::AUTHORIZED,
'amount' => $amount,
'currency_code' => $this->order->currency->code,
'exchange_rate' => $this->order->currency->exchange_rate,
'merchant_mode' => $this->getMerchantMode(),
]);
// request to capture the transaction using the 3rd party API
$capture = AcmePaymentsInc::captureTransaction($reference, $amount);
// check if the transaction status is "captured"
if ($capture->status !== AcmePaymentsInc::STATUS_CAPTURED) {
// update the status of the aero payment to "failed"
$payment->update([
'state' => \Aero\Payment\Models\Payment::FAILED,
]);
// set an error on the response
$response->setError('The transaction failed to be captured.');
return $response;
}
// internally capture the amount for the payment
$payment->capture([
'amount' => $amount,
]);
// mark the response as successful
$response->setSuccessful(true);
return $response;
}
```
# How do I display payment icons on checkout in my payment driver?
To improve brand awareness of the payment provider during the checkout process, a label view can be used. The payment driver should implement the labelView method, which returns a string. This is typically a namespaced view that lives in the payment gateway module.
```
public function labelView(PaymentMethod $method): ?string
{
return view('my_gateway::label', compact('method'));
}
```
# How do I restrict the availability of my payment driver?
It is likely that a payment gateway could have restrictions on when it can be used. For example, a finance based provider may require a certain order total amount, be restricted by geographical location or the items being purchased.
To determine if the gateway should be offered for the customer's session, use the `availableForCart`method within the payment driver:
```
public function availableForCart(Cart $cart): bool
{
$minAmount = setting('my_gateway.min_order_amount');
if ($minAmount !== null) {
return $cart->total()->inc()->value >= $minAmount;
}
return true;
}
```
# Payment Gateways
Payment Gateways
# What are the available payment gateways?
A cash payment method is provided out of the box, which allows developers to complete orders through the checkout without having to worry about installing and configuring a payment gateway.
The cash payment method should be disabled before the store is put live.
The following payment methods are built into the platform:
- Cash - Gift Voucher - Paymentless (for when no payment is needed)
### Supported Gateways
If you are a payment gateway interested in partnering with Aero, or the one you're looking for isn't listed below, then please [contact us](https://www.aerocommerce.com/resources/contact) to discuss further.
Aero offers and maintains the following gateway integrations, with more being added all the time.
Some gateways also support additional functionality which is indicated by the icons below. You - or your retailer - should consult with the gateway regarding any extra requirements needed from them in order to use these features.
💾 **Supports saving of card details**
Customers can save their card details and re-use them on future orders. This is typically done via generating a payment token which identifies the card to the gateway, and no sensitive card information is collected or stored on your server.
➕ **Supports additional payments
**An Aero feature allowing you to collect additional payments via our MOTO flow for orders which have not been completed by the customer or that have been modified, leading to extra charges.
📞 **Supports MOTO**
MOTO orders are taken by mail or telephone and these drivers will allow you to submit "cardholder not present" payments through the Aero admin.
🔗 **Supports Pay By Link**
An Aero feature allowing you to email a link to your customer so that they can pay for their order online even if it was taken over the phone or had previously been abandoned
********
- [](https://agora.aerocommerce.com/packages/aerocommerce/adyen)- [](https://agora.aerocommerce.com/packages/aerocommerce/barclaycard-epdq)- [](https://agora.aerocommerce.com/packages/aerocommerce/barclaycard-fuse)- [](https://agora.aerocommerce.com/packages/aerocommerce/barclaycard-smartpay)- [](https://agora.aerocommerce.com/packages/aerocommerce/checkoutcom)- [](https://agora.aerocommerce.com/packages/aerocommerce/dna-payments)- [](https://agora.aerocommerce.com/packages/aerocommerce/opayo)- [](https://agora.aerocommerce.com/packages/aerocommerce/paypal)- [](https://agora.aerocommerce.com/packages/aerocommerce/sagepay)- [](https://agora.aerocommerce.com/packages/aerocommerce/secure-trading)- [](https://agora.aerocommerce.com/packages/aerocommerce/stripe)- [](https://agora.aerocommerce.com/packages/aerocommerce/total-processing)- [](https://agora.aerocommerce.com/packages/aerocommerce/tyl)- [](https://agora.aerocommerce.com/packages/aerocommerce/windcave)- [](https://agora.aerocommerce.com/packages/aerocommerce/worldline)- [](https://agora.aerocommerce.com/packages/aerocommerce/worldpay)
- [](https://agora.aerocommerce.com/packages/aerocommerce/clearpay)- [](https://agora.aerocommerce.com/packages/aerocommerce/deko-newpay)- [](https://agora.aerocommerce.com/packages/aerocargo/duologi)- [](https://agora.aerocommerce.com/packages/aerocommerce/humm-group)- [](https://agora.aerocommerce.com/packages/aerocommerce/klarna)- [](https://agora.aerocommerce.com/packages/aerocargo/omni-capital)- [](https://agora.aerocommerce.com/packages/aerocargo/v12-finance)
****
- [](https://agora.aerocommerce.com/packages/aerocommerce/boodil)
| Card Payments | Finance / BNPL |
| ---------------------------------------------------------------------------------------------------------------------------------------------------------------------------------------------------------------------------------------------------------------------------------------------------------------------------------------------------------------------------------- | ------------------------------------------------------------------------------------- |
| Adyen 💾Barclaycard ePDQBarclaycard Fuse 💾 ➕ 📞 🔗Barclaycard Smartpaycheckout.com 💾 📞DNA Payments 💾 📞Opayo PI 💾 ➕ 📞 🔗PayPal (including Advanced Credit / Debit Cards)SagePay (VSP Server) 📞 🔗Secure Trading (Trust Payments) 📞Stripe (including Klarna and Link) 💾 🔗Total Processing 💾 📞 🔗Tyl by NatWestWindcave 💾 📞Worldline 💾 📞Worldpay (Access / Worldwide Payment Gateway) 💾 📞 🔗 | ClearpayDeko NewpayDuologiHumm GroupKlarnaOmni CapitalV12 FinanceOpen BankingBoodil 🔗 |
### Apple Pay / Google Pay
Gateways supporting Apple Pay and Google Pay are as follows - please note additional integration such as domain verification and certificates, as well as Apple Pay and Google Pay accounts may be required in order to take payments through digital wallets.
Please ensure you are on the latest available version of your integration, and check the integration's README for further instructions on what is required.
************
| Driver | Apple Pay | Google Pay |
| ---------------- | --------- | ---------- |
| Adyen * | Yes | Yes |
| Barclaycard Fuse | Yes | Yes |
| checkout.com | Yes | Yes |
| DNA Payments * | Yes | Yes |
| Opayo | Yes * | Yes |
| Secure Trading | Yes | No |
| Stripe * | Yes | Yes |
| Total Processing | Yes | Yes |
| Tyl by NatWest * | Yes | Yes |
| Windcave | Yes | Yes |
| Worldline * | Yes | Yes |
| Worldpay * | Yes | Yes |
* - Support provided by gateway without requiring separate Apple Pay / Google Pay account. If the asterisk appears alongside the gateway name, this means the gateway supports this for both.
### Other Available Gateways
We also have integrations available for the following gateways but do not officially support them as they have been built by third parties or have been deprecated. You can still install and use them but we will be unable to offer assistance if you experience issues:
- [Biller / NOTYD](https://agora.aerocommerce.com/packages/aerocommerce/biller) (now only available in Belgium / Netherlands) - [Payl8r](https://agora.aerocommerce.com/packages/aerocommerce/payl8r) (deprecated) - [Zip](https://agora.aerocommerce.com/packages/aerocommerce/zipco) (no longer supports UK merchants)
### Need a payment gateway that isn't listed above?
See our "[Introduction to payment drivers](../../introduction/4410561120785-introduction-to-payment-drivers/index.md)
# How do I restrict payment methods?
There may be circumstances where a retailer wishes to restrict the payment methods that are available to a customer when checking out. Whilst a payment gateway may have restrictions, these may not be sufficient, or the limitations may need to apply to multiple methods.
The payment methods can be refined for a store, by adding a cart validator resolver, for example:
```
\Aero\Payment\Models\PaymentMethod::setCartValidator(function ($method, $cart) {
if ($method->driver === 'cash' && $cart->total()->inc()->value > 1000) {
return false;
}
return $method->getDriver()->validateForCart($cart);
});
```
Note that the validator falls back to the driver validation.
# Php Traits
Php Traits
# Aero\\Common\\Traits\\CanExtendFillable
This trait can be added to a model class. When added your model will have the ability to have fillables dynamically added. The trait adds the following methods:
##
## static makeFillable Method
This method accepts a key for the attribute to make fillable.
# Aero\\Common\\Traits\\CastsToJavaScript
This trait can be added to a model class. This trait provides a way of defining attributes that should be kept when casting to javascript. You can define these attributes in a protected **$castsToJs**array. The trait adds the following methods:
## static addCastToJs Method
This static method provides a way to dynamically add attributes to the models **$castsToJs**array. It expects you to pass the attribute key to be added.
## jsSerialize Method
This method returns the value of the **attributesToJs**method.
## toJavaScript Method
This method returns the JSON value of the **jsSerialize**method.
## attributesToJs Method
This method returns an array of the attributes that should be casted to javascript.
## getCastsToJs Method
This method returns the attribute keys that should be cast to javascript.
# Aero\\Common\\Traits\\Sluggable
This trait can be added to a model class. The trait adds a relationship to **Aero\Store\Models\Slug**and helper methods for adding a slug to the model.
# Aero\\Catalog\\Traits\\Taggable
This trait can be added to a model class. The trait adds the ability to add tags to the model. The trait adds the following methods:
## tag Method
This method accepts a **Aero\Catalog\Models\Tag**and will attach the tag to the model without detaching any other tags.
## tags Method
This method defines the Eloquent relationship with **Aero\Catalog\Models\Tag**.
## untag Method
This method accepts a **Aero\Catalog\Models\Tag**and will detach the tag from the model without detaching any other tags.
# Aero\\Common\\Traits\\CanHaveAdditionalAttributes
This trait can be added to a model class. When added your model will have the ability to have additional attributes. The trait adds the following methods:
## additionals Method
This is the relationship method. This provides the relationship to **Aero\Common\Models\AdditionalAttribute**.
## hasAdditional Method
This method accepts a key string parameter and will do a database query to return a boolean value if the additional attribute with the key you provided exists.
## scopeHavingAdditional Method
This method is a [Laravel local scope method](https://laravel.com/docs/6.x/eloquent#local-scopes) that will allow you to scope a query on your module to require that the model has a specific additional attribute.
## getAdditionalAttribute Method
This method accepts an additional attributes key and allows you to get an additional attributes value using its key.
## saveAdditionalAttribute Method
This method accepts key and value parameters and will save the key and value you provide as an additional attribute.
# Aero\\Catalog\\Traits\\HasPrices
This trait can be added to a model class. This trait adds prices to the model. The trait adds the following methods:
## currentPrices Method
This method returns a collection of the current viable price based upon the date and time.
## basePrice Method
This method returns the base price.
## prices Method
This method defines the eloquent relationship with **Aero\Catalog\Models\Price**.
## futurePrices Method
This method returns a collection of prices that are set for the future.
# Aero\\Store\\Traits\\Seoable
This trait can be added to a model class. The trait adds a relationship to **Aero\Store\Models\Seo**and helper methods for adding SEO data to the model.
# Aero\\Responses\\Traits\\HasSections
This trait can be added to a response builder class. It adds useful methods for managing sections of the page. There are other traits (HasBottomSections, HasTopSections, and HasSidebarSections) in the same namespace that add more section helpers (these traits all require that the class uses the HasSections trait as well). The trait adds the following methods:
## getSectionKey Method
This method defines the key that is used to store the sections data on the response builder (defaults to ‘sections’).
## setSection Method
This method will set a section. It accepts a key and value and optionally a section key (the section key will default to the **getSectionKey**method).
## setSections Method
This method will set the sections. It accepts an array of sections and optionally a section key (the section key will default to the **getSectionKey**method).
## getSection Method
This method will return a specified section. It accepts a key for the section and optionally a section key (the section key will default to the **getSectionKey**method).
## getSections Method
This method will return a collection of the sections. It optionally accepts a section key (the section key will default to the **getSectionKey**method).
## addSection Method
This method accepts a key and value to add to the sections. Using this method will put your section at the top of the sections collection.
## addSectionBefore Method
This method works the same way as the **addSection**method but also accepts a key for the section that this new section should be added before.
## addSectionAfter Method
This method works the same way as the **addSection**method but also accepts a key for the section that this new section should be added after.
## removeSection Method
This method accepts a key of the section to remove and optionally accepts a section key (the section key will default to the **getSectionKey**method).
## hasSections Method
This method returns if there are sections. It optionally accepts a section key (the section key will default to the **getSectionKey**method).
# Aero\\Admin\\Traits\\HasPermissions
This trait adds the ability to add permissions to a class easily. The trait adds the following methods:
## permissions Method
This method accepts an array that will set the permissions required.
## allowed Method
This method optionally accepts a user and will return if the user has the required permissions.
# Aero\\Admin\\Traits\\IsExtendable
This trait can be added to a class. This trait can be used on Pipelines (more information "[introduction to pipelines](../../introduction/4409548756369-introduction-to-pipelines/index.md)
# Pipelines
Pipelines
# What are the available pipelines
****
****
****
| Class | Description | Payload |
| --------------- | ------------------------------------------------------------------------------------------------------------------------------------------------------ | -------------------------------------- |
| CartItemBuilder | The process that occurs when adding an item to the cart. Extending this class allows for manipulation of the cart item before it is saved to the cart. | Aero\Cart\CartItem $item |
| ContentForHead | The HTML content that will be inserted into the tag of the page. | String $content |
| ContentForBody | The HTML content that will be inserted just before the closing tag of the page. | String $content |
| RobotsTxt | The robots.txt file. For more information, click here. | Illuminate\Support\Collection $content |
# How do I extend pipelines?
The payload data can be altered using the **extend()**method. This is typically done from within a **Service Provider**. If the code is unique to a particular store it could be placed in the **boot()**method of the **AppServiceProvider**. If it is to be included as part of a module, then it can be added to the setup method of the module's **Service Provider**.
For example, if a module needs to add an option to items to flag them as requiring gift wrap, the **CartItemBuilder**pipeline class should be extended in the module's **ServiceProvider**as shown below:
```
has('gift_wrap')) {
$option = CartItemOption::create('Gift wrap');
$item->addOption($option);
}
});
}
}
```
To adjust a payload which is a simple string, ensure that the payload variable is passed by reference so that it can be directly modified:
```
\Aero\Store\Pipelines\ContentForHead::extend(function (&$content) {
$content .= "";
// or ...
$content .= view('my_module::script-snippet');
});
```
# Resource Lists
Resource Lists
# How do I create a custom bulk action?
If we wish to add a new bulk action to a screen within the admin, all we have to do is create the bulk action using the **BulkAction**facade. The bulk action also requires a specific **Resource List**, for example for **Products**.
```
BulkAction::create(BulkActionClass::class, ResourceList::class)
->permissions('bulkaction.permission')
->title('Title');
```
The above code would be instantiated within a **Service Provider**, whether it is a module service provider or the **AppServiceProvider**.
Example:
If we were to create a new bulk action for exporting products, we would first need to create a class extending BulkActionJob:
```
BulkAction::create(ExportProducts::class, ProductsResourceList::class)
->notRunnable()
->permissions('products.export')
->title('Export products');
```
### Properties
Bulk Actions have a number of properties, each responsible for affecting a different aspect of the bulk action.
#### Wide Content
We can choose to display the contents of our bulk action in a wider container, which can prove to be more useful for certain modules. In order to display its contents in a container stretched to the width of the screen, apply the following function to the facade while creating it:
```
BulkAction::create(BulkActionClass::class, ResourceList::class)
->wideContent()
->permissions('bulkaction.permission')
->title('Title');
```
#### Runnable & Not Runnable
Not every bulk action is the same, and it’s possible to remove the **Run**button from the bulk action in order to replace it with a custom button, for example calling the API. In order to remove the built-in **Run**button for a particular bulk action, apply the following function to the facade while creating it:
```
BulkAction::create(BulkActionClass::class, ResourceList::class)
->notRunnable()
->permissions('bulkaction.permission')
->title('Title');
```
#### Confirm
We can set the bulk action to prompt the user before performing its intended action by simply chaining a method to the BulkAction creation:
```
BulkAction::create(BulkActionClass::class, ResourceList::class)
->confirm()
->permissions('bulkaction.permission')
->title('Title');
```
The prompt will now ask the user if they are sure of their selection.
#### Title
We can set a custom title/main heading for the bulk action content, this can be done by chaining a function to the facade we use for creating the bulk action, e.g.:
```
BulkAction::create(BulkActionClass::class, ResourceList::class)
->title('Your title')
->permissions('bulkaction.permission')
->title('Title');
```
#### View
Aero has the ability to display a specific view when it performs the bulk action, this can be done by chaining a function to the facade we use for creating the bulk action, e.g.:
```
BulkAction::create(BulkActionClass::class, ResourceList::class)
->view(‘namespace::bulk.form’)
->permissions('bulkaction.permission')
->title('Title');
```
# What are the default resource lists?
The following classes are in the **Aero\Admin\ResourceLists**namespace and any class that doesn’t have a view uses the **admin::resource-lists.index**view.
| Class | View |
| ------------------------------ | ------------------------------- |
| AttributeGroupsResourceList | – |
| BlocksResourceList | – |
| CategoriesResourceList | admin::catalog.categories.index |
| CollectionsResourceList | – |
| CombinationsResourceList | – |
| CountriesResourceList | – |
| CurrenciesResourceList | – |
| CustomerGroupsResourceList | – |
| CustomersResourceList | – |
| CustomerTaxGroupsResourceList | – |
| DiscountsResourceList | – |
| FulfillmentMethodsResourceList | – |
| FulfillmentsResourceList | – |
| MailNotificationsResourceList | – |
| ManufacturersResourceList | – |
| MissingPagesResourceList | – |
| OrdersResourceList | – |
| OrderStatusesResourceList | – |
| PagesResourceList | – |
| PaymentMethodsResourceList | – |
| PriceListsResourceList | – |
| ProductsResourceList | admin::catalog.products.index |
| ProductTaxGroupsResourceList | – |
| RedirectsResourceList | admin::content.redirects.index |
| ShippingMethodsResourceList | – |
| SubscriptionPlansResourceList | – |
| SubscriptionsResourceList | – |
| TagGroupsResourceList | – |
| TaxRatesResourceList | – |
| TaxRulesResourceList | – |
| UsersResourceList | – |
| VouchersResourceList | – |
# How do I create my own resource list?
To create a resource list you need a normal Laravel controller and a class that extends **Aero\Admin\ResourceListsAbstractResourceList**.
```
$list = $list(),
'results' => $list->apply($request->all())
->with('status', 'customer', 'items', 'currency')
->paginate($request->input('per_page', 24) ?? 24),
]);
}
}
```
### Adding Columns to your Resource List
To add columns to your resource list you need to implement the protected **columns()**method and make it return an array of your columns. The entries in the array should use the **Aero\Admin\ResourceLists\ResourceListColumn::create**helper method. This method expects a string parameter for the columns heading, a closure parameter for how to render the columns data (this can return a string), and an optional string parameter for the columns key (by default this is generated from the columns header).
```
route('admin.orders.view', array_merge(request()->all(), ['order' => $row])),
'text' => '#'.$row->reference,
])->render();
}),
];
}
}
```
### Making Columns Searchable
You can use the **setSearchAction**method to define how your column is searched. This method accepts a closure (that is passed the query and search term) that defines how the search should happen and an optional string for the text to show in the search field dropdown (this is column header by default).
```
ResourceListColumn::create('Order', function ($row) {
return view('admin::resource-lists.link', [
'route' => route('admin.orders.view', array_merge(request()->all(), ['order' => $row])),
'text' => '#'.$row->reference,
])->render();
})
->setSearchAction(function ($query, $term) {
$searchTerm = ltrim($search, '#');
$query->whereLower('reference', 'like', "%{$searchTerm}%");
}, 'Order Reference')
```
### Making Columns Invisible
You can use the **invisible**method to make your column invisible. The main reason for wanting to do this is to add a search for a column that shouldn’t be rendered.
```
ResourceListColumn::create('Order', function ($row) {
return view('admin::resource-lists.link', [
'route' => route('admin.orders.view', array_merge(request()->all(), ['order' => $row])),
'text' => '#'.$row->reference,
])->render();
})
->invisible()
```
### Handling Searching for your Resource List
When your resource list is searched without a specific column being selected a **handleSearch()**function will be called to handle the search. The method will be passed the search term and you are able to use **$this->query**to access the query.
```
query->whereLower('reference', 'like', "%{$searchTerm}%");
}
}
```
### Adding Row Views to your Resource List
Row views are additional rows rendered after each complete row (the best example of this is how the order items are listed after each row of the order on the orders page). To add a row view you simply need to provide your view in the protected **$rowViews**array.
```
'Order A to Z',
'order-za' => 'Order Z to A',
], function ($sortBy, $query) {
return $sortBy === 'order-az' ? $query->orderBy('reference') : $query->orderByDesc('reference');
}),
];
}
}
```
If you would like your sort by to be enabled by default then you call pass null for the first parameter like this:
```
orderByRaw('coalesce(`orders`.`ordered_at`, `orders`.`created_at`) desc');
}),
];
}
}
```
# How do I extend an exisiting resource list?
### Adding a New Column
To add columns to a resource list you can use the **addColumn**, **addColumnBefore**, or **addColumnAfter**methods from within the pipeline. These methods return a usual resource list column which allows you to chain on the other available column methods.
#### addColumn Method
This method accepts a column header and a closure that defines how the column will be rendered. A column added with this method will be added as the first column.
#### addColumnBefore Method
This method accepts the same parameters as the **addColumn**method but additionally accepts a third parameter, the key of the column this new column should be added before.
#### addColumnAfter Method
This method accepts the same parameters as the addColumn method but additionally accepts a third parameter, the key of the column this new column should be added after.
#### Finding the Current Column Keys
If you do not know the keys of the current columns you can use this code snippet to dump the current keys out.
```
getColumns()->map->key());
}
}
```
```
addColumn('My Column', function($row) {
return 'Example';
});
$list->addColumnBefore('Before Ref', function($row) {
return $row->reference;
}, 'order');
$list->addColumnAfter('After Ref', function($row) {
return $row->reference;
}, 'order');
});
}
}
```
### Adding a New Filter
To add a filter to a resource list you can use the **addFilter**method from within the pipeline. This method expects you to pass an admin filter class. You can create an admin filter class as shown in the article "[How do I create a custom Admin Filter?](../../admin-filters/4408595336593-how-do-i-create-a-custom-admin-filter/index.md)
```
addFilter(CreatedAtAdminFilter::class);
});
}
}
```
#### Adding a New Sort By
To add a sort by to a resource list you can use the **addSortBy**method from within the pipeline. This method expects you to pass a **Aero\Admin\ResourceLists\ResourceListSortBy**. You can create a resource list sort by class as shown in the article "[How do I create my own Resource List?](https://support.aerocommerce.com/link/292)
```
addSortBy(ResourceListSortBy::create([
'latest' => 'Latest',
'oldest' => 'Oldest',
], function ($sortBy, $query) {
return $sortBy === 'oldest' ? $query->orderBy('created_at') : $query->orderByDesc('created_at');
}));
});
}
}
```
# What is a bulk action?
A bulk action allows for the selection of multiple values from a list, and apply some logic to items that have only been selected. Bulk actions exist for many different **Resource Lists**, which is what is used for determining items that have been selected.
Bulk actions are usually dispatched as a job, given the bulk nature of the action, which carries out tasks in a sequential manner. There are exceptions to this rule however and Aero can also return responses straight to the browser, e.g. downloading all selected content blocks as a .zip.
# How do I add a custom column to the product list?
As the products list is a resource list you can add a custom column like this:
More information on resource lists can be found in the article "[How do I extend an existing Resource List?](https://support.aerocommerce.com/link/293)
```
addColumn('My Column', function ($row) {
return $row->id;
});
});
}
}
```
# How do I add a custom column to the order list?
As the orders list is a resource list you can add a custom column like this:
More information on resource lists can be found in the article "[How do I extend an existing Resource List?](https://support.aerocommerce.com/link/293)
```
addColumn('My Column', function ($row) {
return '#'.$row->reference;
});
});
}
}
```
# Response Builders
Response Builders
# How do I access the properties of the response builder?
All response builders hold properties that were assigned to them upon creation from the request. These properties are typically the arguments that would be passed to a conventional Laravel controller and subsequently used in the code within the controller.
For example on the **ProductPage**, the **Aero\Catalog\Models\Product model**for the requested URL can be accessed as follows:
```
\Aero\Store\Http\Responses\ProductPage::extend(function ($page) {
$product = $page->product;
// do things with the $product model
});
```
# How do I pass data to a response?
The most common task performed when extending responses, is setting additional data. Typically, for HTML responses that render from a view, this involves sending data to the view to be used as a variable. If the response returns JSON, it may be adding additional key/value pairs.
For example, if you needed to obtain customer reviews for a given product and output them on the product page, you could do the following, which passes a product to a 3rd party reviews API and then adds the reviews it returns to the response data, which is then passed to the product.twig view file ready to be loop around and outputted.
```
\Aero\Store\Http\Responses\ProductPage::extend(function ($page) {
$reviews = \Acme\ReviewsAPI::forProduct($page->product);
$page->setData('reviews', $reviews);
});
```
Another example is getting the latest 5 blog posts from a blog module and sending them to the homepage to be displayed:
```
\Aero\Store\Http\Responses\Homepage::extend(function ($page) {
$posts = \Acme\BlogPosts::latest()->limit(5)->get();
$page->setData('posts', $posts);
});
```
You can obtain the existing data set against the response builder using the **getData()**method and remove data using the **removeData()**method.
# How do I redirect a response?
Sometimes you may wish to redirect the user to another location, either to an external site or within the store. To do so, pass the URL, **route()**, or an **Illuminate\Http\RedirectResponse**instance to the **setRedirect()**method. For example, if you stored the age of customers (computed from their provided date of birth), and needed to prevent access to those under the age of 18:
```
\Aero\Store\Http\Responses\ProductPage::extend(function ($page) {
if ($page->request->customer()->age < 18) {
$page->setRedirect('/denied');
}
});
```
As extension code is evaluated in the order it's added to the response builder, code that runs after this step may override the redirect. To force a redirect and prevent execution of the code that follows in the pipeline, you should return an instance of the **redirect()**helper:
```
\Aero\Store\Http\Responses\ProductPage::extend(function ($page) {
if (! $page->product->canBeViewedByIp($page->request->ip())) {
return redirect('/denied');
}
});
```
# How do I set the response status code?
There may be situations where the HTTP response status needs to be altered. By default, the returned status is **200**, however, this can be changed by passing the new status code to the **setStatus()**method:
```
\Aero\Store\Http\Responses\ProductPage::extend(function ($page) {
$page->setStatus(403);
});
```
# How do I set response headers?
When extending the response builder, you can set HTTP headers to be sent with the response:
```
\Aero\Store\Http\Responses\ProductPage::extend(function ($page) {
$page->setHeader('foo', 'bar');
});
```
# How do I attach middlewear to a response builder?
Since Aero does not expose the underlying routes and controllers, middleware can be attached directly to the response builder. This allows for code to be executed before the main pipeline is run.
For example, to restrict all products from being accessible to guest visitors, you could register the **auth**middleware to the **ProductPage**response:
```
\Aero\Store\Http\Responses\ProductPage::middleware('auth');
```
When assigning middleware, you can also pass the fully qualified class name:
```
\Aero\Store\Http\Responses\ProductPage::middleware(\App\Http\Middleware\CheckAge::class);
```
Alternatively, you can provide a **Closure**. For example, middleware could be added to the homepage to set a tracking cookie from the referrer:
```
\Aero\Store\Http\Responses\Homepage::middleware(function ($request, $next) {
return tap($next($request), function ($response) use ($request) {
$response->cookie('referer', $request->header('Referer'));
});
});
```
Refer to the [Laravel documentation](https://laravel.com/docs/8.x/middleware) for more information on middleware.
# How do I extend responses?
Adding additional code to run on the response is as simple as calling the **extend()**method on the response builder class. This is typically done from within a **Service Provider**. If the code is unique to a particular store it could be placed in the boot method of the **AppServiceProvider**. If it is to be included as part of a module, then it can be added to the setup method of the module's Service Provider.
For example, if a module needs to send a variable **foo**to the **product.twig**view file for it to be outputted in the HTML, the **ProductPage**response builder class should be extended in the module's **Service Provider**as shown below:
```
setData('foo', 'bar');
});
}
}
```
When passing a **Closure**to the extend method, the **$page**argument is the response builder instance that will process the response.
For more advanced use cases, you can pass the response builder on for further processing in order to return the **Illuminate\Http\Response**instance. This is useful in situations when you may wish to modify the response before it is passed to the browser. A common use case for this is to add cookies to the response:
```
\Aero\Store\Http\Responses\ProductPage::extend(function ($page, $next) {
$response = $next($page);
$response->cookie('foo', 'bar');
return $response;
});
```
Alternatively, a fully qualified class name can be passed to the **extend()**method, which reduces bloat in the **Service Provider**and provides a better indication of what the code is responsible for. When doing so, the class must implement a **handle()**method:
```
setData('foo', 'bar');
}
}
```
```
\Aero\Store\Http\Responses\ProductPage::extend(AddFooVariableToProductPage::class);
```
Note that this code will only evaluate when Aero routes a request to the particular response builder, i.e. code that is set to run on the **ProductPage**will not be processed on a request for the **Homepage**.
# How do I change the response view?
For responses that return HTML, a Twig view file is used. Whilst these are originally defined, the view can be changed. For example, to change the product page view based on product data:
```
\Aero\Store\Http\Responses\ProductPage::extend(function ($page) {
if ($view = $page->product->additional('view')) {
$page->setView($view);
}
});
```
Setting the view to **null**will result in a JSON response.
You can get the current view for a response using **$page->getView()**.
# What are the available responses from the response builder?
## Core
****
****
****
****
****
****
****
****
****
****
****
****
****
****
****
****
| Class | Description | View |
| ---------------------- | ------------------------------------------------------------------------------------------------------------ | ----------------------------- |
| Homepage | The homepage of the store. | homepage.twig |
| ProductPage | The product page providing information on a particular product. | product.twig |
| ListingsPage | The listings page which displays available products for the particular criteria defined against the URL | listings.twig |
| ListingsJson | The JSON response of listings for the particular criteria defined against the URL. | - |
| SearchPage | The search results for a particular search term. | search.twig |
| SearchJson | The JSON response of search results for a particular search term. | - |
| CartPage | The cart summary page, where customers can see an overview of the items in their cart and update quantities. | cart.twig |
| CartItemAdd | Actions to take when an item is added to the cart. | - |
| CartItemUpdate | Actions to take when an item is updated in the cart. | - |
| CartEmpty | Actions to take when the cart is emptied. | - |
| CartDiscountCodeApply | Actions to take when a discount code is applied to the cart. | - |
| CartDiscountCodeRemove | Actions to take when a discount code is removed from the cart. | |
| InformationPage | A static page used to display information, for example the About Us or Terms & Conditions. | information-page.twig |
| Error404Page | The 404 page that displays when a page does not exist. | errors/404.twig |
| FormSubmit | Actions to take when a form is submitted. | - |
| AccountOverviewPage | A static page used to display account overview information. | account/account-overview.twig |
## Admin
### Catalog
****
****
****
****
****
****
****
****
****
****
****
****
****
| Class | Description | View |
| --------------------------- | ------------------------------------------------------------ | ----------------------------------------- |
| AdminDashboardPage | Used to display the admin dashboard. | admin/dashboard.blade.php |
| AdminCategoryCreatePage | Used to display the category creation page in the admin. | admin/catalog/categories/new.blade.php |
| AdminCategoryEditPage | Used to display the category edit page in the admin | admin/catalog/categories/edit.blade.php |
| AdminCategoryStore | Actions for creating a new category. | - |
| AdminCategoryUpdate | Actions for updating an existing category. | - |
| AdminCollectionCreatePage | Used to display the collection creation page in the admin. | admin/catalog/collections/index.blade.php |
| AdminCollectionEditPage | Used to display the collection edit page in the admin. | admin/catalog/collection/edit.blade.php |
| AdminCollectionStore | Actions for creating a new collection. | - |
| AdminCollectionUpdate | Actions for updating an existing collection. | - |
| AdminManufacturerCreatePage | Used to display the manufacturer creation page in the admin. | admin/catalog/manufacturers/new.blade.php |
| AdminProductCreatePage | Used to display the product creation page in the admin. | admin/catalog/products/new.blade.php |
| AdminProductStore | Action for creating a new product. | - |
| AdminProductUpdate | Actions for updating an existing product. | - |
### Discounts
****
****
****
****
| Class | Description | View |
| ----------------------- | -------------------------------------------------------- | ------------------------------ |
| AdminDiscountCreatePage | Used to display the discount creation page in the admin. | |
| AdminDiscountEditPage | Used to display the discount edit page in the admin. | admin/discounts/edit.blade.php |
| AdminDiscountStore | Actions for creating a new discount. | - |
| AdminDiscountUpdate | Actions for updating an existing discount. | - |
### Orders
****
| Class | Description | View |
| ------------------ | ------------------------------------------------- | --------------------------- |
| AdminOrderViewPage | Used to display the order view page in the admin. | admin/orders/view.blade.php |
# Settings
Settings
# What are the settings available to developers?
Settings allow you to add dynamic values to your modules that can be modified by admin users easily through the admin.
The values of your settings (unless the value is the default you set) are stored in json files inside of your storage directory.
```
└─ storage
└─ app
└─ settings
```
# Do do I set the default value of my custom setting?
You can add a default value to any setting by using the **default**method and passing your default value.
```
string('denied_message')->default('Access Denied');
$group->array('allow_list')->default(['admin']);
$group->boolean('allow_list_enabled')->default(true);
});
}
}
```
# How do I register custom settings?
To register settings you need to use the **Aero\Common\Facades\Settings**facade from the **setup**method of your modules service provider. You should call the **group**method on the facade and pass in a unique name for your settings group and a closure that defines your settings group.
```
string('denied_message');
$group->array('allow_list');
$group->boolean('allow_list_enabled');
});
}
}
```
# How do I access a custom setting?
You can access a setting by using the **setting**function that is available in PHP, Blade, and Twig. You simply need to pass your setting group name, a full stop, and then the settings name.
```
setting(‘acme-my-module.allow_list’)
```
# What are the available setting types?
********
| Setting | Description |
| ----------------------------------------------------- | ----------------------------------------------------------------------------------- |
| $group->array(‘allow_list’); | Returns an array. |
| $group->boolean(‘enabled’); | Returns a boolean, true or false. |
| $group->eloquent('order_status', OrderStatus::class); | Stores the key of the eloquent model you pass and returns an instance of the model. |
| $group->encrypted('api_key'); | Stores a string encrypted and returns the string decrypted. |
| $group->float('min_value'); | Returns a number as a float. |
| $group->integer('per_page'); | Returns a number as an integer. |
| $group->string(‘message’); | Returns a string. |
| $group->date('go_live'); | Returns a Carbon date instance. |
| $group->dateRange('sale_period'); | Returns an array with start and end keys that hold a Carbon date instance. |
# How do I configure the admin edit page?
By default your setting group is editable through the admin by a generated edit page. You cannot remove this generated edit page but you can stop users from being able to edit the settings using it. It’s important to note that if you disable editing through this edit page that users can still edit the settings manually through the storage json file.
To make your setting group not editable you should call the **notEditable**method when defining your group.
```
string('denied_message');
$group->array('allow_list');
$group->boolean('allow_list_enabled');
$group->notEditable();
});
}
}
```
### Validation Rules
These are helper methods that map to their equivalent [Laravel Validation Rules](https://laravel.com/docs/6.x/validation#available-validation-rules)
| Rule | Works For |
| ------------------------------------------------- | ---------------------------------------- |
| $group->string('key')->required(); | All |
| $group->string('key')->between($min, $max); | String, Integer, Float, Array, Encrypted |
| $group->string('key')->min($min); | String, Integer, Float, Array, Encrypted |
| $group->string('key')->max($max); | String, Integer, Float, Array, Encrypted |
| $group->string('key')->size($size); | String, Integer, Float, Array, Encrypted |
| $group->string('key')->greaterThan($size); | String, Integer, Float, Array, Encrypted |
| $group->string('key')->lessThan($size); | String, Integer, Float, Array, Encrypted |
| $group->string('key')->in($needles); | String, Integer, Float |
| $group->string('key')->email(); | String, Encrypted |
| $group->string('key')->uuid(); | String, Encrypted |
| $group->string('key')->url(); | String, Encrypted |
| $group->string('key')->ip(); | String, Encrypted |
| $group->string('key')->startsWith($needle); | String, Encrypted |
| $group->string('key')->startsWithOneOf($needles); | String, Encrypted |
| $group->float('key')->step($step); | Float |
| $group->date('key')->beforeToday(); | Date |
| $group->date('key')->before($date); | Date |
| $group->date('key')->afterToday(); | Date |
| $group->date('key')->after($date); | Date |
### Methods
************
| Method | For | Description |
| --------------------------------------------------------------------------- | -------- | ----------------------------------------------------------------------------------------------- |
| $group->title($title); | - | Set the title shown in the list of settings (by default this is generated from the group name). |
| $group->summary($summary); | - | Set the summary shown in the list of settings. |
| $group->notEditable(); | - | Disable editing through the generated admin page. |
| $group->string('key')->label($label); | All | Set the label for the edit field (by default this is generated from the settings key). |
| $group->string('key')->hint($hint); | All | Add a helpful hint to the edit field. |
| $group->string('key')->textarea(); | String | Make the string field appear as a textarea. |
| $group->string('key')->wysiwyg(); | String | Make the string field appear as a wysiwyg. |
| $group->eloquent('order_status', OrderStatus::class)->searchField($field); | Eloquent | Define the field used for searching in the searchable select. |
| $group->eloquent('order_status', OrderStatus::class)->searchFields($field); | Eloquent | Define multiple fields used for searching in the searchable select (first field is the value). |
| $group->array('key')->associative(); | Array | Define the array as an associative array - an array that has a key and value. |
| $group->array('key')->definition($definition); | Array | Set a custom definition for your array (link:section below this). |
#### Complex Array Definitions
If you have a complex array (an array of arrays that have multiple keys), you need to define the contents of the array and any validation for each key.
Here is a code example that defines an additional_checkboxes array that is an array of arrays. The child arrays have a text key (that has validation ensuring it is a string and required) and a required key (that has validation ensuring it is a boolean).
Although this example uses the string, required, and boolean rules you can use any [Laravel Validation rule](https://laravel.com/docs/6.x/validation#available-validation-rules)
```
array('additional_checkboxes')->definition([
'text' => ['string', 'required'],
'required' => ['boolean']
]);
});
}
}
```
# How do I handle translations?
When defining your setting groups title/summary, or a settings label/hint you can make use of [Laravel Localization](https://laravel.com/docs/6.x/localization) for translations.
```
title(__('acme-my-module.title'));
$group->summary(__('acme-my-module.summary'));
$group->string('message')
->label(__('acme-my-module.labels.message'))
->hint(__('acme-my-module.hints.message'));
});
}
}
```
# How do I add settings to the product model?
Using the same syntax as when you [create settings](https://support.aerocommerce.com/link/310)
```
encrypted('password');
$group->boolean('require_password_to_view')->default(false);
});
}
}
```
To access your settings value you need to use the settings method on the product model, passing in the key for the setting you want.
```php
encrypted('password');
$group->boolean('require_password_to_view')->default(false);
});
$product = Product::first();
$password = $product->settings('my-module.password');
dd($password);
}
}
```
# Validation
Validation
# How do I create custom validation requests?
To create a custom validation request, we need to extend the **AeroRequest**abstract class that’s located in **aerocommerce/core**.
To create a custom request, open the terminal in the project root directory and type the following command:
```
php artisan make:request MyRequest
```
The above command generates a class file that we now have to modify to suit the needs of both **AeroRequest**and the data we’re working with. The first change is the class our brand new request extends, instead of **FormRequest**, we now need the class to extend **AeroRequest**from namespace *App\Http\Requests*.
```
route('address');
return $address && $this->user()->can('update', $address);
```
The above code checks if a user has been permitted to update for a given route, in this case, the address.
The **rules()**function allows creating all the necessary rules for fields in a given request. The [Laravel documentation on validation](https://laravel.com/docs/6.x/validation#quick-writing-the-validation-logic) showcases ways of writing validation rules, alongside mentioning several useful dev tips.
### Adding rules
If you wish to add rules to a brand new validation request, all we have to do is populate the array in the return of the **rules()**method.
For example, if we wanted to add validation rules for a basic contact form, they’d look like this:
```
**
* Get the validation rules that apply to the request.
*
* @return array
*/
public function rules(): array
{
return [
'first_name' => 'required|string|max:50',
'last_name' => 'required|string|max:50',
'email' => ‘required|email',
'message' => 'required|string',
];
}
```
### Adding messages
The messaged method will not be automatically scaffolded when creating a new request and we have to do this manually. To add custom messages for our validation errors, we simply create a new method under **rules()**, called **messages()**like so:
```
public function messages(): array
{
return parent::messages(); // TODO: Change the autogenerated stub
}
```
If we wish to set [custom validation messages](https://laravel.com/docs/6.x/validation#custom-error-messages)
```
public function messages(): array
{
return [
'email.required' => 'The email address is required!',
];
}
```
# How do I use validation requests?
To use a custom validation request, we have to replace the request that is passed to the controller function we wish to affect.
Change from:
```
public function updateAddress(Request $request, Customer $customer)
```
Change to:
```
public function updateAddress(UpdateAddressRequest $request, Customer $customer)
```
# How do I display validation error messages?
There are multiple ways of displaying your validation errors. From the backend perspective, the request always returns errors to the view if validation had not passed.
### Alert partial view
Aero has an error partial which automatically displays all the validation errors, provided that it is included in the view we want validation errors to display. To achieve this, simply paste this code under any **@extends**blade directive:
```
@include('admin::partials.alerts')
```
### Admin
In the admin, we’d use **Blade**to display all validation errors at once like so:
```
@if($errors->isNotEmpty())
@foreach($errors->all() as $error)
{{ $error }}
@endforeach
@endif
```
On the other hand, if we wish to display an error only for a specifed field - in this case firstname, we’d use:
```
@error('firstname')
{{ $message }}
@enderror
```
### Store
In the frontend, we’re using **Twig**to display errors from a request. If we wish to display all validation errors, we’d use something along the lines of:
```
{% if errors %}
{% for error in errors %}
{{ error }}
{% endfor %}
{% endif %}
```
If we wish to display an error for a particular field, in this case **email**:
```
{% if errors.has('email') %}
{{ errors.first('email') }}
{% endif %}
```
# What are the available validation requests?
Example:
```
route('address');
return $address && $this->user()->can('update', $address);
}
/**
* Get the validation rules that apply to the request.
*
* @return array
*/
public function rules(): array
{
return [
'first_name' => 'required|string|max:255',
'last_name' => 'required|string|max:255',
'company' => 'nullable|string|max:255',
'line_1' => 'required|string|max:255',
'line_2' => 'nullable|string|max:255',
'city' => 'required|string|max:255',
'zone_name' => 'nullable|string|max:255',
'postcode' => 'required|string|max:255',
'country_code' => 'required|string|size:2|exists:countries,code',
'mobile' => 'nullable|string|max:20',
'phone' => 'nullable|string|max:20',
];
}
}
```
| ValidateOrderAddress | FilterSaveRequest |
| --------------------------- | ------------------------------ |
| SeoFormRequest | UpdateSubscriptionPlanRequest |
| ValidateCartCustomer | ValidateGuestConversionRequest |
| ValidatePaymentMethod | ValidateShippingMethod |
| CreateAddressRequest | SearchRequest |
| UpdateAccountDetailsRequest | UpdateAccountPasswordRequest |
| UpdateAddressRequest | ValidateAccountDetails |
| ValidateAddress | ValidateEmail |
| ValidateLogin | ValidateRegister |
| ValidatePasswordReset | ValidatePasswordUpdate |
# How do I set a custom order validator for shipping methods?
You can define logic that will be used to confirm if a shipping method is available for a specific order. By default all shipping methods that have available shipping rates (you can set a custom order validator for shipping rates too) for an order are available.
To set the logic you need to use the **\Aero\Cart\Models\ShippingMethod::setOrderValidator()**method. This method expects you to pass a closure that will return **true**or **false**. The closure will be passed the shipping method and order to validate.
In this example code if the shipping method id is not 1, nothing will happen but if the shipping method id is 1 then the shipping method will only be available if the order is being placed on a Monday.
```
id !== 1) {
return true;
}
return Carbon::now()->isDayOfWeek(1);
});
}
}
```
# How do I set a custom order validator for shipping rates?
You can override the default logic that decides whether a shipping rate is applicable to an order. By default shipping rates are validated against their configuration set in the admin (allowed/disallowed tags, total weight, and total price).
To set the logic you need to use the **\Aero\Cart\Models\ShippingRate::setOrderValidator()**method. This expects you to pass a closure that will return **true**, **false**, or **null**(if null is returned then the default shipping rate logic is used). The closure will be passed the shipping rate and the order to validate.
In this example code if the shipping rate price is free then the shipping rate will be invalid unless the current day is Monday. If the shipping rate price is not free then **null**is returned so that the normal shipping rate validation code runs.
```
price_inc === 0) {
return Carbon::now()->isDayOfWeek(1);
}
return null;
});
}
}
```
# How do I use a custom total item price totalizer for a shipping rate?
Setting a custom item price totalizer allows you to define the logic used to get the total price of a collection of order items (this value will be used when validating that a shipping rate is available for an order).
To set the logic you need to use the **\Aero\Cart\Models\ShippingRate::setItemPriceTotalizer()**method. This method expects you to pass a closure that will return a **number**for the total price or **null**(if null is returned then the default total price logic is used). The closure will be passed the order items and the shipping rate.
In this example code if an order item costs less than 500 then the item will not be used in the calculation for the total price of the order items.
```
filter(function (OrderItem $item) {
return ($item->total + $item->total_tax) <= 500;
});
return round($items->sum('total') + $items->sum('total_tax'));
});
}
}
```
# How do I use a custom total item weight totalizer for a shipping rate?
Setting a custom item weight totalizer allows you to define the logic used to get the total weight of a collection of order items (this value will be used when validating that a shipping rate is available for an order).
To set the logic you need to use the **\Aero\Cart\Models\ShippingRate::setItemWeightTotalizer()**method. This method expects you to pass a closure that will return a **number**for the total price or **null**(if null is returned then the default total weight logic is used). The closure will be passed the order items and the shipping rate.
In this example code if an order item weighs less than 50 then the item will not be used in the calculation for the total weight of the order items.
```
filter(function (OrderItem $item) {
return $item->total_weight <= 50;
});
return $items->sum('total_weight');
});
}
}
```