Content Management
Content Management
- Blocks
- How do I create a new block?
- How do I delete a block?
- What is a block?
- Where do I find my blocks?
- What is the blocks list?
- How do I search my blocks?
- How do I edit a block?
- Combinations
- What are combinations?
- Where do I find my combinations?
- How do I search my combinations?
- How do I edit a combination?
- What is the combinations list?
- How do I create a new combination?
- How do I delete a combination?
- Introduction
- What is content management?
- Introduction to missing pages
- Where do I find content management?
- Introduction to combinations
- Introduction to pages
- Introduction to blocks
- Introduction to redirects
- Missing Pages
- How do I export my missing pages?
- What is a missing page?
- Where do I find missing pages?
- What is the missing pages list?
- How do I search my missing pages?
- Pages
- How do I search my pages?
- How do I create a new page?
- What is a page?
- Where do I find my pages?
- What is the pages list?
- How do I edit a page?
- How do I delete a page?
- Redirects
Blocks
Blocks
How do I create a new block?
In order to create a new block for your store first navigate to the blocks listings page and click the "+ New Block" button at the top of the page.

From here you will be presented with the form for creating a new block.
The form is grouped into sections with non-required sections collapsed.
Block Information
The first section is the block name, key and description;
- Name- The main identifier for your Block, shown on the Block list - Key- Allows you to enter useful information to describe your Block - Description- The back-end identifier for your Block

Block Elements
The block elements section is where you add content to your block;

Once you have created an element you have the following options;
- Copy- Creates a duplicate copy of this element in your Block - Delete- Instantly deletes your element (also deletes elements nested beneath your element)

Element types
When adding a new element, your options change depending on the type of element;
Menu element
To nest an element under a menu, following these steps
The fields available for the menu element are as follows;
- Title- The text that appears in the menu element when displayed on screen - Link- Optional - The URL your menu element links to - Show / hide this block at a particular time- Allows you to set show and hide times for your menu element
- Show at- Set the time to start displaying your menu element - Hide at- Set the time to start displaying your menu element
- Additional Attributes- Adds a new attribute
- Delete icon- Instantly delete your attribute - Name- Enter your attribute name - **Value **- Enter your attribute value

Link element
Links allow you to create linkable list elements. When used with menus you can create nested link lists.
-
Title- The text that appears in the link element when displayed on screen - Link- Optional - The URL your link element links to - Show/Hide this Block at a particular time- Allows you to set show and hide times for your link element
- Show at- Set the time to show your link element - Hide at- Set the time to hide your link element
-
+ add attribute- Adds a new attribute
- Delete icon- Instantly delete your attribute - Name- Enter your attribute name - Value- Enter your attribute value

Text element
Text allows you to create textual list elements. When used with menus, you can create nested lists.
-
Text- The text that appears in the link element when displayed on screen - Show/Hide this Block at a particular time- Allows you to set show and hide times for your link element
- Show at- Set the time to show your link element - Hide at- Set the time to hide your link element
-
+ add attribute- Adds a new attribute
- Delete icon- Instantly delete your attribute - Name- Enter your attribute name - Value- Enter your attribute value

Image element
Image allows you to create image elements. These can contain up to 3 images, used depending on the type of device displaying the storefront.
Image filetypes
Aero supports the following image types:
- .png - .jpg/.jpeg
Image size
Aero storefront supports images up to 10MB
The fields available for the image element are as follows;
-
3 x Drop files here to upload- Optional - Either drag your product image file into the box or click to browse files - Alt text- Enter the alt text that describes the image - Link- Optional - The URL your image element links to - Show/Hide this Block at a particular time- Allows you to set show and hide times for your link element
- Show at- Set the time to show your link element - Hide at- Set the time to hide your link element
-
+ add attribute- Adds a new attribute
- Delete icon- Instantly delete your attribute - Name- Enter your attribute name - Value- Enter your attribute value

HTML elements
HTML allows you to create HTML Block elements.
-
HTML- - Show/Hide this Block at a particular time- Allows you to set show and hide times for your link element
- Show at- Set the time to show your link element - Hide at- Set the time to hide your link element
-
+ add attribute- Adds a new attribute
- Delete icon- Instantly delete your attribute - Name- Enter your attribute name - Value- Enter your attribute value

How do I delete a block?
Deleting blocks cannot be undone
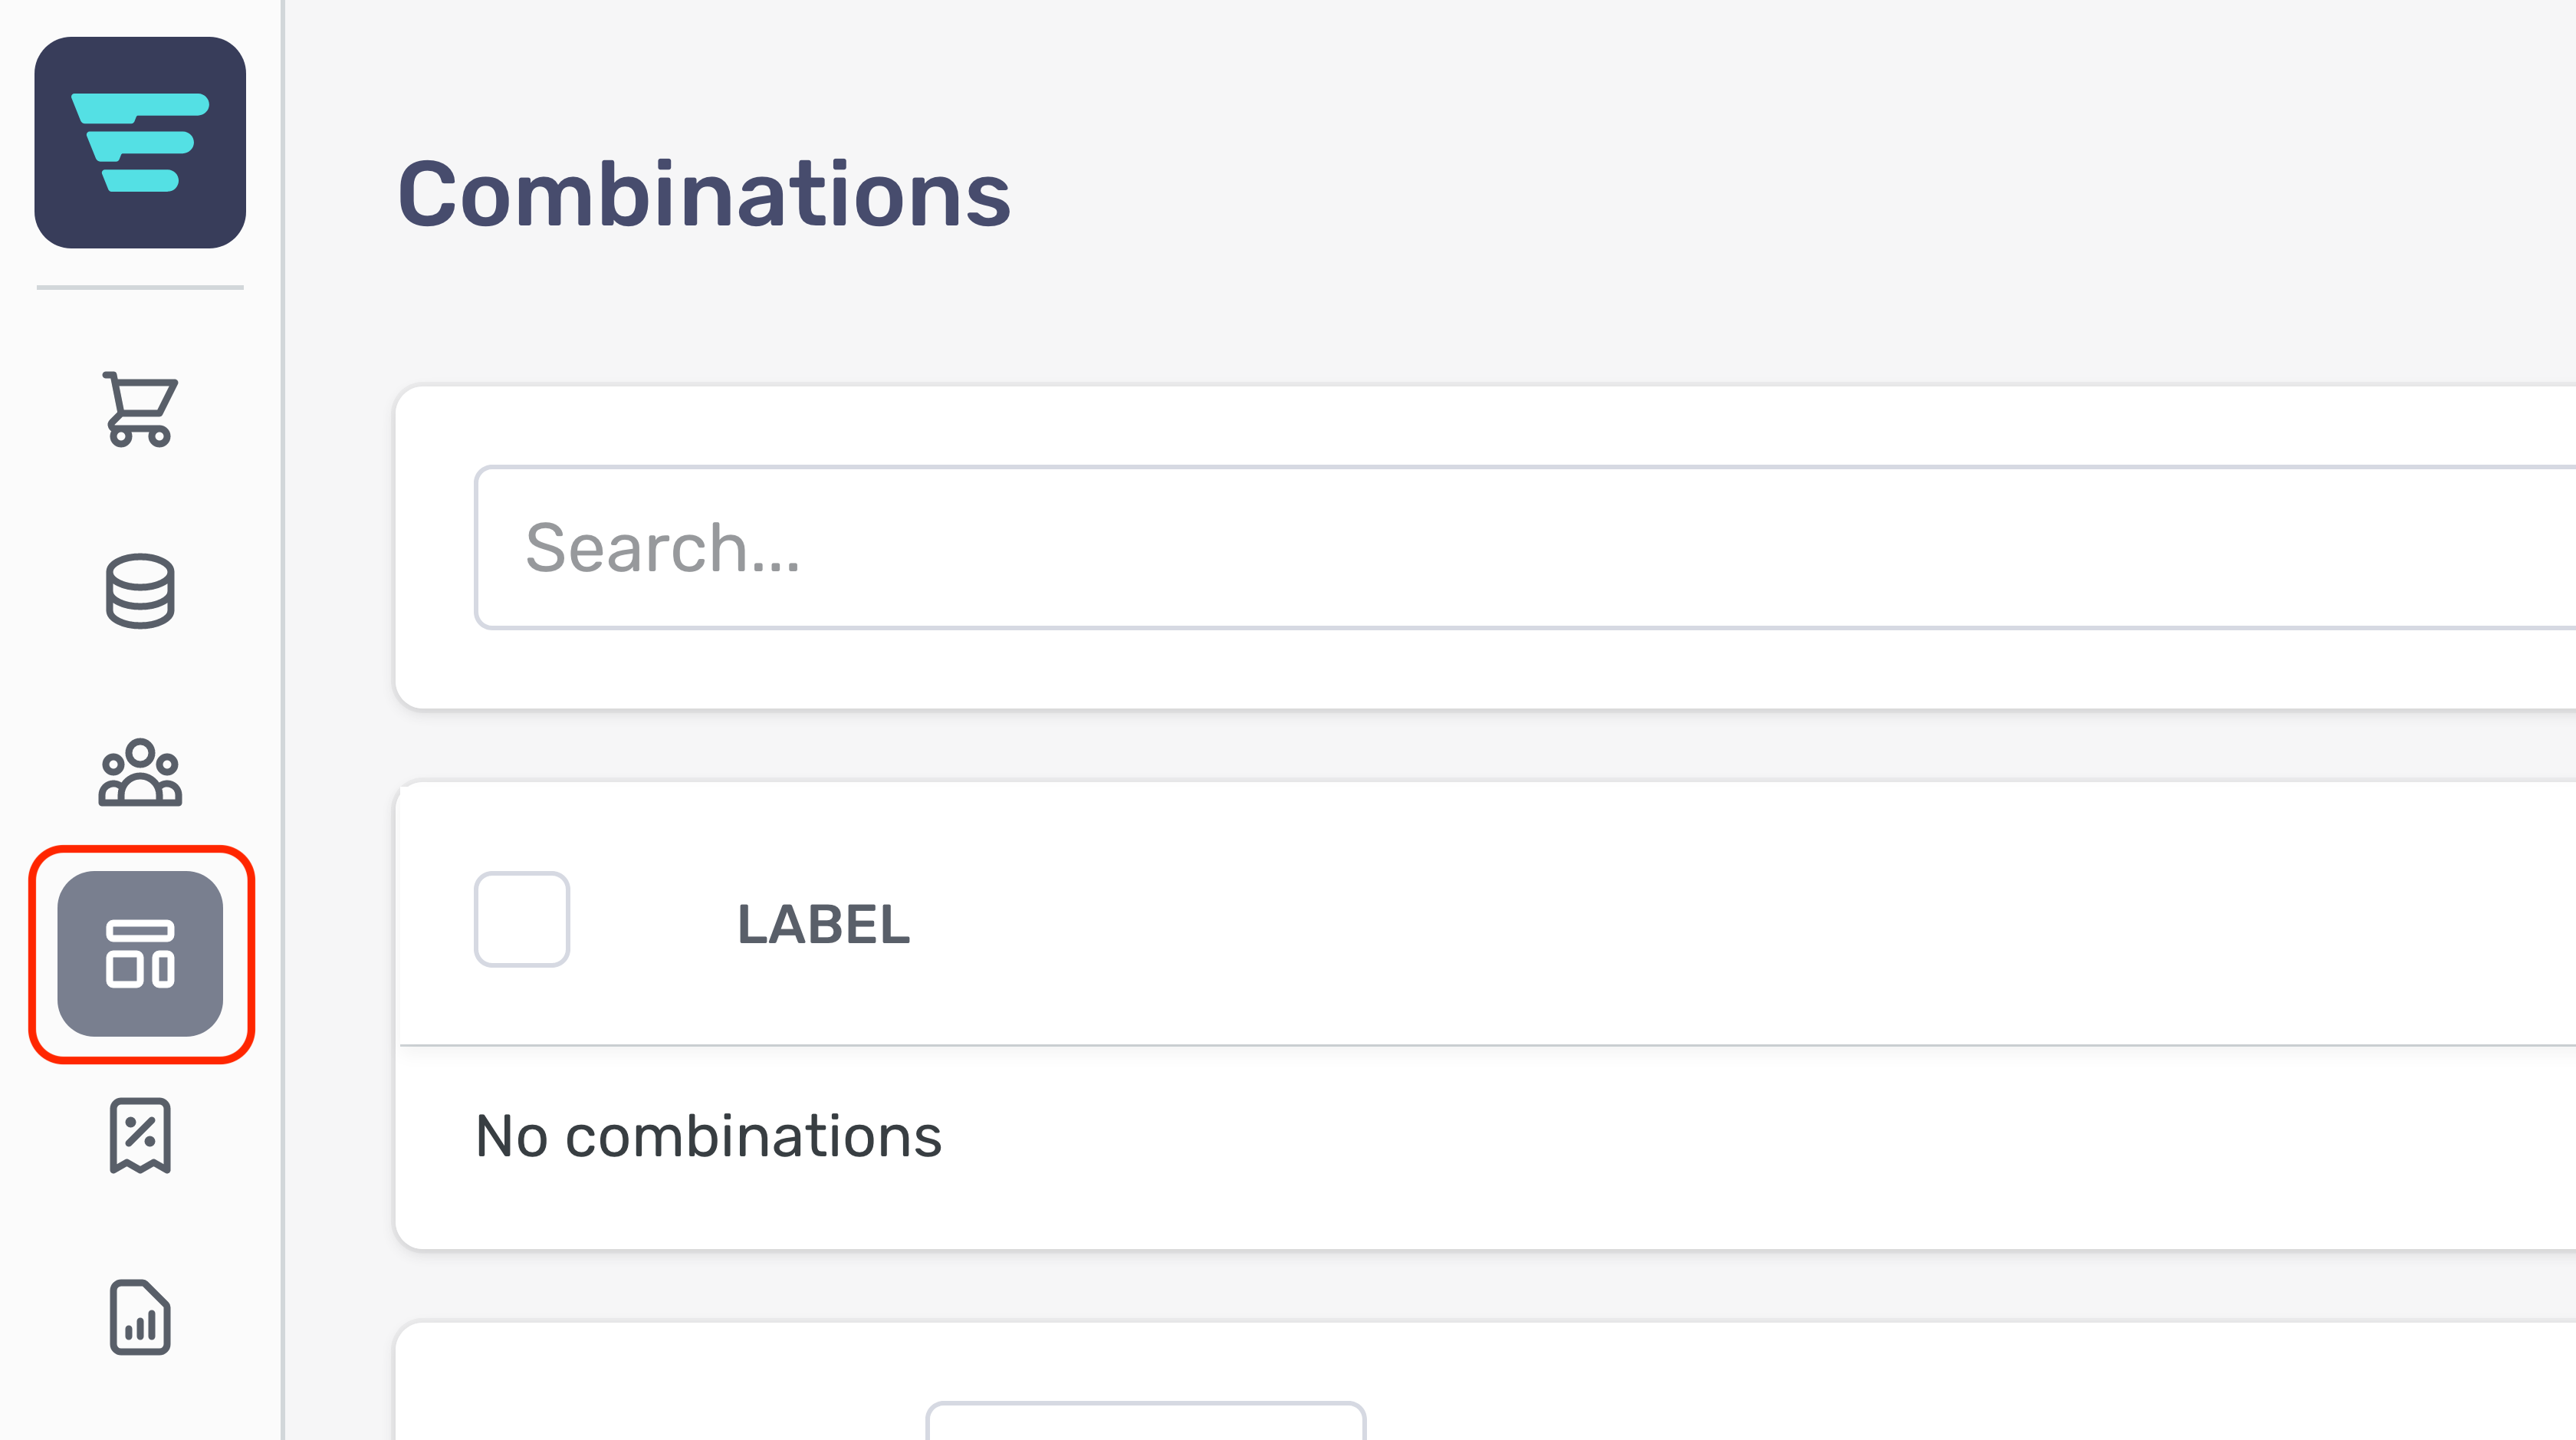
- Step 1 - Login to your Aero Admin Console - Step 2 - Hover over the 'Content Management' icon in the left hand menu
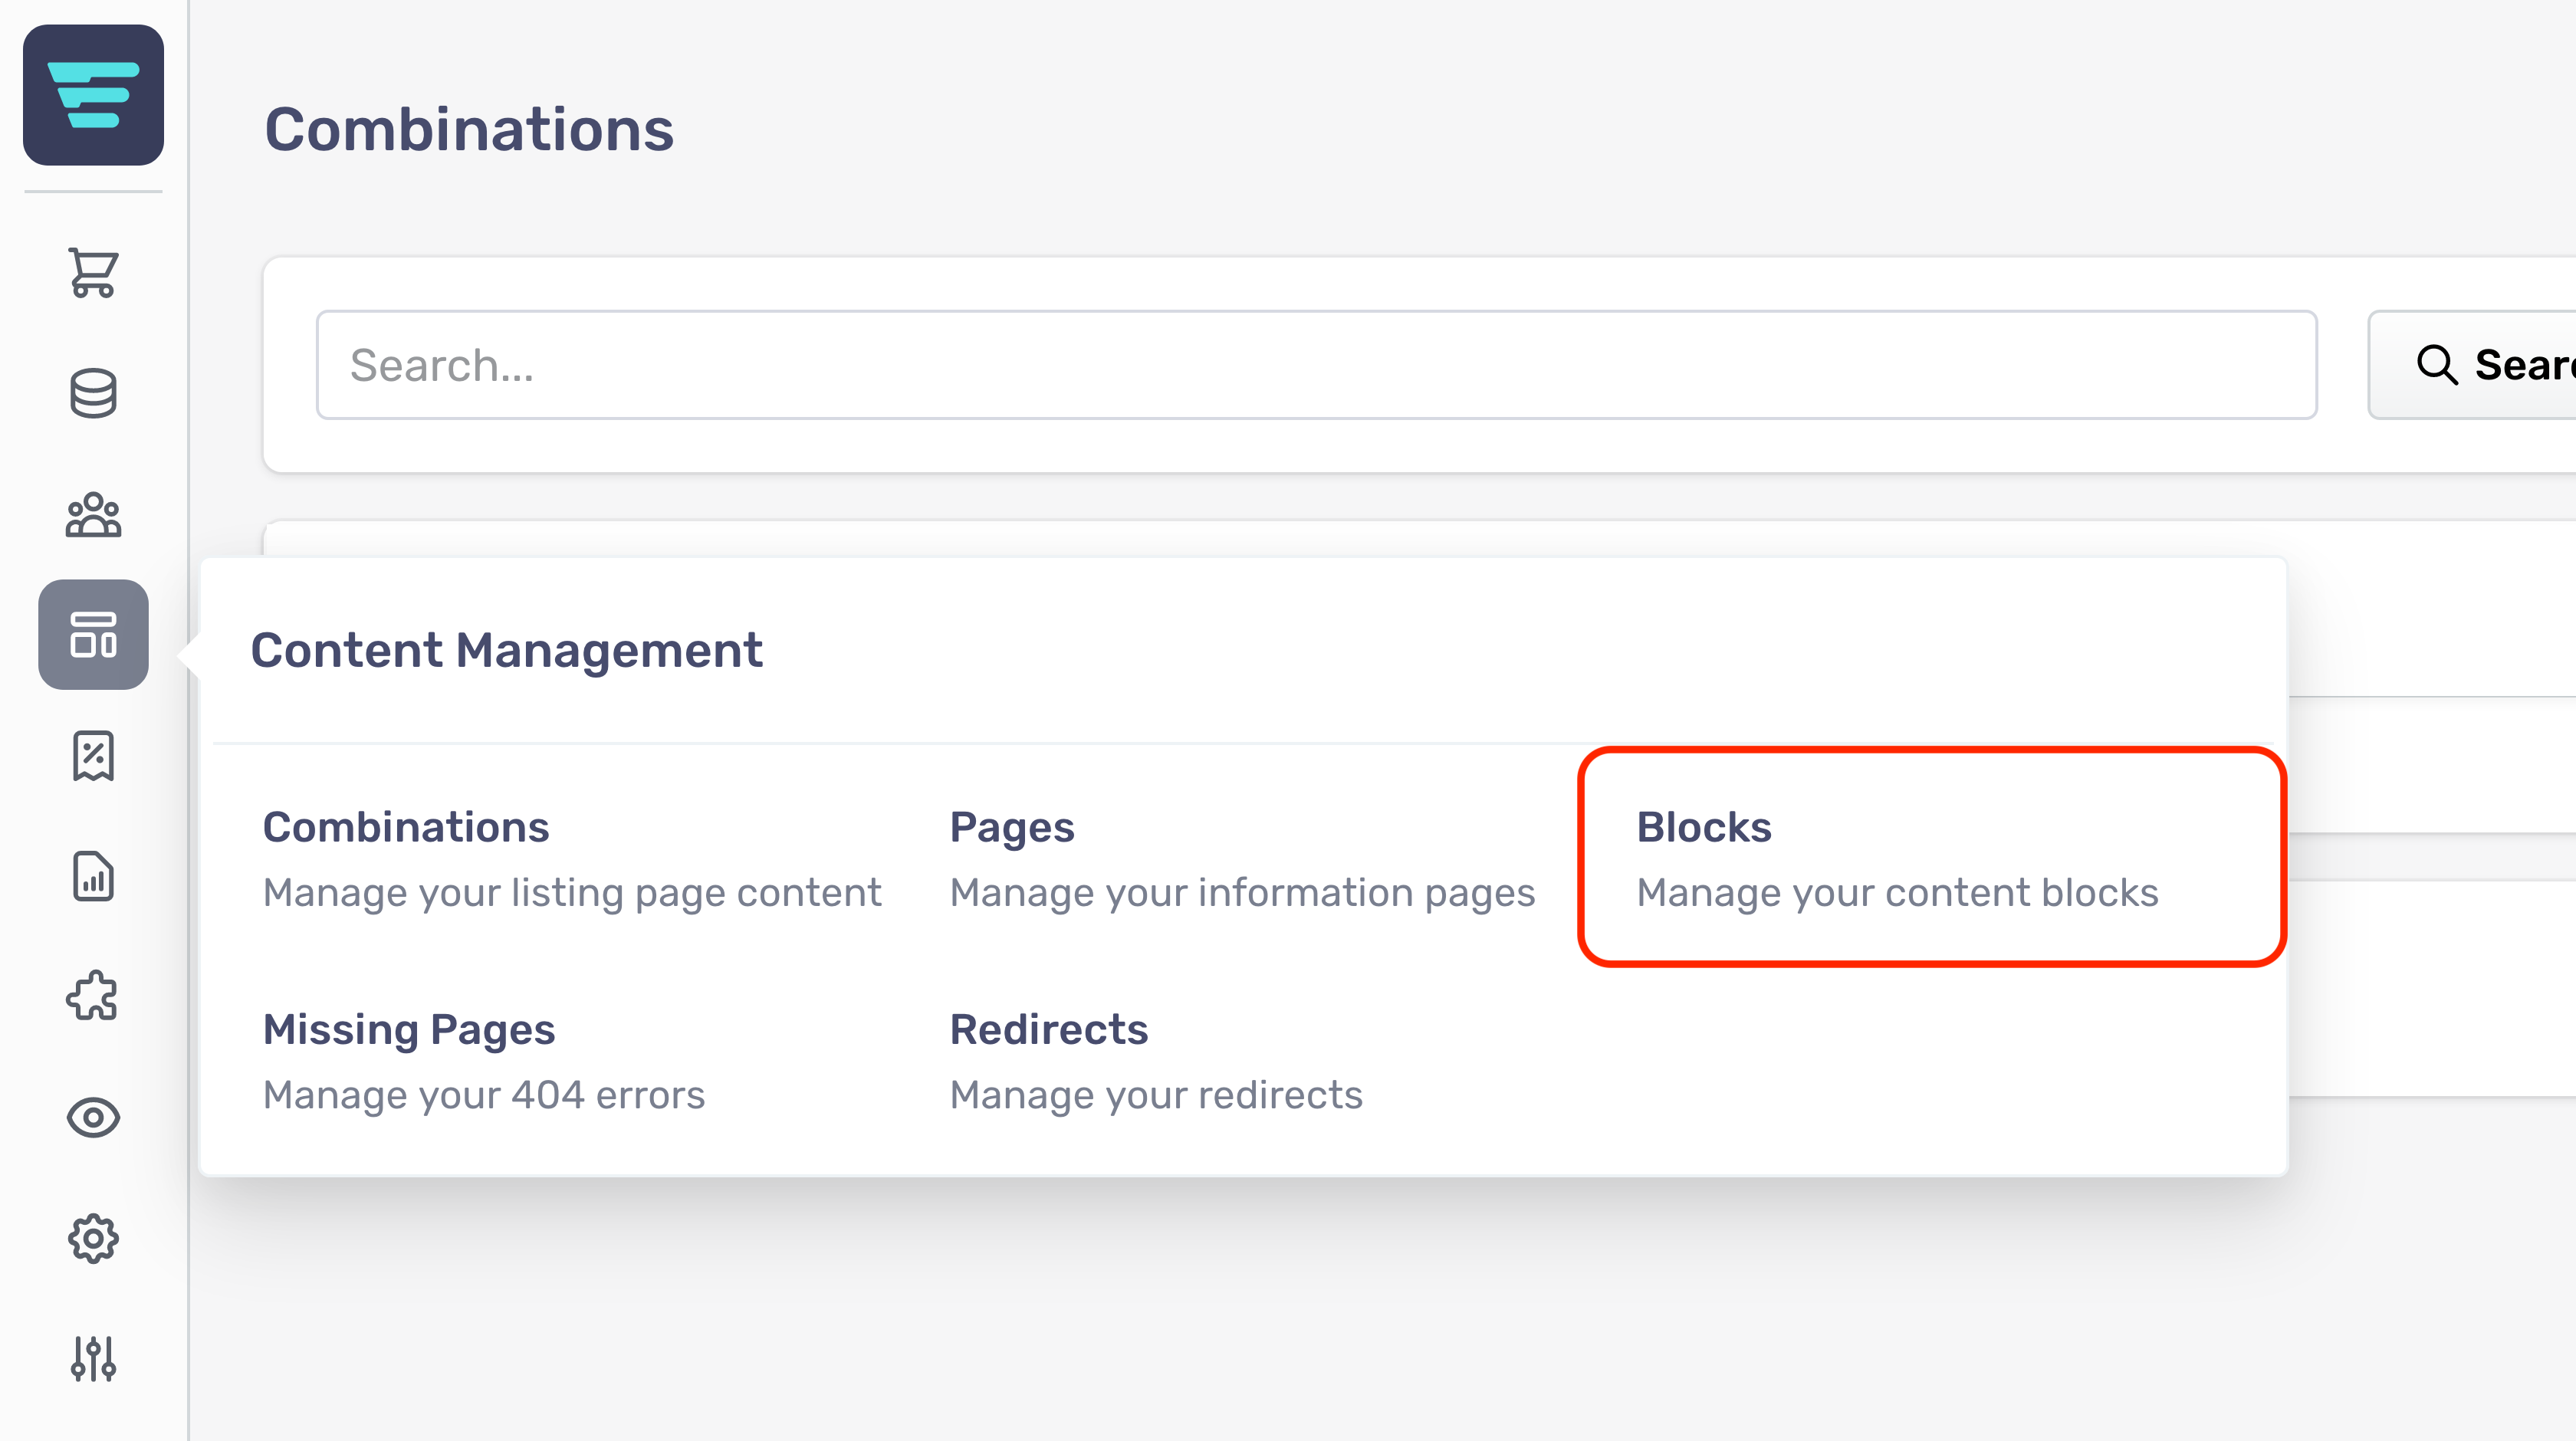
- Step 3 - Click on 'Blocks'
- Step 4 - Search for the block(s) you would like to delete (more information here; "How do I search my blocks? - Step 5 - Select the block(s) you would like to delete by click their checkbox(es)

- Step 6 - Select 'Delete blocks' from the 'Select a bulk action' dropdown - Step 7 - Click go - A confirmation tick will appear when your bulk action has been completed
What is a block?
Within Aero, Blocks provide an easy way to include dynamic content in your storefront.
Blocks are specific elements, or sections of displayed content within pages. Blocks allow easy duplication of content and can be reused across an unlimited number of pages.
Blocks can be made up of a combination of the following content types:
Where do I find my blocks?
Your Blocks are located in your Aero admin console.
- Step 1 - Hover over the Content Management button in the left hand menu
- Step 2 - Select Blocks from the Content Management menu

What is the blocks list?
Your blocks list shows all of you current blocks and includes the label and key of each block. This allows you to quickly check key details and quickly drill into your blocks for further information.

How do I search my blocks?
- Step 1 - Login to your Aero Admin Console - Step 2 - Hover over the 'Content Management' icon in the left hand menu
- Step 3 - Click on 'Blocks'
- Step 4 - Enter your search term in the SEARCH input at the top of the page

- Step 5 - Click 'Search'
How do I edit a block?
- Step 1 - Login to your Aero Admin Console - Step 2 - Hover over the 'Content Management' icon in the left hand menu
- Step 3 - Click on 'Blocks'
- Step 4 - Search for the block you would like to edit (more information here; "How do I search my blocks? - Step 5 - Click on the block name or arrow icon - Step 6 - Edit or enter the necessary information for your block - (more information here; "How do I create a new block? - Step 7 - Click the 'Save' button in the bottom left of your screen
Combinations
Combinations
What are combinations?
Within Aero, Combinations allow you to change the way certain listings pages appear.
When filtered by specified criteria, your storefront will display distinct Combination pages. These pages will have a specific title, SEO and images.
Combination criteria
Combinations are made by combining a mix of the following criteria:
- Collections - Categories - Manufacturers - Tags
An example Combination
For example, you could combine the following if you wanted to create a specific listings page for Fender Electric Guitars:
- Category: Electric Guitars - Manufacturer: Fender

Where do I find my combinations?
Your Combinations are located in your Aero admin console.
- Step 1 - Click the Content Management button in the left hand menu
- Step 2 - Select Combinations from the Content Management menu

How do I search my combinations?
- Step 1 - Login to your Aero Admin Console - Step 2 - Hover over the 'Content Management' icon in the left hand menu
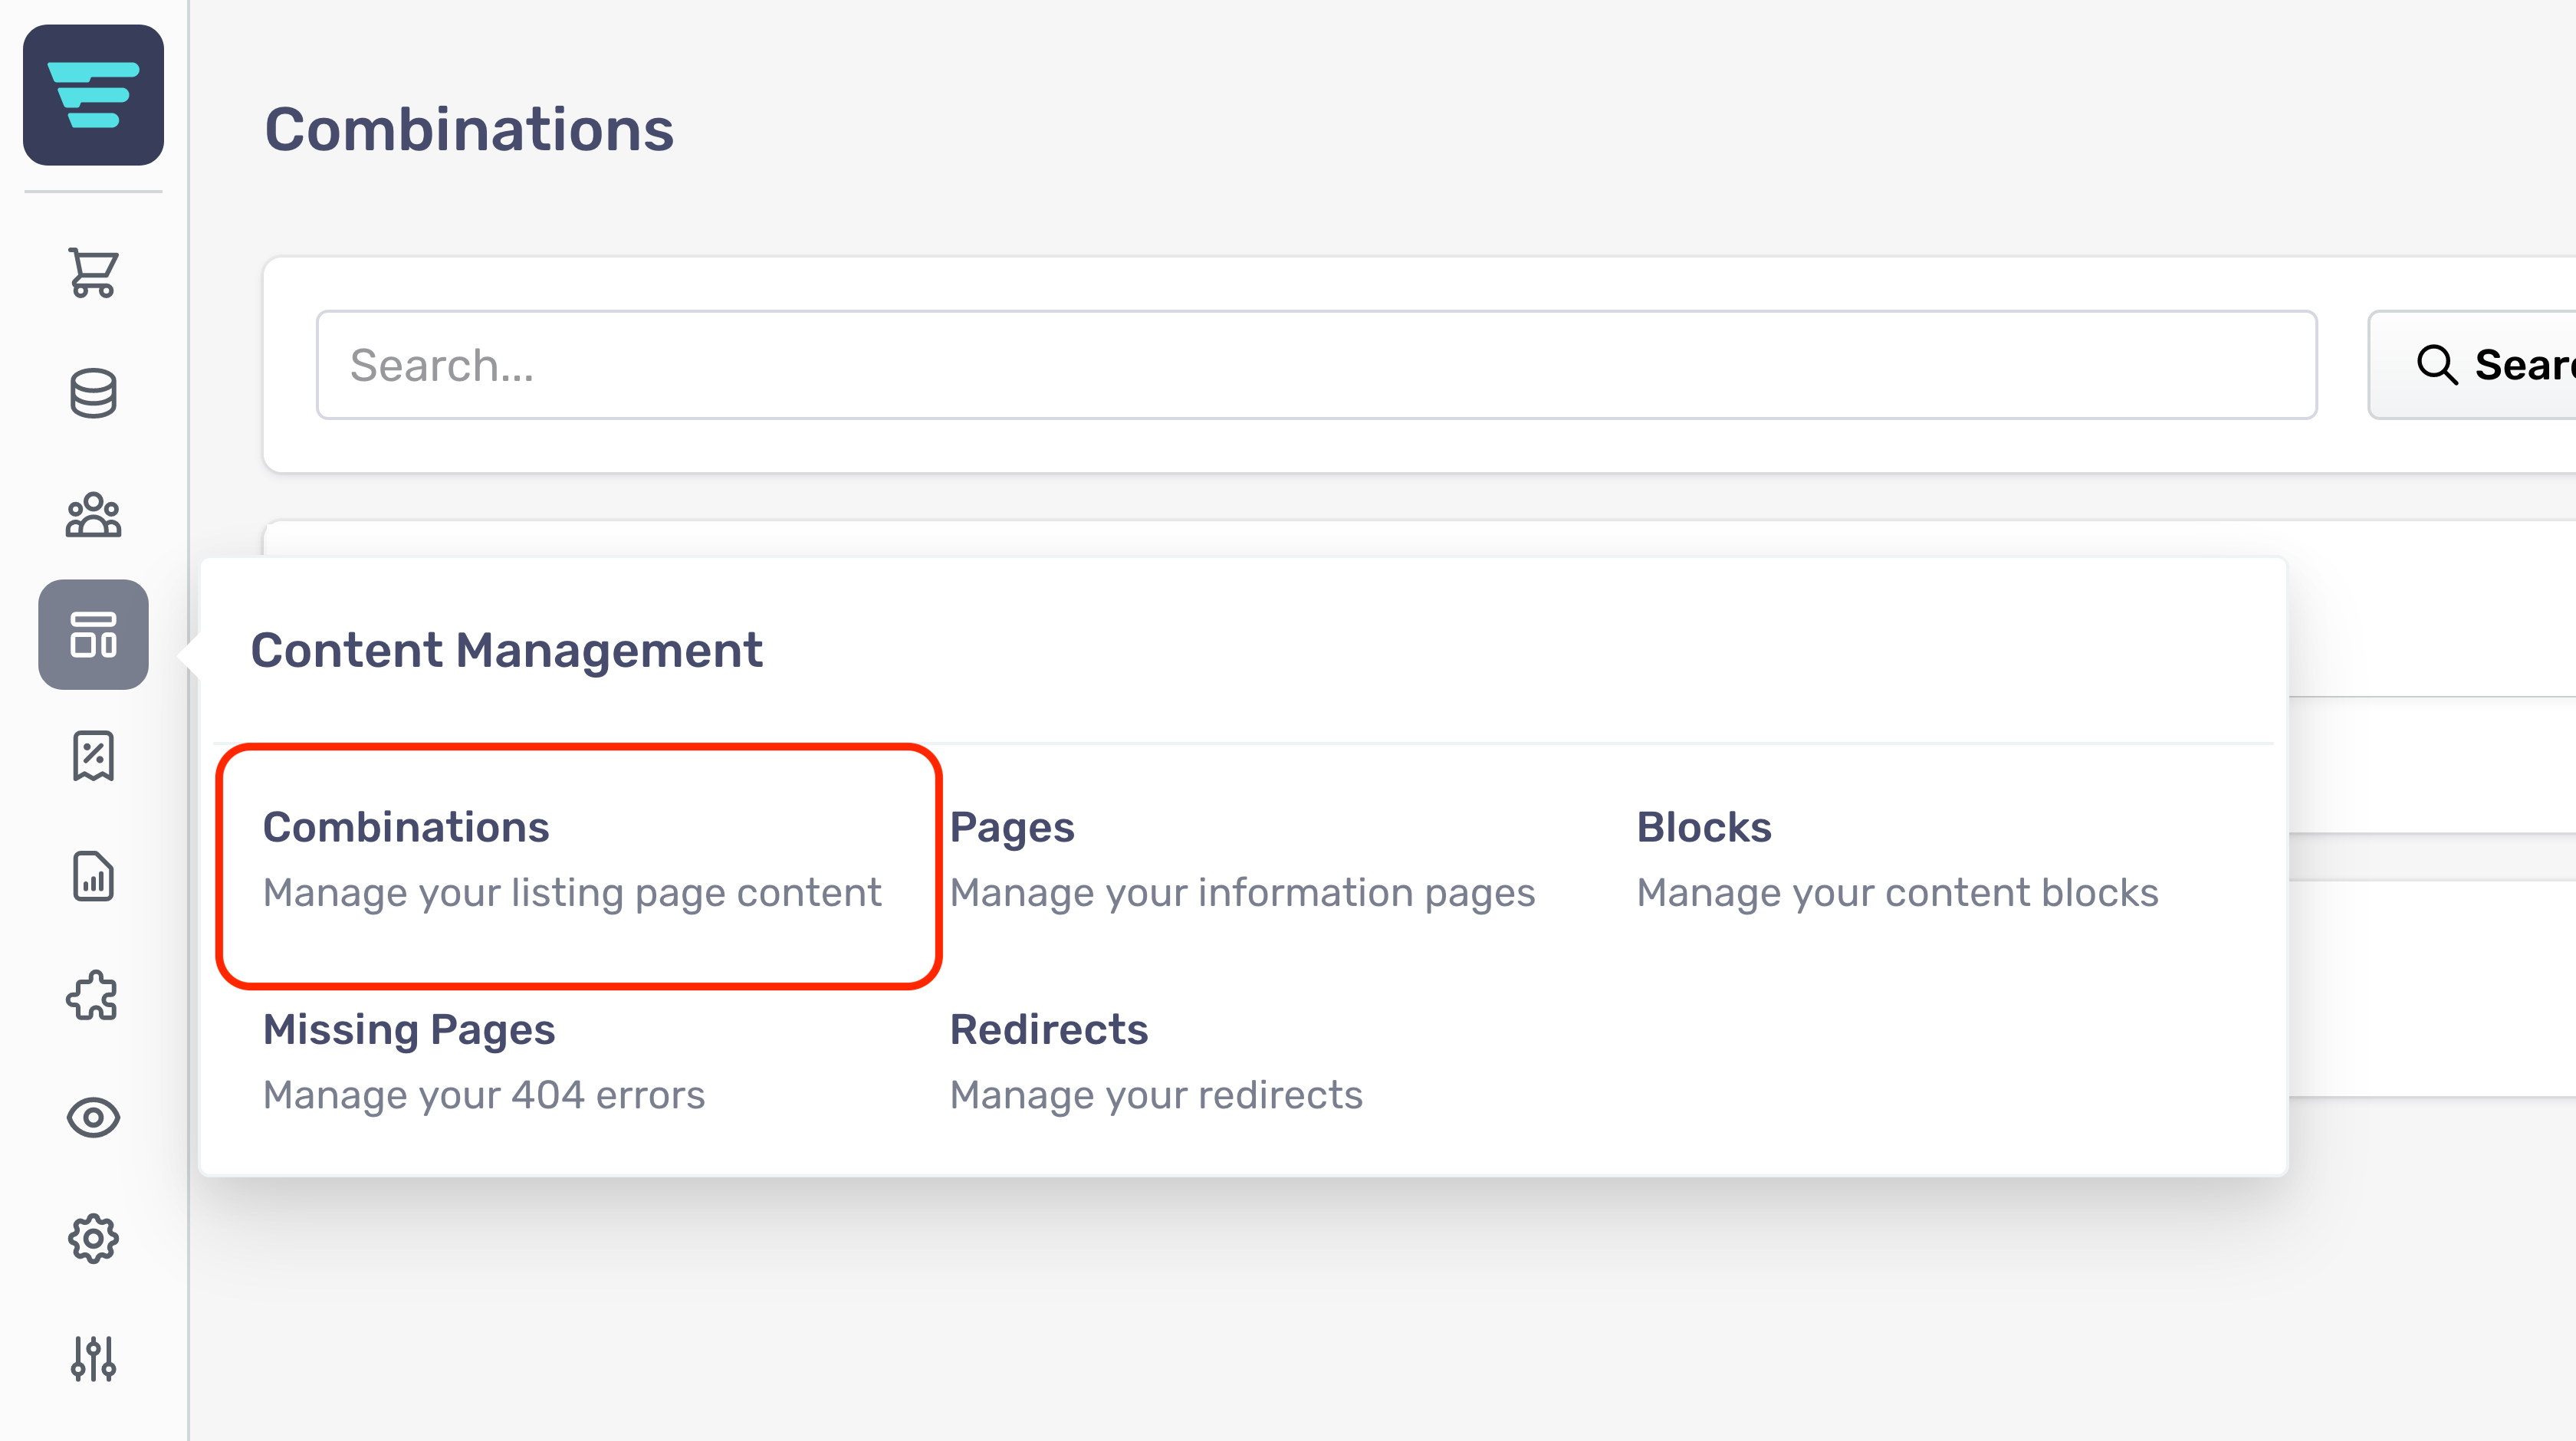
- Step 3 - Click on 'Combinations'
- Step 4 - Enter your search term in the SEARCH input on the top right hand side of the page

- Step 5 - Click 'Search'
How do I edit a combination?
- Step 1 - Login to your Aero Admin Console - Step 2 - Hover over the 'Content Management' icon in the left hand menu
- Step 3 - Click on 'Combinations'
- Step 4 - Search for the Combination you would like to edit (more information here; "How do I search my combinations? - Step 5 - Click on the Combination arrow icon - Step 6 - Edit or enter the necessary information for your Combination - (more information here; "How do I create a new combination? - Step 7 - Click the 'Save' button in the bottom left of your screen
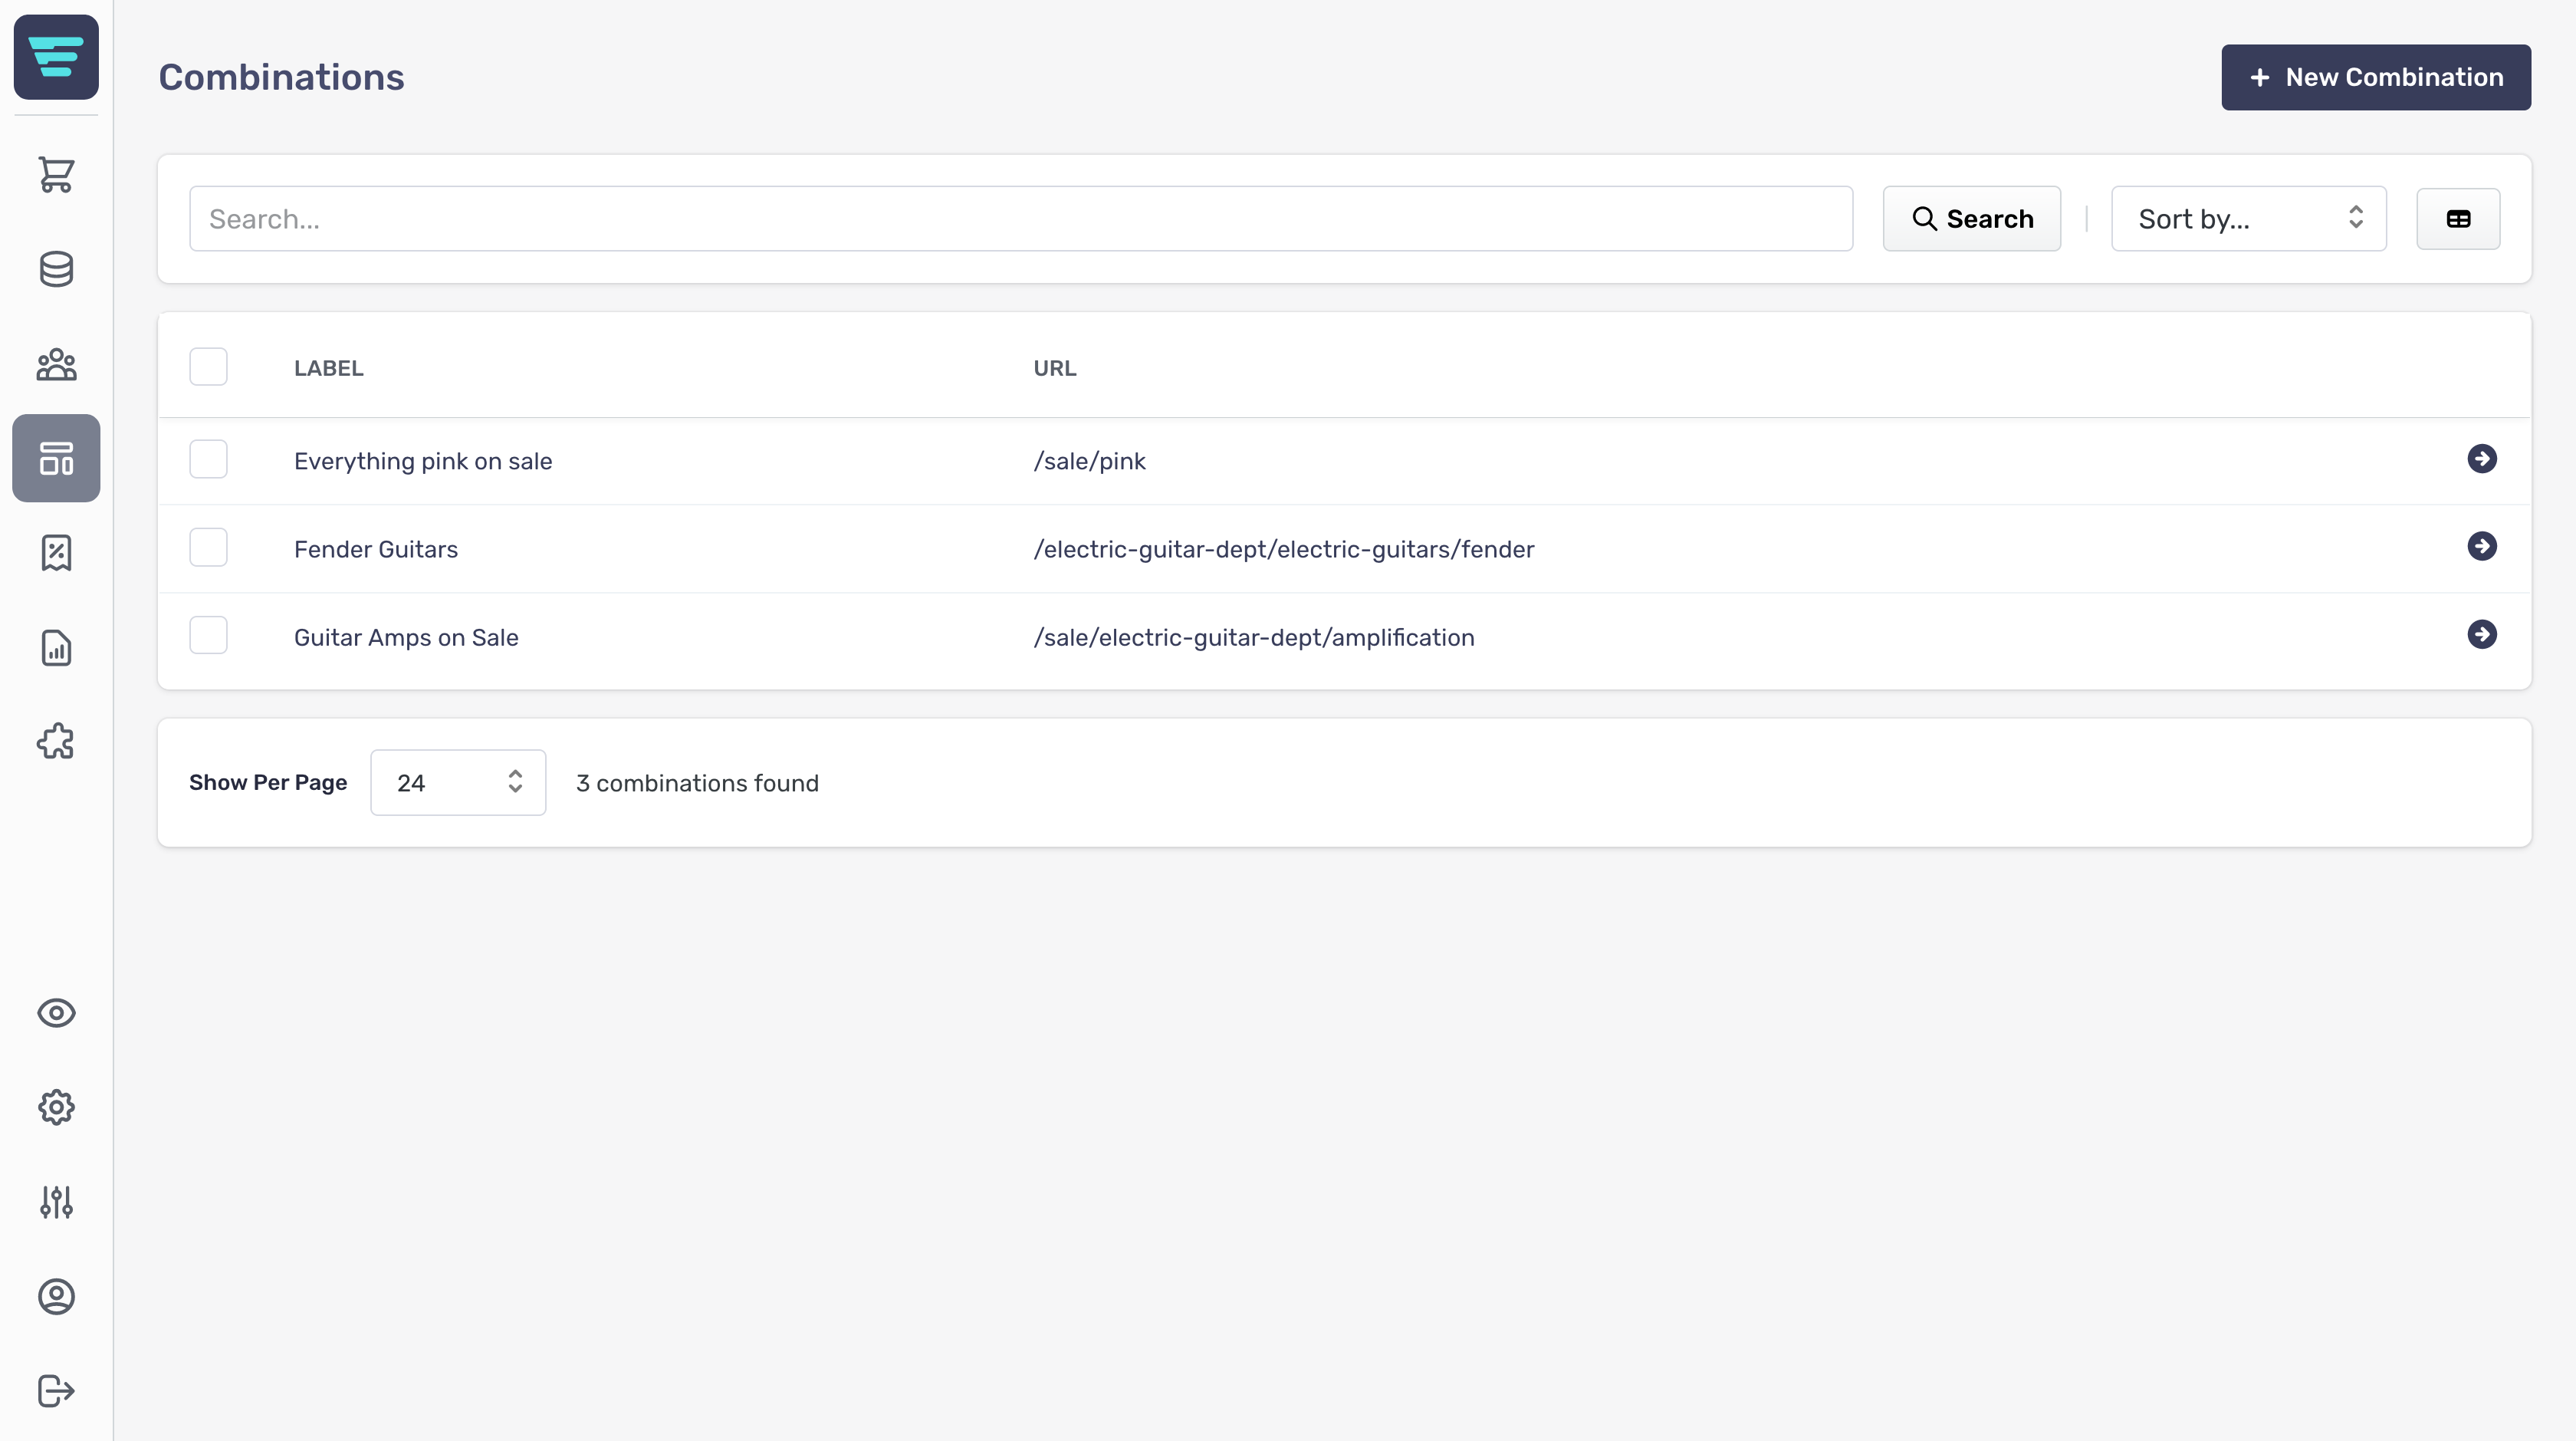
What is the combinations list?
Your combination list shows all of you current combinations and includes the label and url of each combination. This allows you to quickly check key details and quickly drill into your combinations for further information.
Example Combination List;
How do I create a new combination?
In order to create a new combination for your store first navigate to the combinations listings page and click the "+ New Combination" button at the top of the page.

Combination Information
The first section is the combination label, search checkbox and content selectors.
- Label- The main identifier for your Combination, shown on the Combination list - Search page- When checked a user can use the Label to search for the Combination - + Add Collection- Select the Collection to add to your Combination - + Add Category- Select the Category to add to your Combination - + Add Manufacturer- Select the Manufacturer to add to your Combination - + Add Tags- Add new tags to your Combination

Listing Page Content
The content entered here will be used to populate certain content areas depending on your theme/configuration.
- Summary- Enter a shorter summary of your combination - Description- Enter a detailed description of your combination - Images- Optional - Either drag your combination image file(s) into the box or click to browse files. The images section is broken down into 3 sections allowing you to provide different sized images for different screen sizes.

Both Summaryand Descriptionprovide the following inputs for controlling the content and layout;
- Bold- Embolden selected text - Italic- Italicise selected text - Format- Select from a range of standard formats. - Lists- Select bulletted or numbered lists, and change indent level. - Table- Insert and control a table (supports all standard table operations). - Link- Link or unlink - When you add a link you can choose to open in new tab - useful if the link points away from your storefront. - Image- Add an image by drag and drop or file selection. - Font- Choose from existing fonts or remove a font. - Size- Choose from existing font sizes or remove a font size. - Text Colour- Choose text or highlight colour to apply - select none to remove text or highlight colour that has already been applied. - Properties- Allows you set CSS Class and ID properties - this is advanced functionality for those comfortable working with CSS. - Main text area- This is where you enter you combination description - the detailed combination text that your customers will see.
Listing Page Options
This section allows you to control the products shown on this page by applying various filters;
- Hide categries- Select this to hide categories from your filters list - Hide filters- Select this to hide categories from your filters list - Applicable & available filters- Drag filters from available filtersto applicable filtersto add them to your combination page - Show per page- Enter the number of listings to show on this combination page - Sort by- Select the 'sort by' options that will be displayed on this combination page

Search Engine Optimization (SEO)
The SEO section is where you manage the content used by search engines to index your store.
SEO is an important aspect when it comes to customers finding your store when searching for products you're selling.
The SEO section has a number of fields for you to complete;
- Heading- this is the combination name and will be the main heading in most themes. - Page title- used by search engines as the title of this page. - Meta description- combined with the page title and displayed as the search engine listing description. - Canonical- used to determine relationships when multiple pages share duplicate content - No index- checking this box will direct search engines to not index this page.

Additional Attributes
The additional attributes section is used to provide custom fields, these may have been set up by your agency and used to display additional information about your combination.
Additional attributes are useful if Aero does not contain a certain attribute that you require, e.g. for integration with an ePos system.

How do I delete a combination?
Deleting combinations cannot be undone
- Step 1 - Login to your Aero Admin Console - Step 2 - Hover over the 'Content Management' icon in the left hand menu
- Step 3 - Click on 'Combinations'
- Step 4 - Search for the Combination/Combinations you would like to delete (more information here; "How do I search my combinations? - Step 5 - Select the Combination/Combinations you would like to delete by click their checkbox(es)

- Step 6 - Select 'Delete combination' from the 'Select a bulk action' dropdown - Step 7 - Click go - A confirmation tick will appear when your bulk action has been completed
Introduction
Introduction
What is content management?
Content Management is where you manage the appearance and content of your storefront.
This includes:
- Managing your listings through combinations - Managing your information/static pages - Identifying missing Pages and creating redirects - Managing resuable content blocks
Introduction to missing pages
Missing Pages shows you a list of URLs within your store's domain that users or agents have tried and failed to access.
A typical missing pages list;

Where do I find content management?
Content Management is located in your Aero admin console.
- Step 1: Click the Content Management button in the left hand menu

- Step 2 - Select the information you want to view from the Content Management menu

Introduction to combinations
Combinations are used where you want to give a unique identity to a combination of filters.
Combinations example - Guitar Amps on Sale
For example if you wanted to create a combination called: Guitar Amps on Sale
This would include all reduced price mens items, and would combining the following:
- Collection: Sale- Category: Electric Guitars » Amplification
A typical combinations list;

Introduction to pages
Pages are static information pages within your storefront. These would include contact, about, terms and conditions and other pages with non-dynamic content.
See "What is a page?
A typical pages list;

Introduction to blocks
Blocks provide an easy way to include dynamic content in your storefront.
Blocks are specific elements, or sections of displayed content within pages. Blocks allow easy duplication of contnet and can be reused across an unlimited number of pages.
Blocks can be made up of a combination of the following content types:
See "What is a block?
A typical blocks list;
Introduction to redirects
Redirects allow you to divert traffic from specific URLs to different specific URLs, including standard redirect codes.
See "What is a redirect?
A typical redirects list;

Missing Pages
Missing Pages
How do I export my missing pages?
- Step 1 - Login to your Aero Admin Console - Step 2 - Hover over the 'Content Management' icon in the left hand menu
- Step 3 - Click on 'Missing Pages'
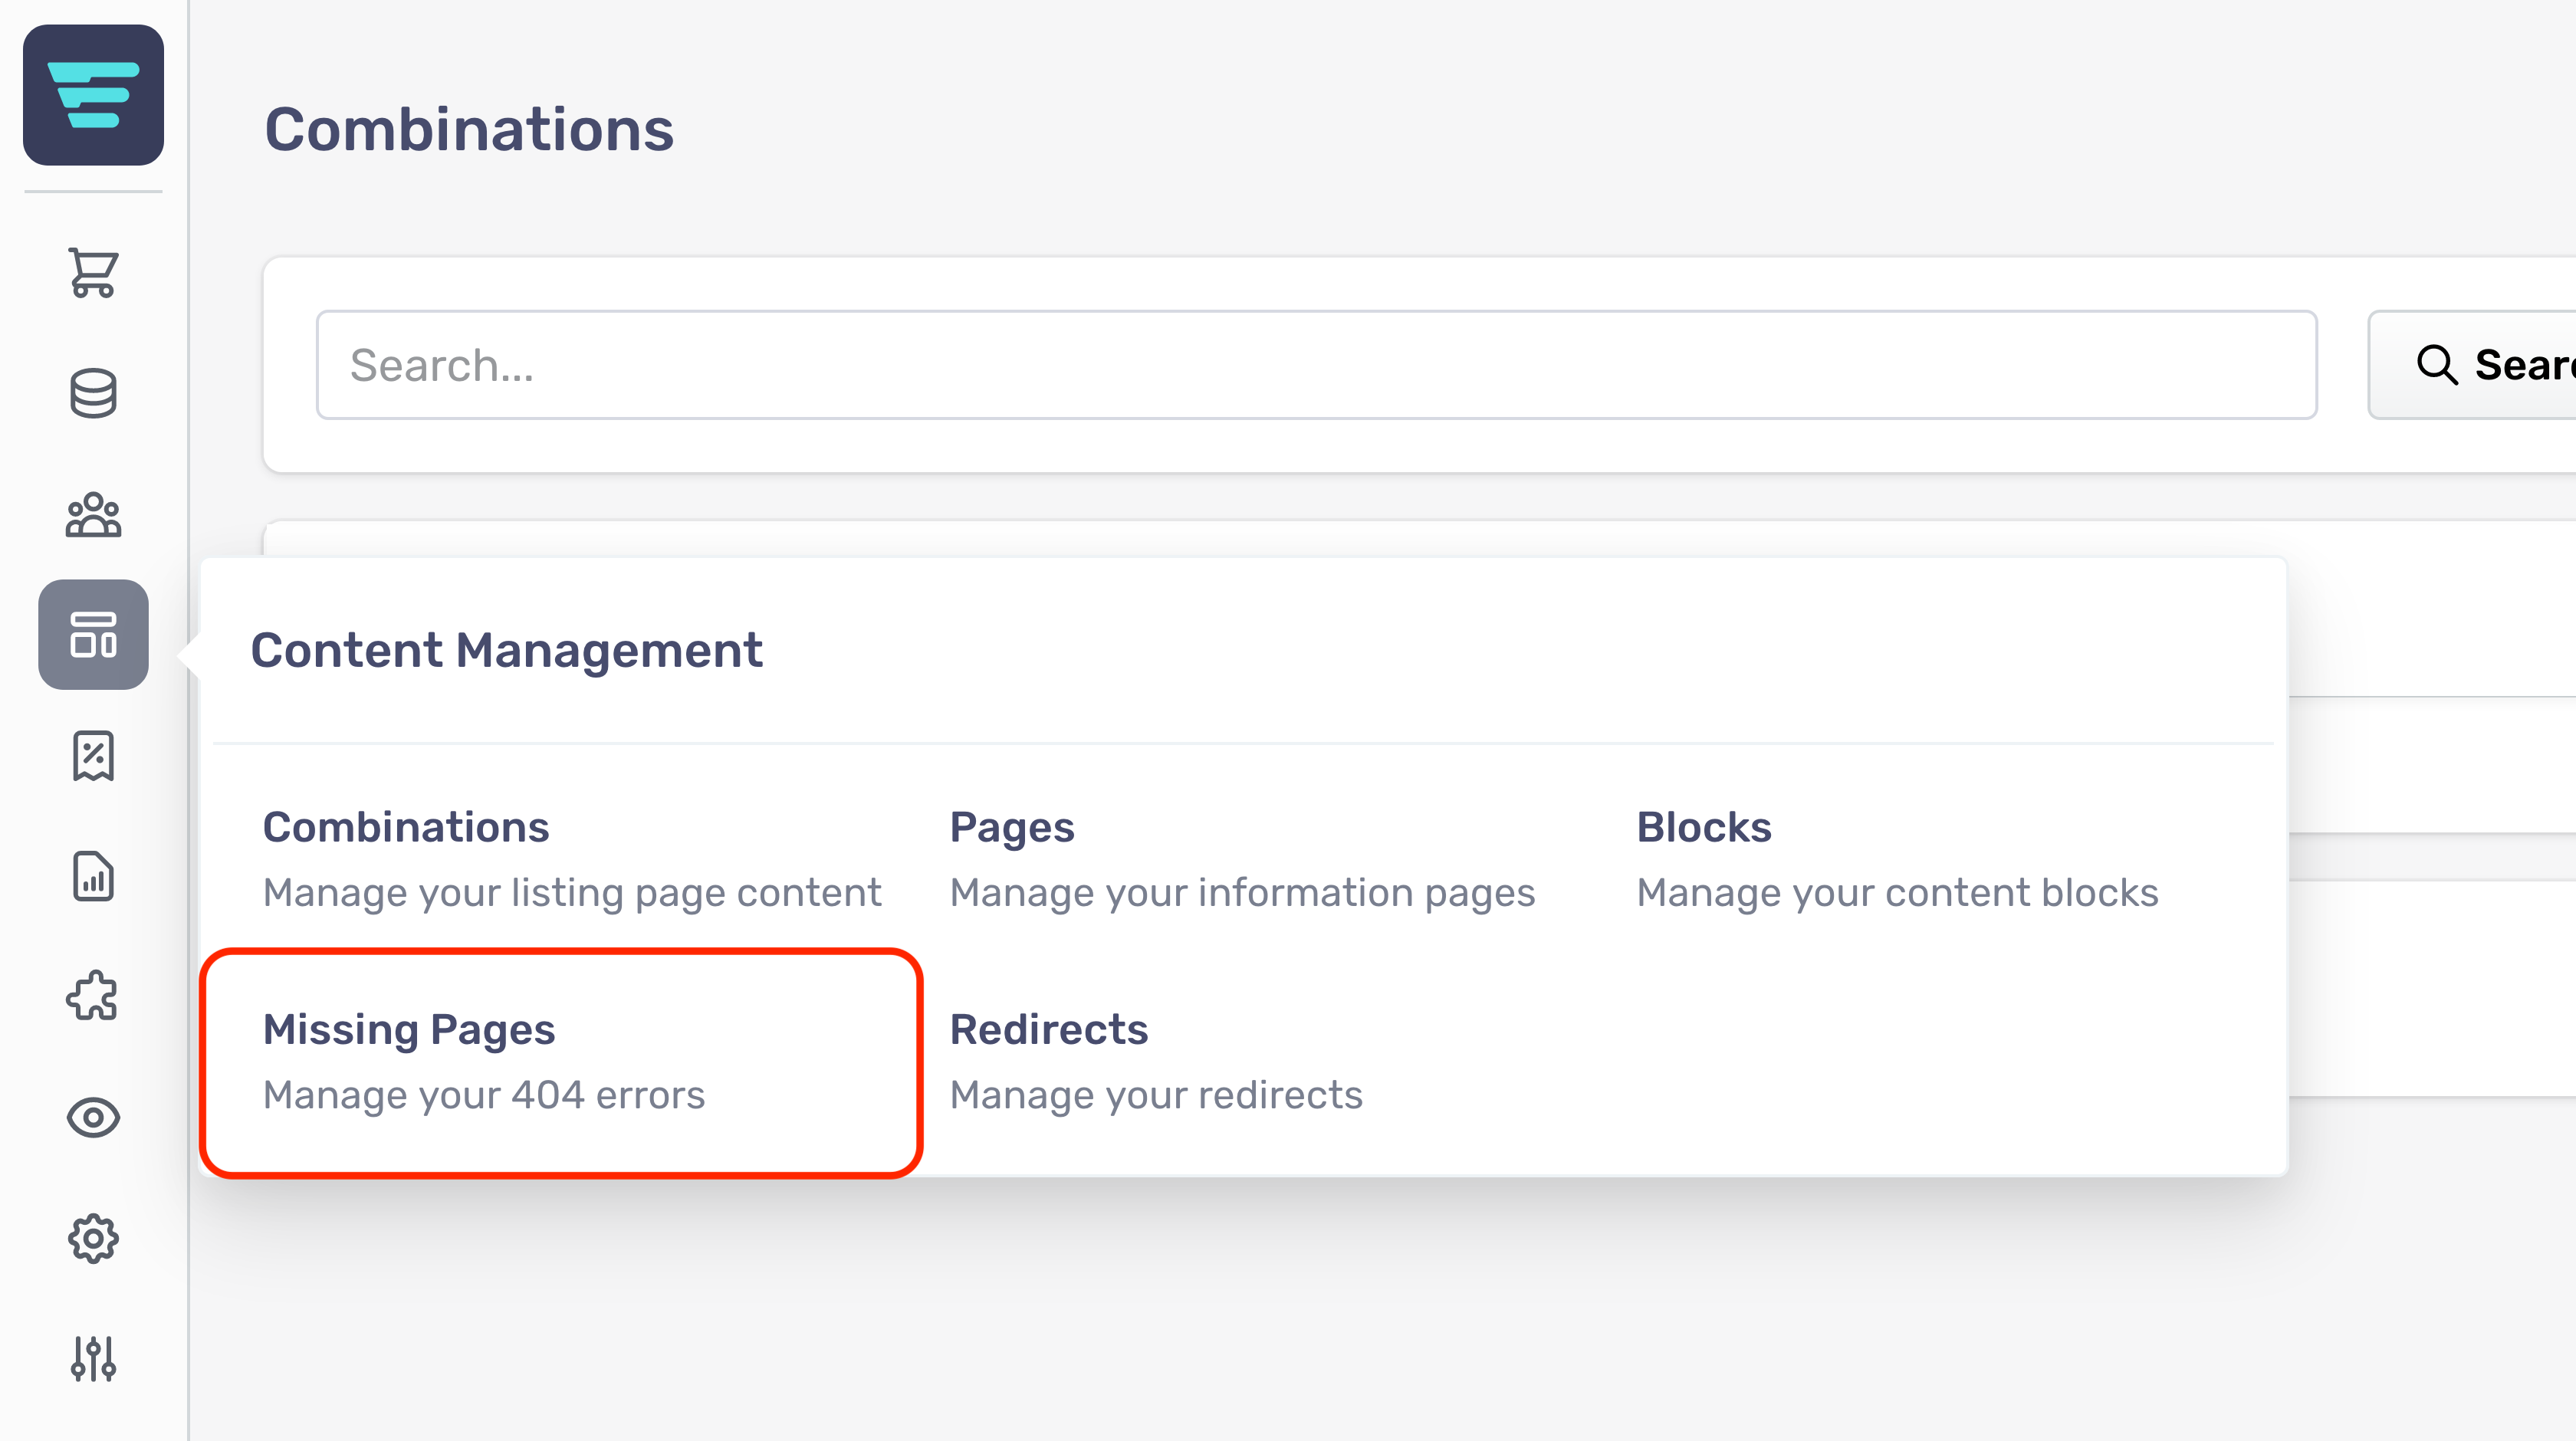
- Step 4 - Click the 'Export' button in the top right of your screen

- Step 5 – Click ‘Export as CSV’

What is a missing page?
Within Aero, Missing Pages shows you a list of URLs (within your store's domain) that users or agents have tried and failed to access.
This can be common when you replatform. Users or search engines might try to access pages that have been moved or that form part of your old structure.
You can use redirects to prevent your customers accessing Missing Pages.
Where do I find missing pages?
Your Missing Pages are located in your Aero admin console.
- Step 1: Click the Content Management button in the left hand menu
- Step 2 - Select Missing Pages from the Content Management menu

What is the missing pages list?
The missing pages list shows you a list of URLs (within your store's domain) that users or agents have tried and failed to access, along with the number of times users have attempted to access that url, the date of the last time someone tried to access it and if a redirect is in place.

How do I search my missing pages?
- Step 1 - Login to your Aero Admin Console - Step 2 - Hover over the 'Content Management' icon in the left hand menu
- Step 3 - Click on 'Missing Pages'
- Step 4 - Enter your search term in the SEARCH input at the top of the page

- Step 5 - Click 'Search'
Pages
Pages
How do I search my pages?
- Step 1 - Login to your Aero Admin Console - Step 2 - Hover over the 'Content Management' icon in the left hand menu
- Step 3 - Click on 'Pages'
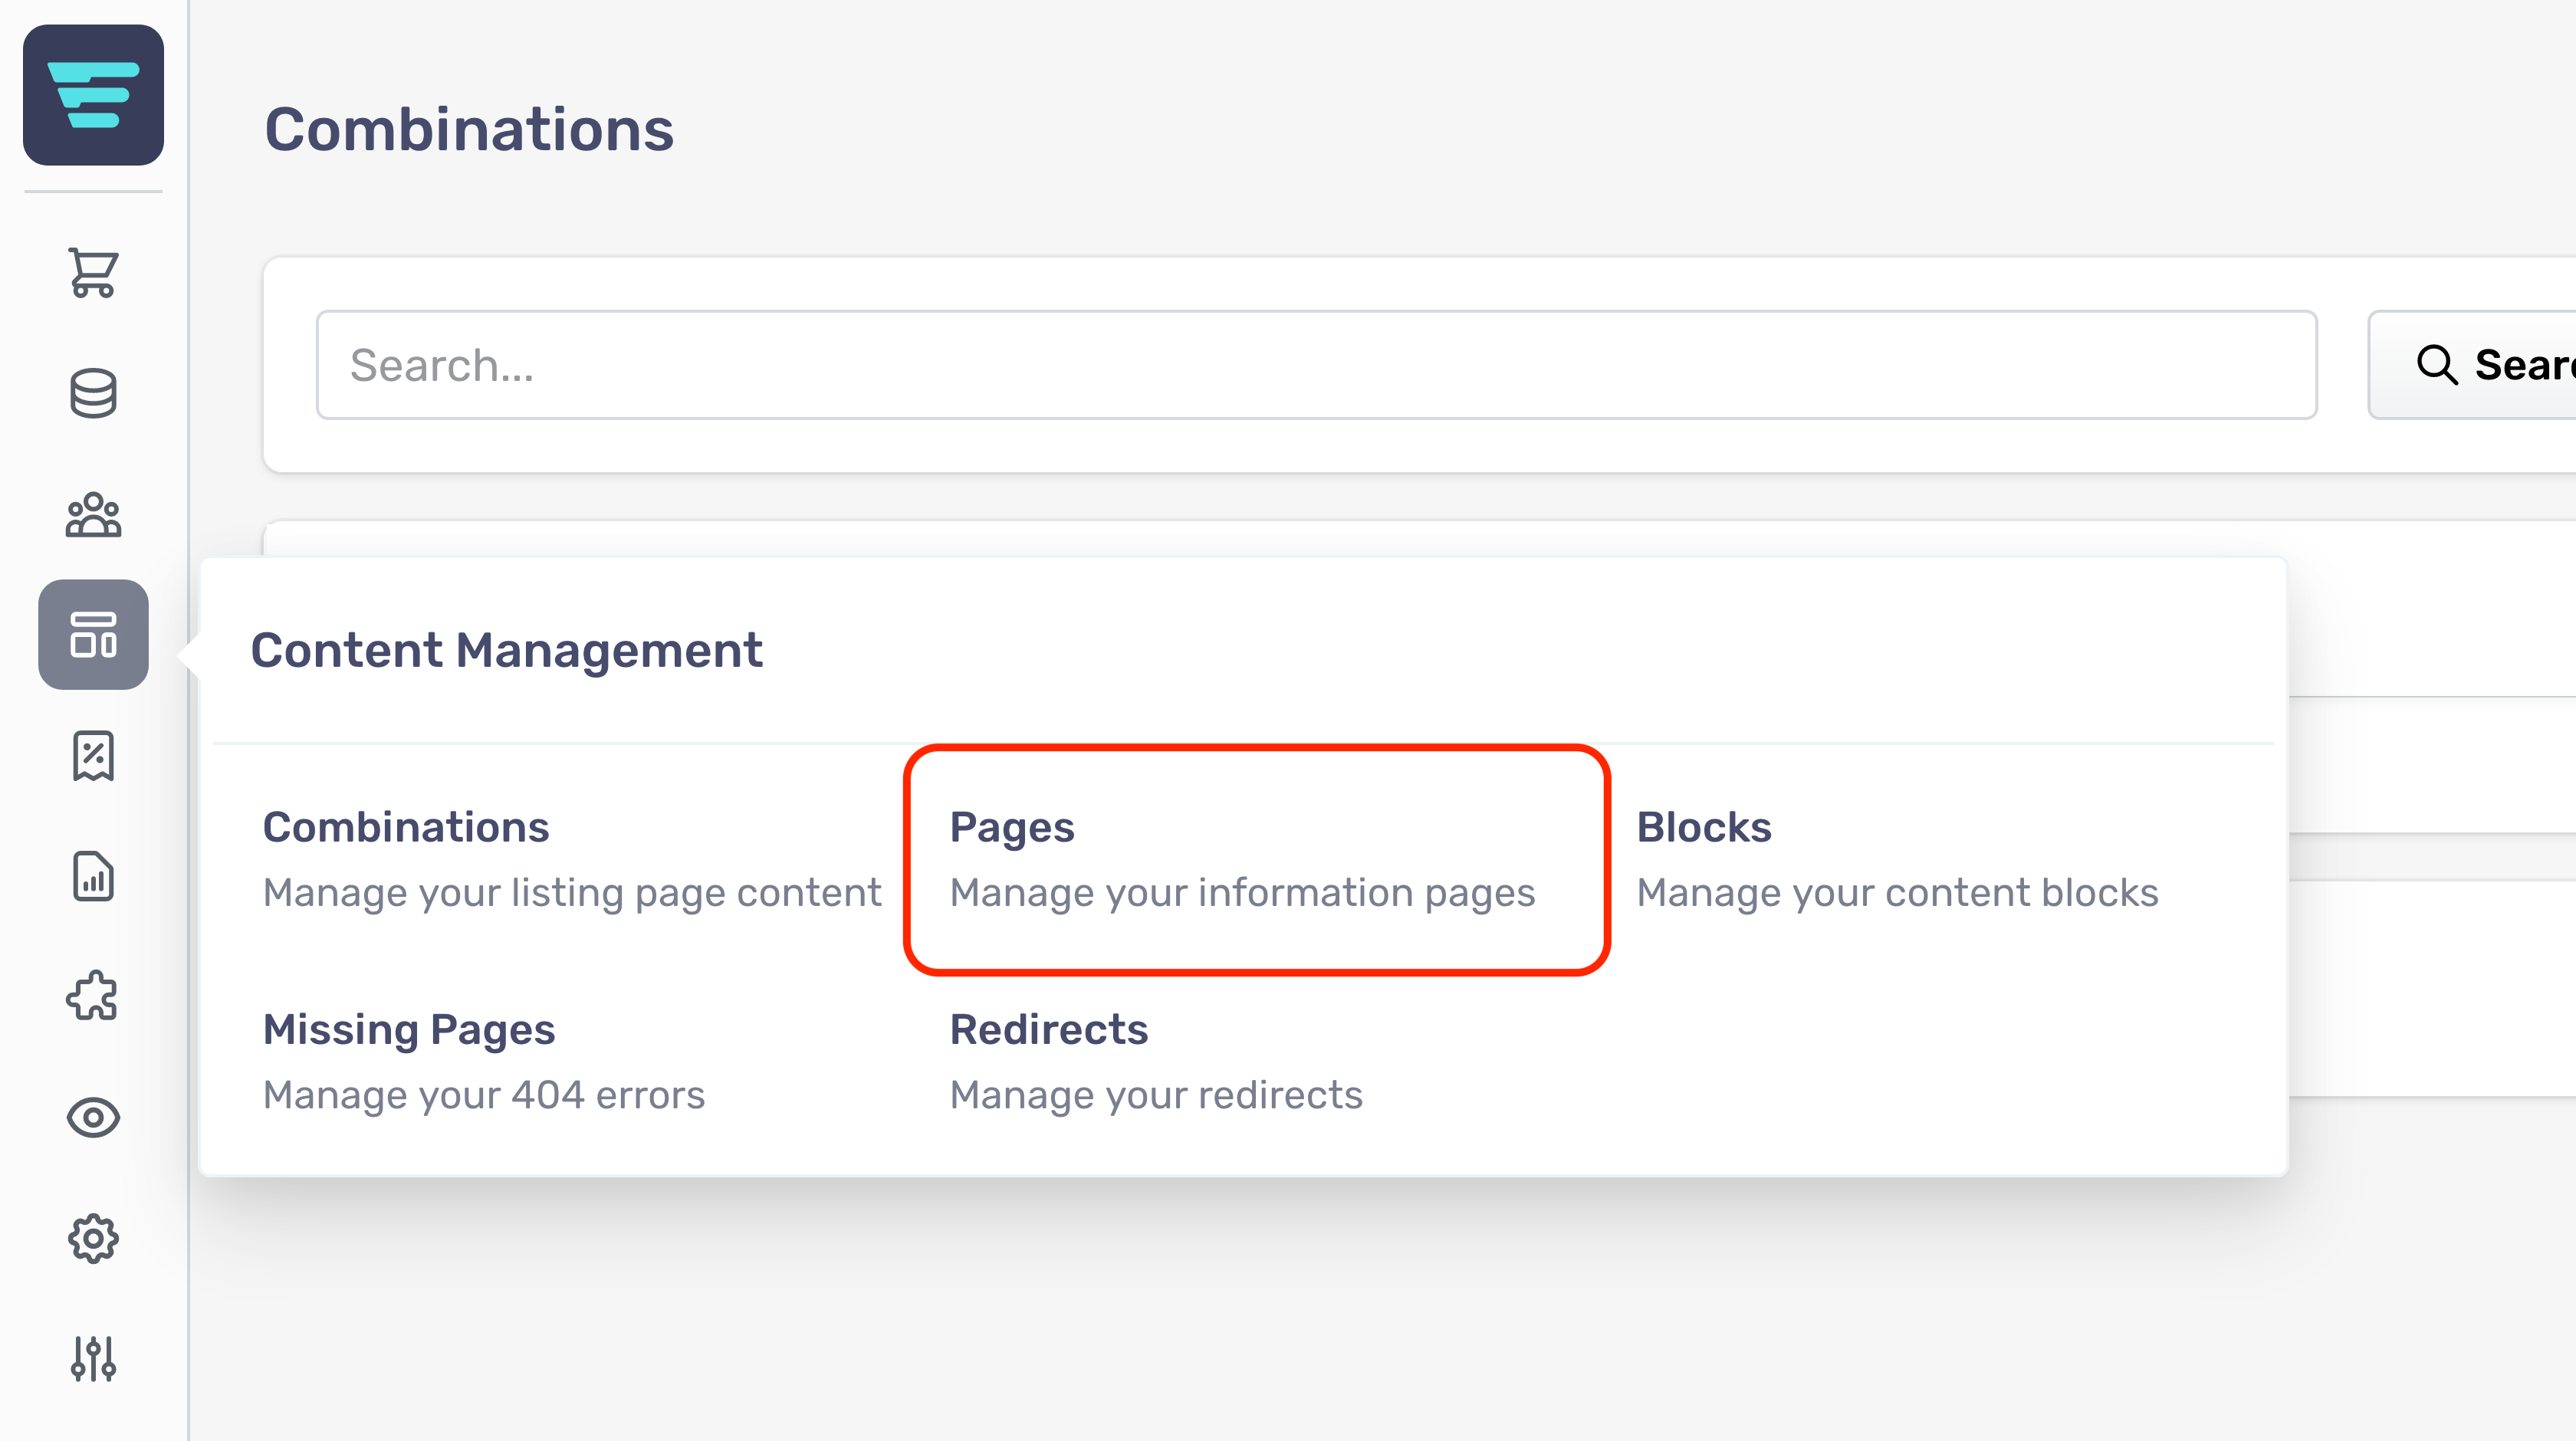
- Step 4 - Enter your search term in the SEARCH input at the top of the page

- Step 5 - Click 'Search'
How do I create a new page?
In order to create a new page for your store first navigate to the page listings page and click the "+ New Page" button at the top of the page.

From here you will be presented with the form for creating a new page.
The form is grouped into sections with non-required sections collapsed.
Page Information
The first section is the page name and content.
- Name- This is the main back-end identifier for your Page. Note that it is neither the Page title, nor the H1 heading. These are set in the SEO section - Content- Your Page content depends on whether you have selected the standard or advanced Page type

The Contentfield provides the following inputs for controlling the content and layout;
- Bold- Embolden selected text - Italic- Italicise selected text - Format- Select from a range of standard formats. - Lists- Select bulletted or numbered lists, and change indent level. - Table- Insert and control a table (supports all standard table operations). - Link- Link or unlink - When you add a link you can choose to open in new tab - useful if the link points away from your storefront. - Image- Add an image by drag and drop or file selection. - Font- Choose from existing fonts or remove a font. - Size- Choose from existing font sizes or remove a font size. - Text Colour- Choose text or highlight colour to apply - select none to remove text or highlight colour that has already been applied. - Properties- Allows you set CSS Class and ID properties - this is advanced functionality for those comfortable working with CSS. - Main text area- This is where you enter your Page contents.
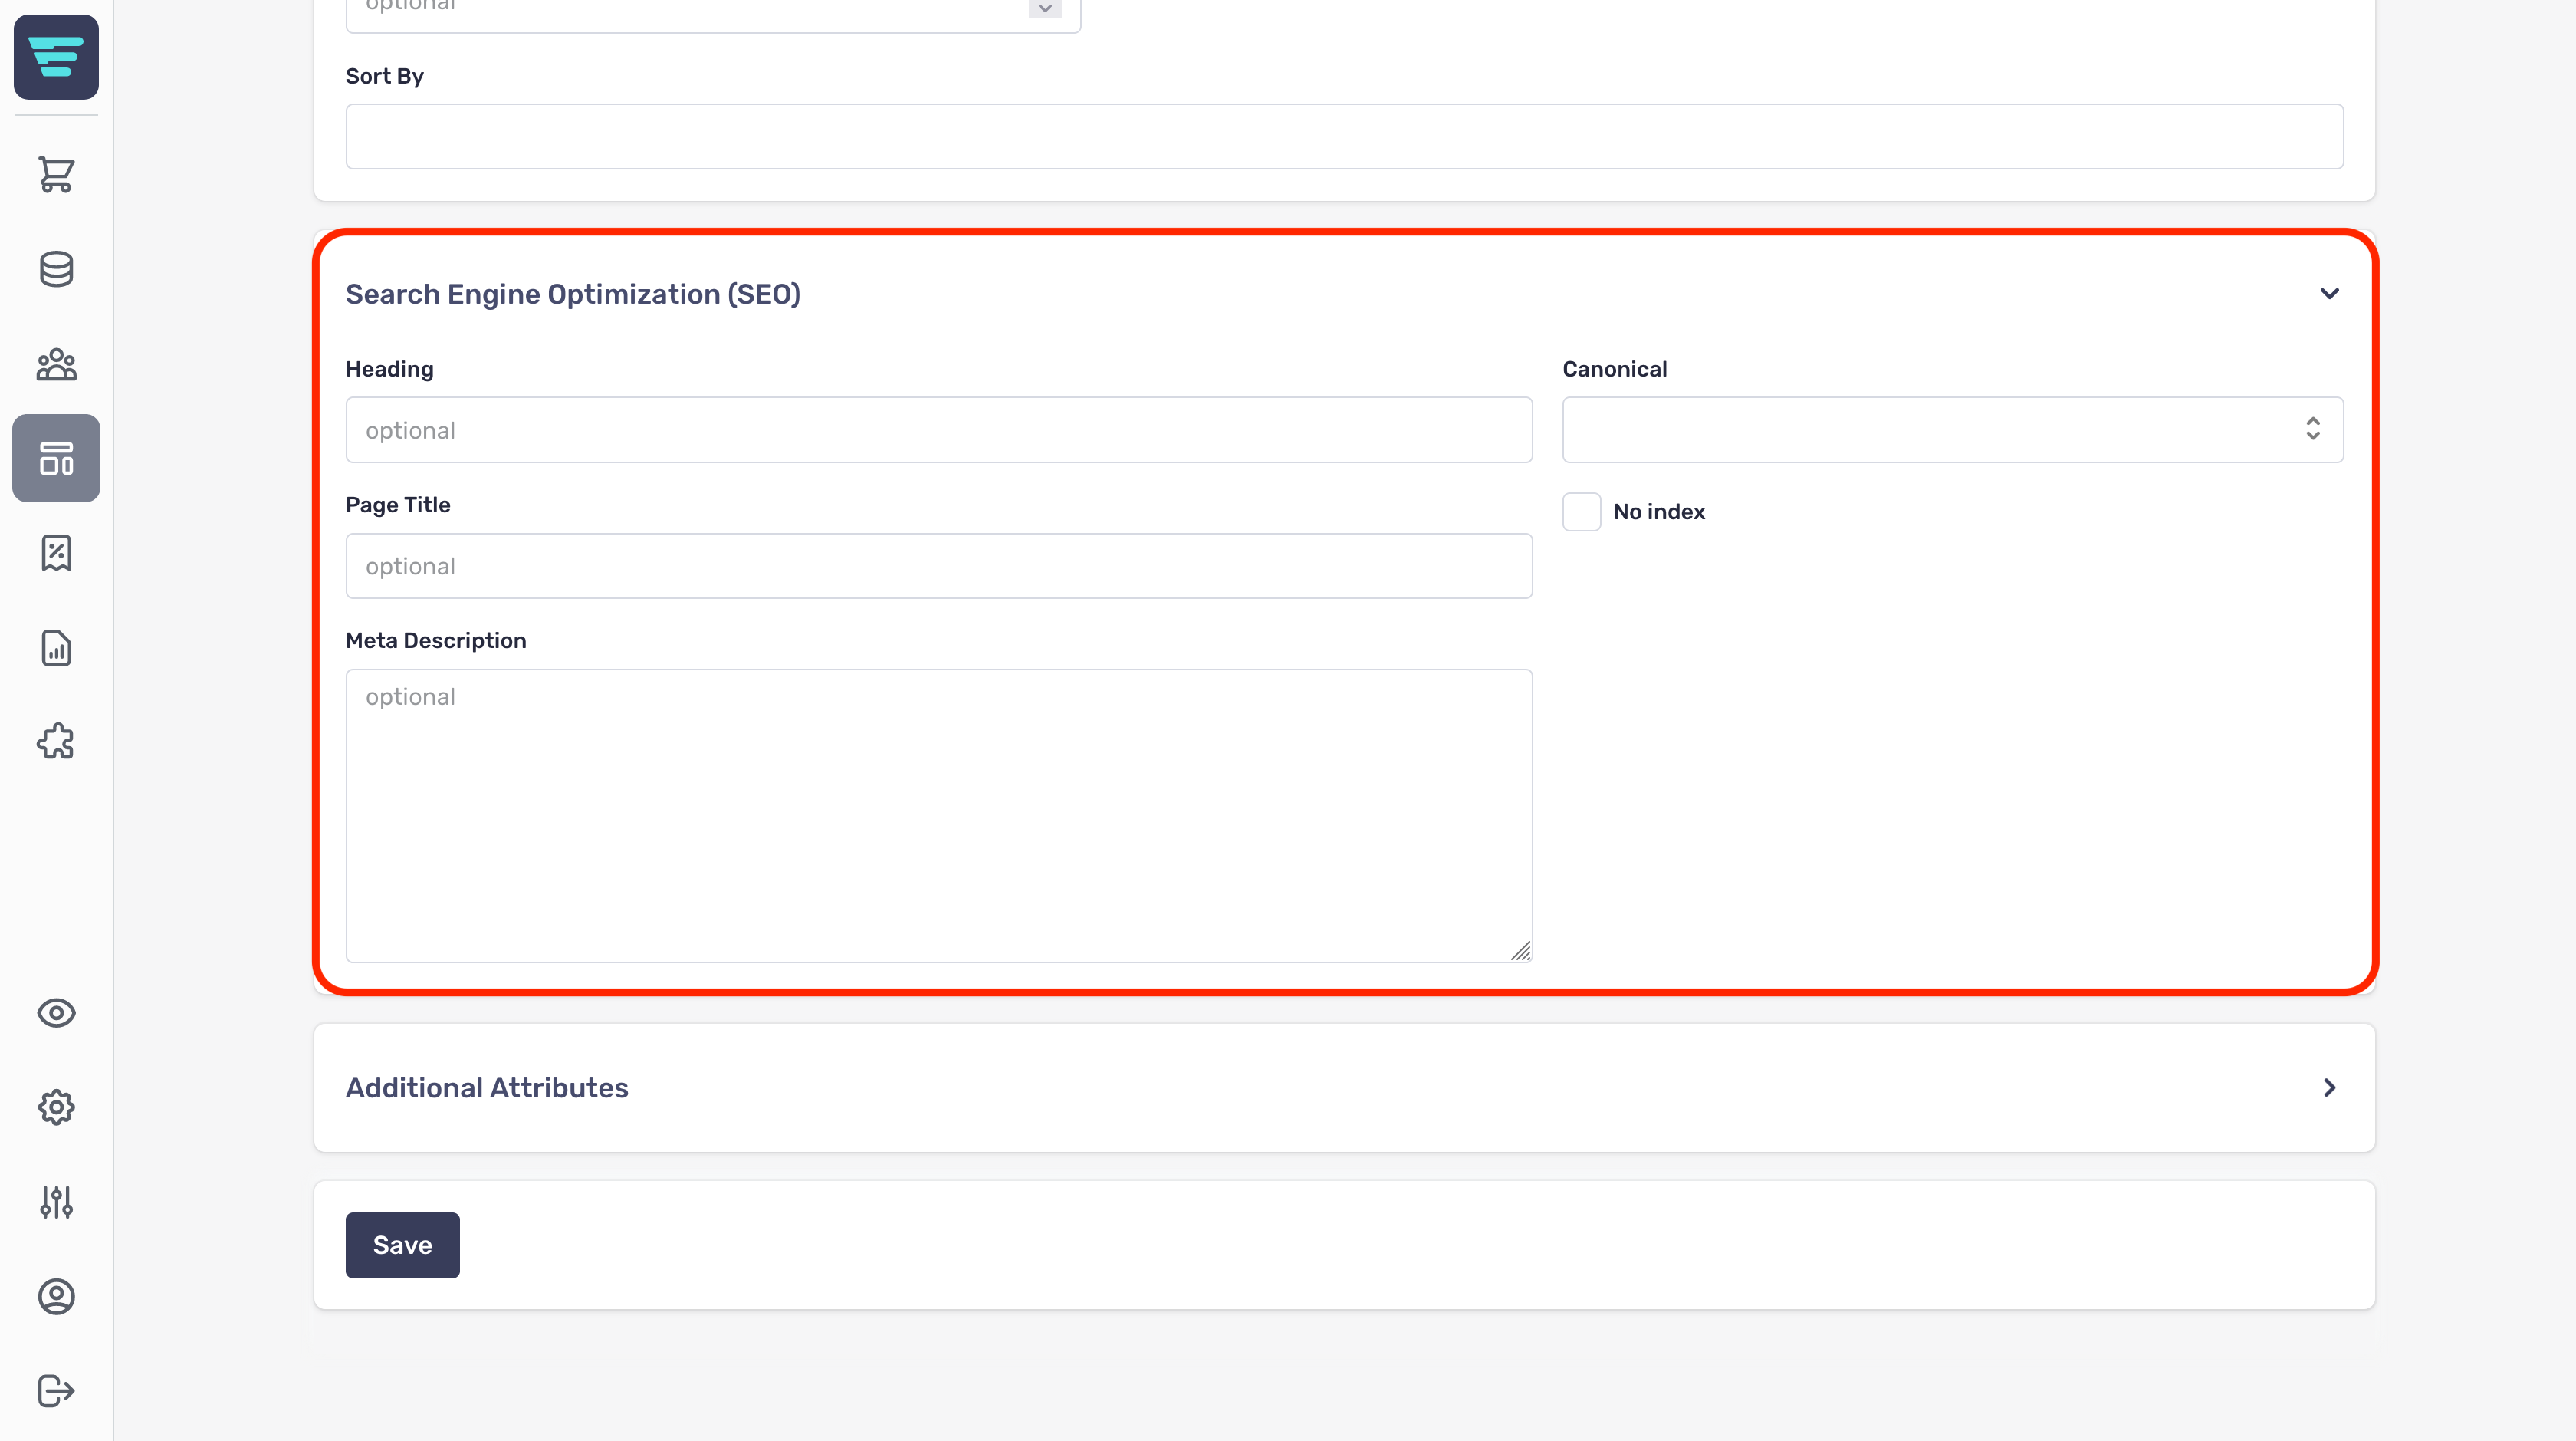
Search Engine Optimization (SEO)
The SEO section is where you manage the content used by search engines to index your store.
SEO is an important aspect when it comes to customers finding your store when searching for products you're selling.
The SEO section has a number of fields for you to complete;
- Heading- this is the page name and will be the main heading in most themes. - Page title- used by search engines as the title of this page. - Meta description- combined with the page title and displayed as the search engine listing description. - Canonical- used to determine relationships when multiple pages share duplicate content - No index- checking this box will direct search engines to not index this page.
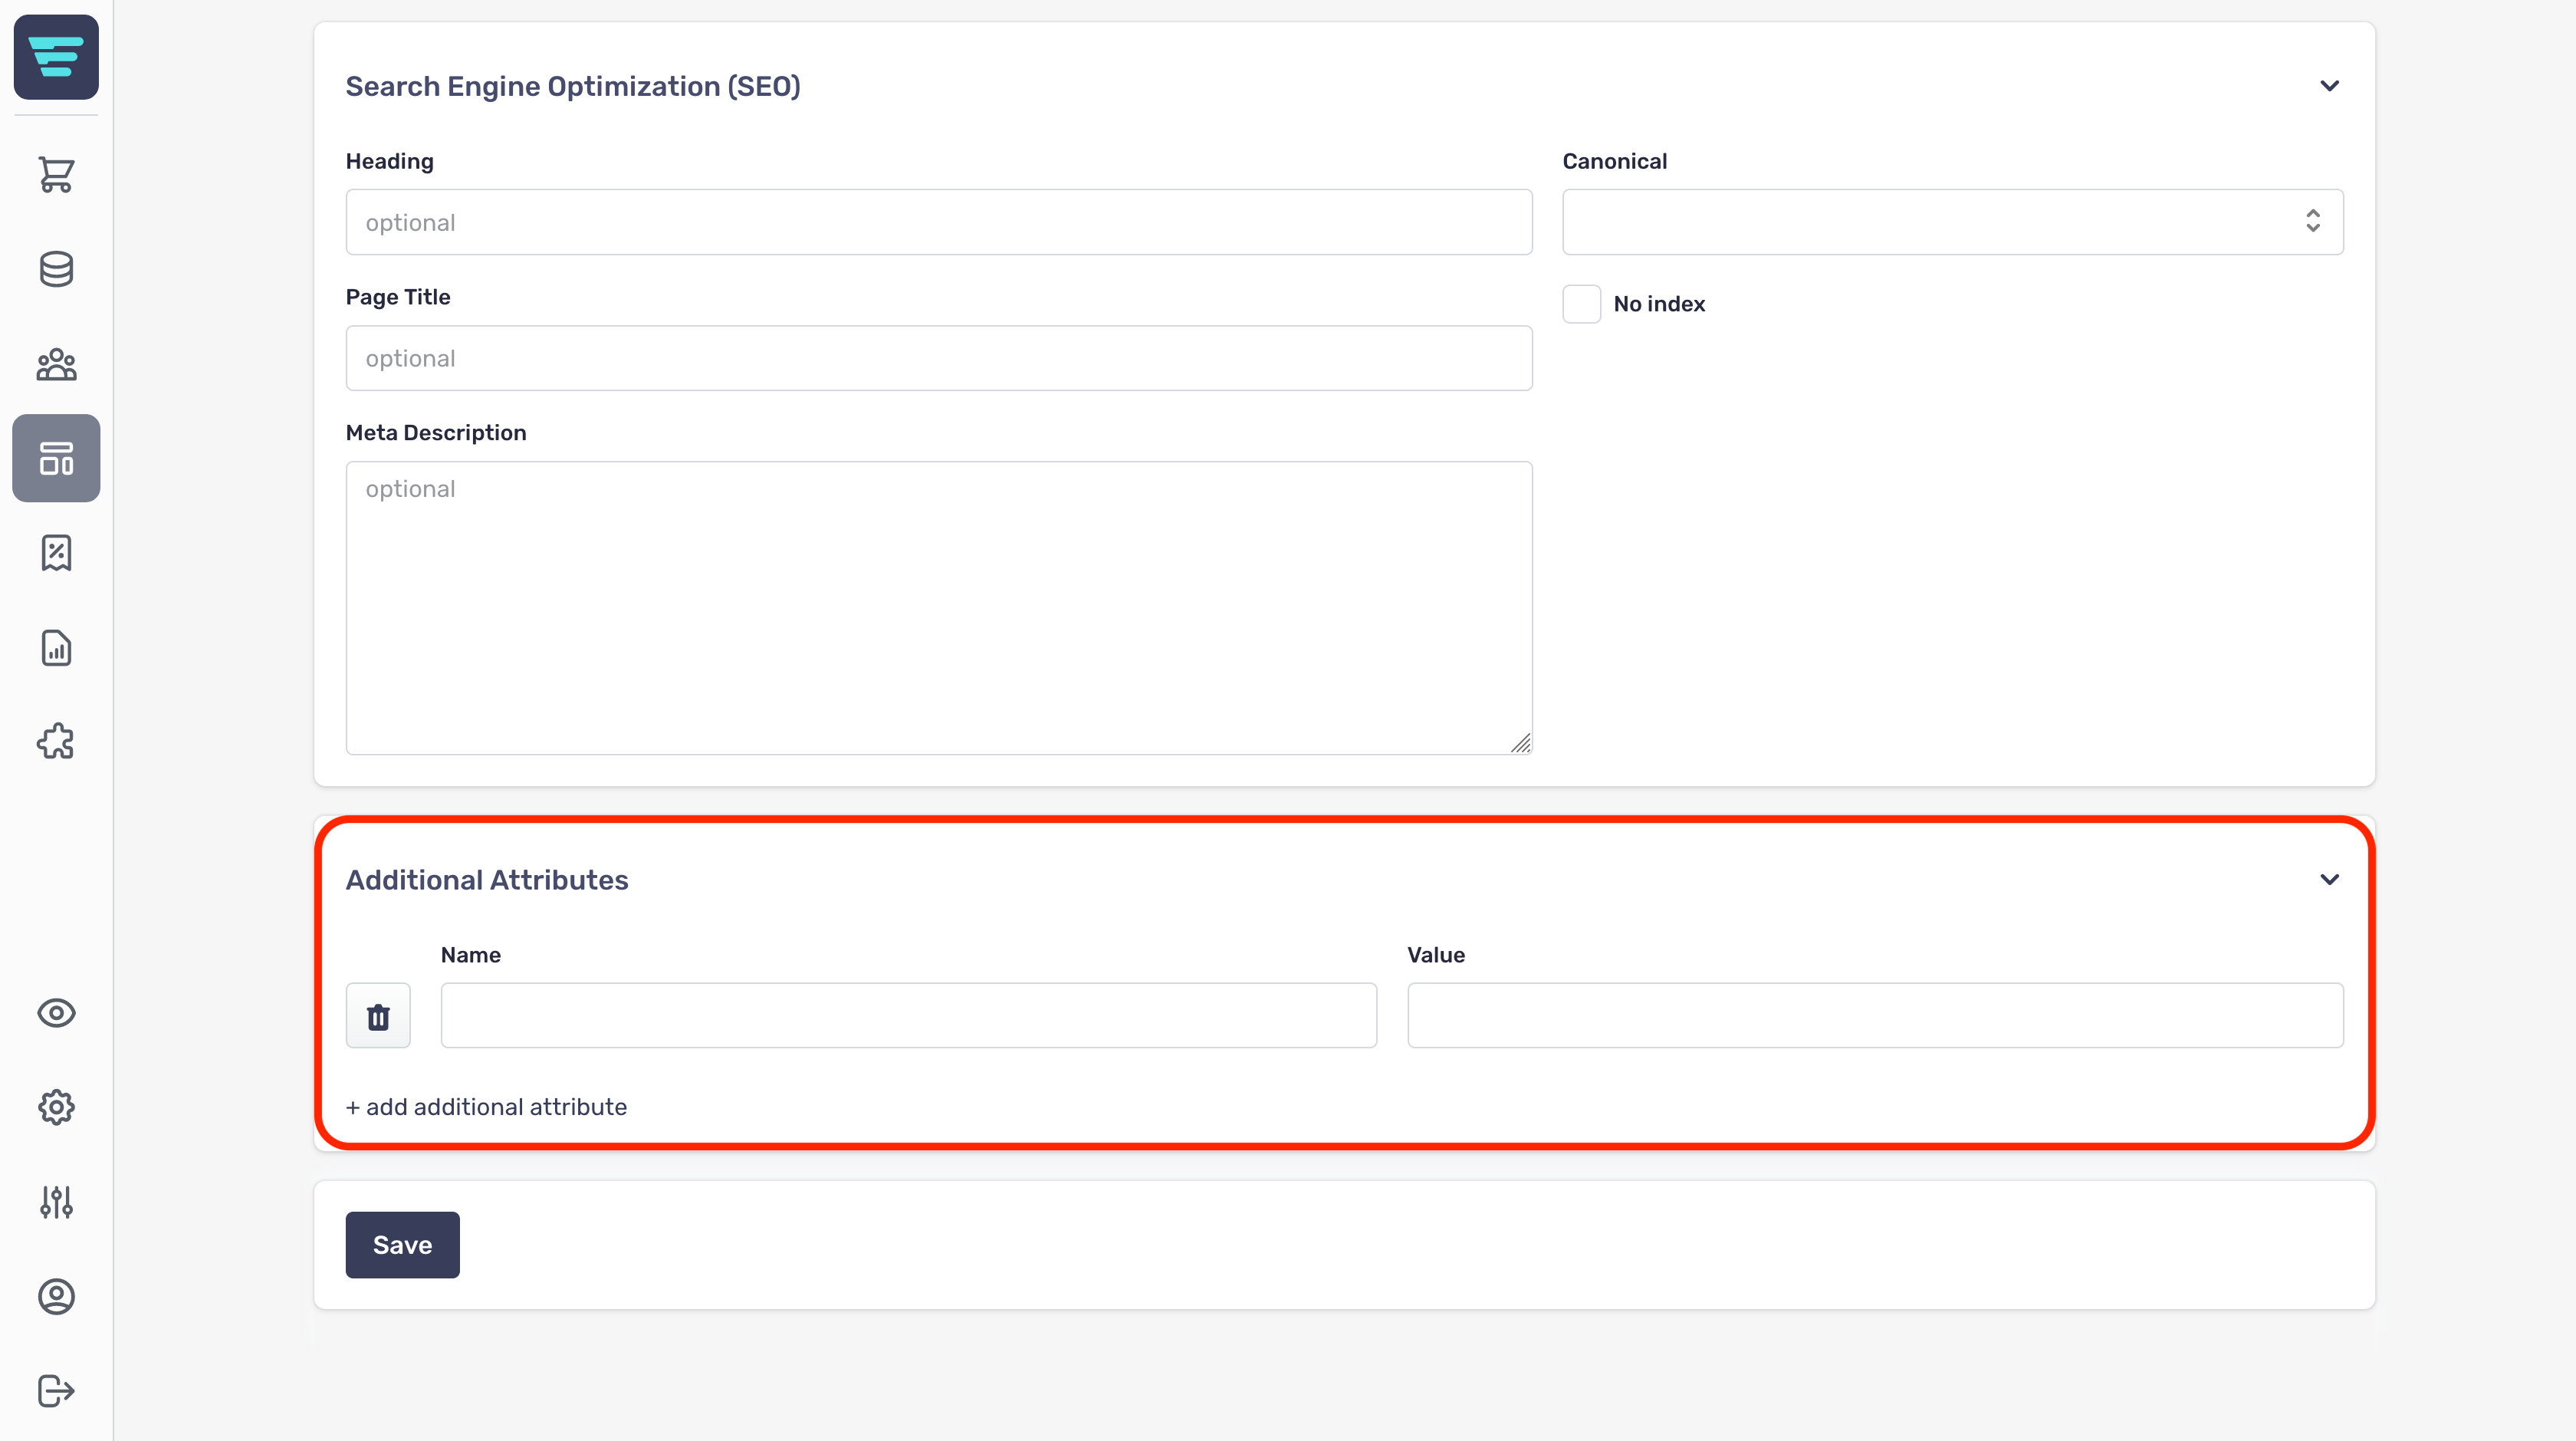
Additional Attributes
The additional attributes section is used to provide custom fields, these may have been set up by your agency and used to display additional information about your page.
Additional attributes are useful if Aero does not contain a certain attribute that you require, e.g. for integration with an ePos system.
What is a page?
Within Aero, Pages allow you to create static/information pages. These pages will not include listings.
Examples of static/information pages include:
- Terms and Conditions - About - Contact - Policies
Where do I find my pages?
Your Pages are located in your Aero admin console.
- Step 1 - Hover over the Content Management button in the left hand menu
- Step 2 - Select Pages from the Content Management menu

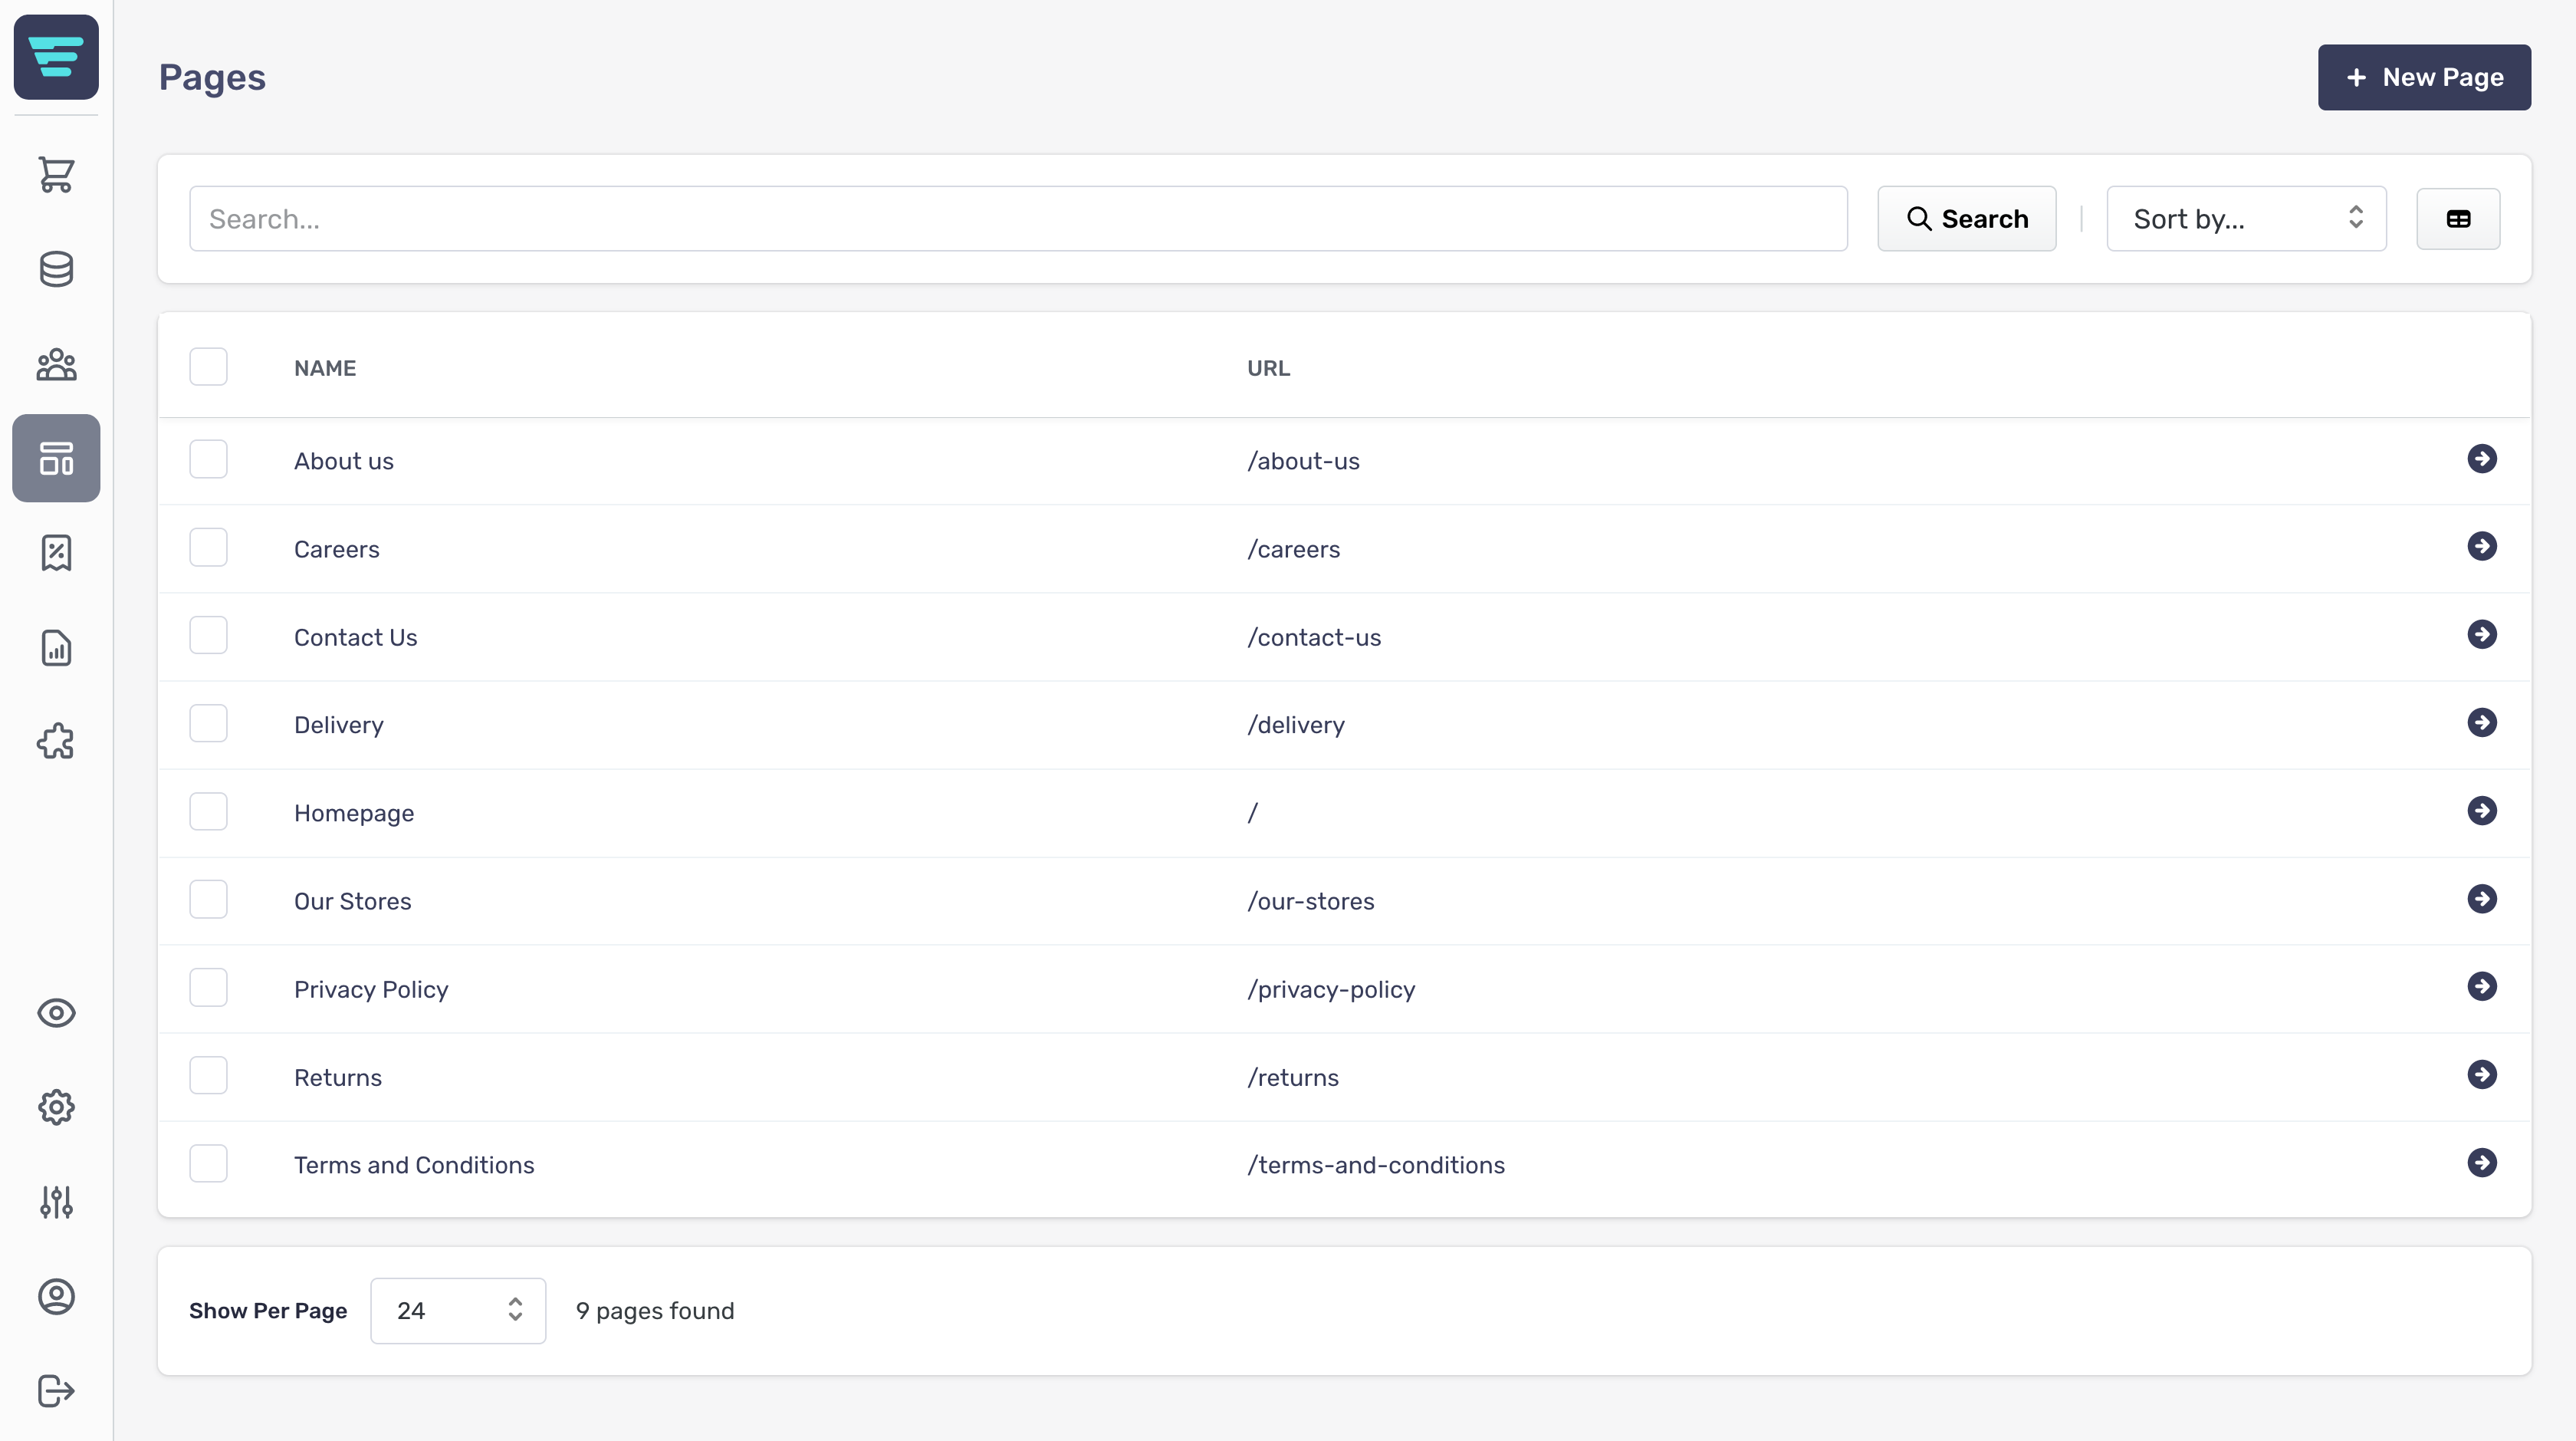
What is the pages list?
Your pages list shows all of you current pages and includes the label and url of each combination. This allows you to quickly check key details and quickly drill into your pages for further information.
Example Pages List;
How do I edit a page?
- Step 1 - Login to your Aero Admin Console - Step 2 - Hover over the 'Content Management' icon in the left hand menu
- Step 3 - Click on 'Pages'
- Step 4 - Search for the Combination you would like to edit (more information here; "How do I search my pages? - Step 5 - Click on the Combination arrow icon - Step 6 - Edit or enter the necessary information for your page - (more information here; "How do I create a new page? - Step 7 - Click the 'Save' button in the bottom left of your screen
How do I delete a page?
Deleting pages cannot be undone
- Step 1 - Login to your Aero Admin Console - Step 2 - Hover over the 'Content Management' icon in the left hand menu
- Step 3 - Click on 'Pages'
- Step 4 - Search for the page(s) you would like to delete (more information here; "How do I search my pages? - Step 5 - Select the page(s) you would like to delete by click their checkbox(es)

- Step 6 - Select 'Delete pages' from the 'Select a bulk action' dropdown - Step 7 - Click go - A confirmation tick will appear when your bulk action has been completed
Redirects
Redirects
What is a redirect?
Within Aero, Redirects allow you to divert traffic from on URLs to another. Aero, including standard redirect codes.
Among other things, this is useful for handling missing pages.
Redirect Codes
Aero allows you to assign the following standard HTTP redirect status codes.
| Code | Purpose | Description |
|---|---|---|
| 301 | Moved Permanently | This and all future requests should be directed to the given URI |
| 302 | Found | Tells the client to look at (browse to) another URL |
| 308 | Permanent Redirect (RFC 7538) | The request and all future requests should be repeated using another URI |
Where do I find my redirects?
Your Redirects are located in your Aero admin console.
- Step 1 - Click the Content Management button in the left hand menu
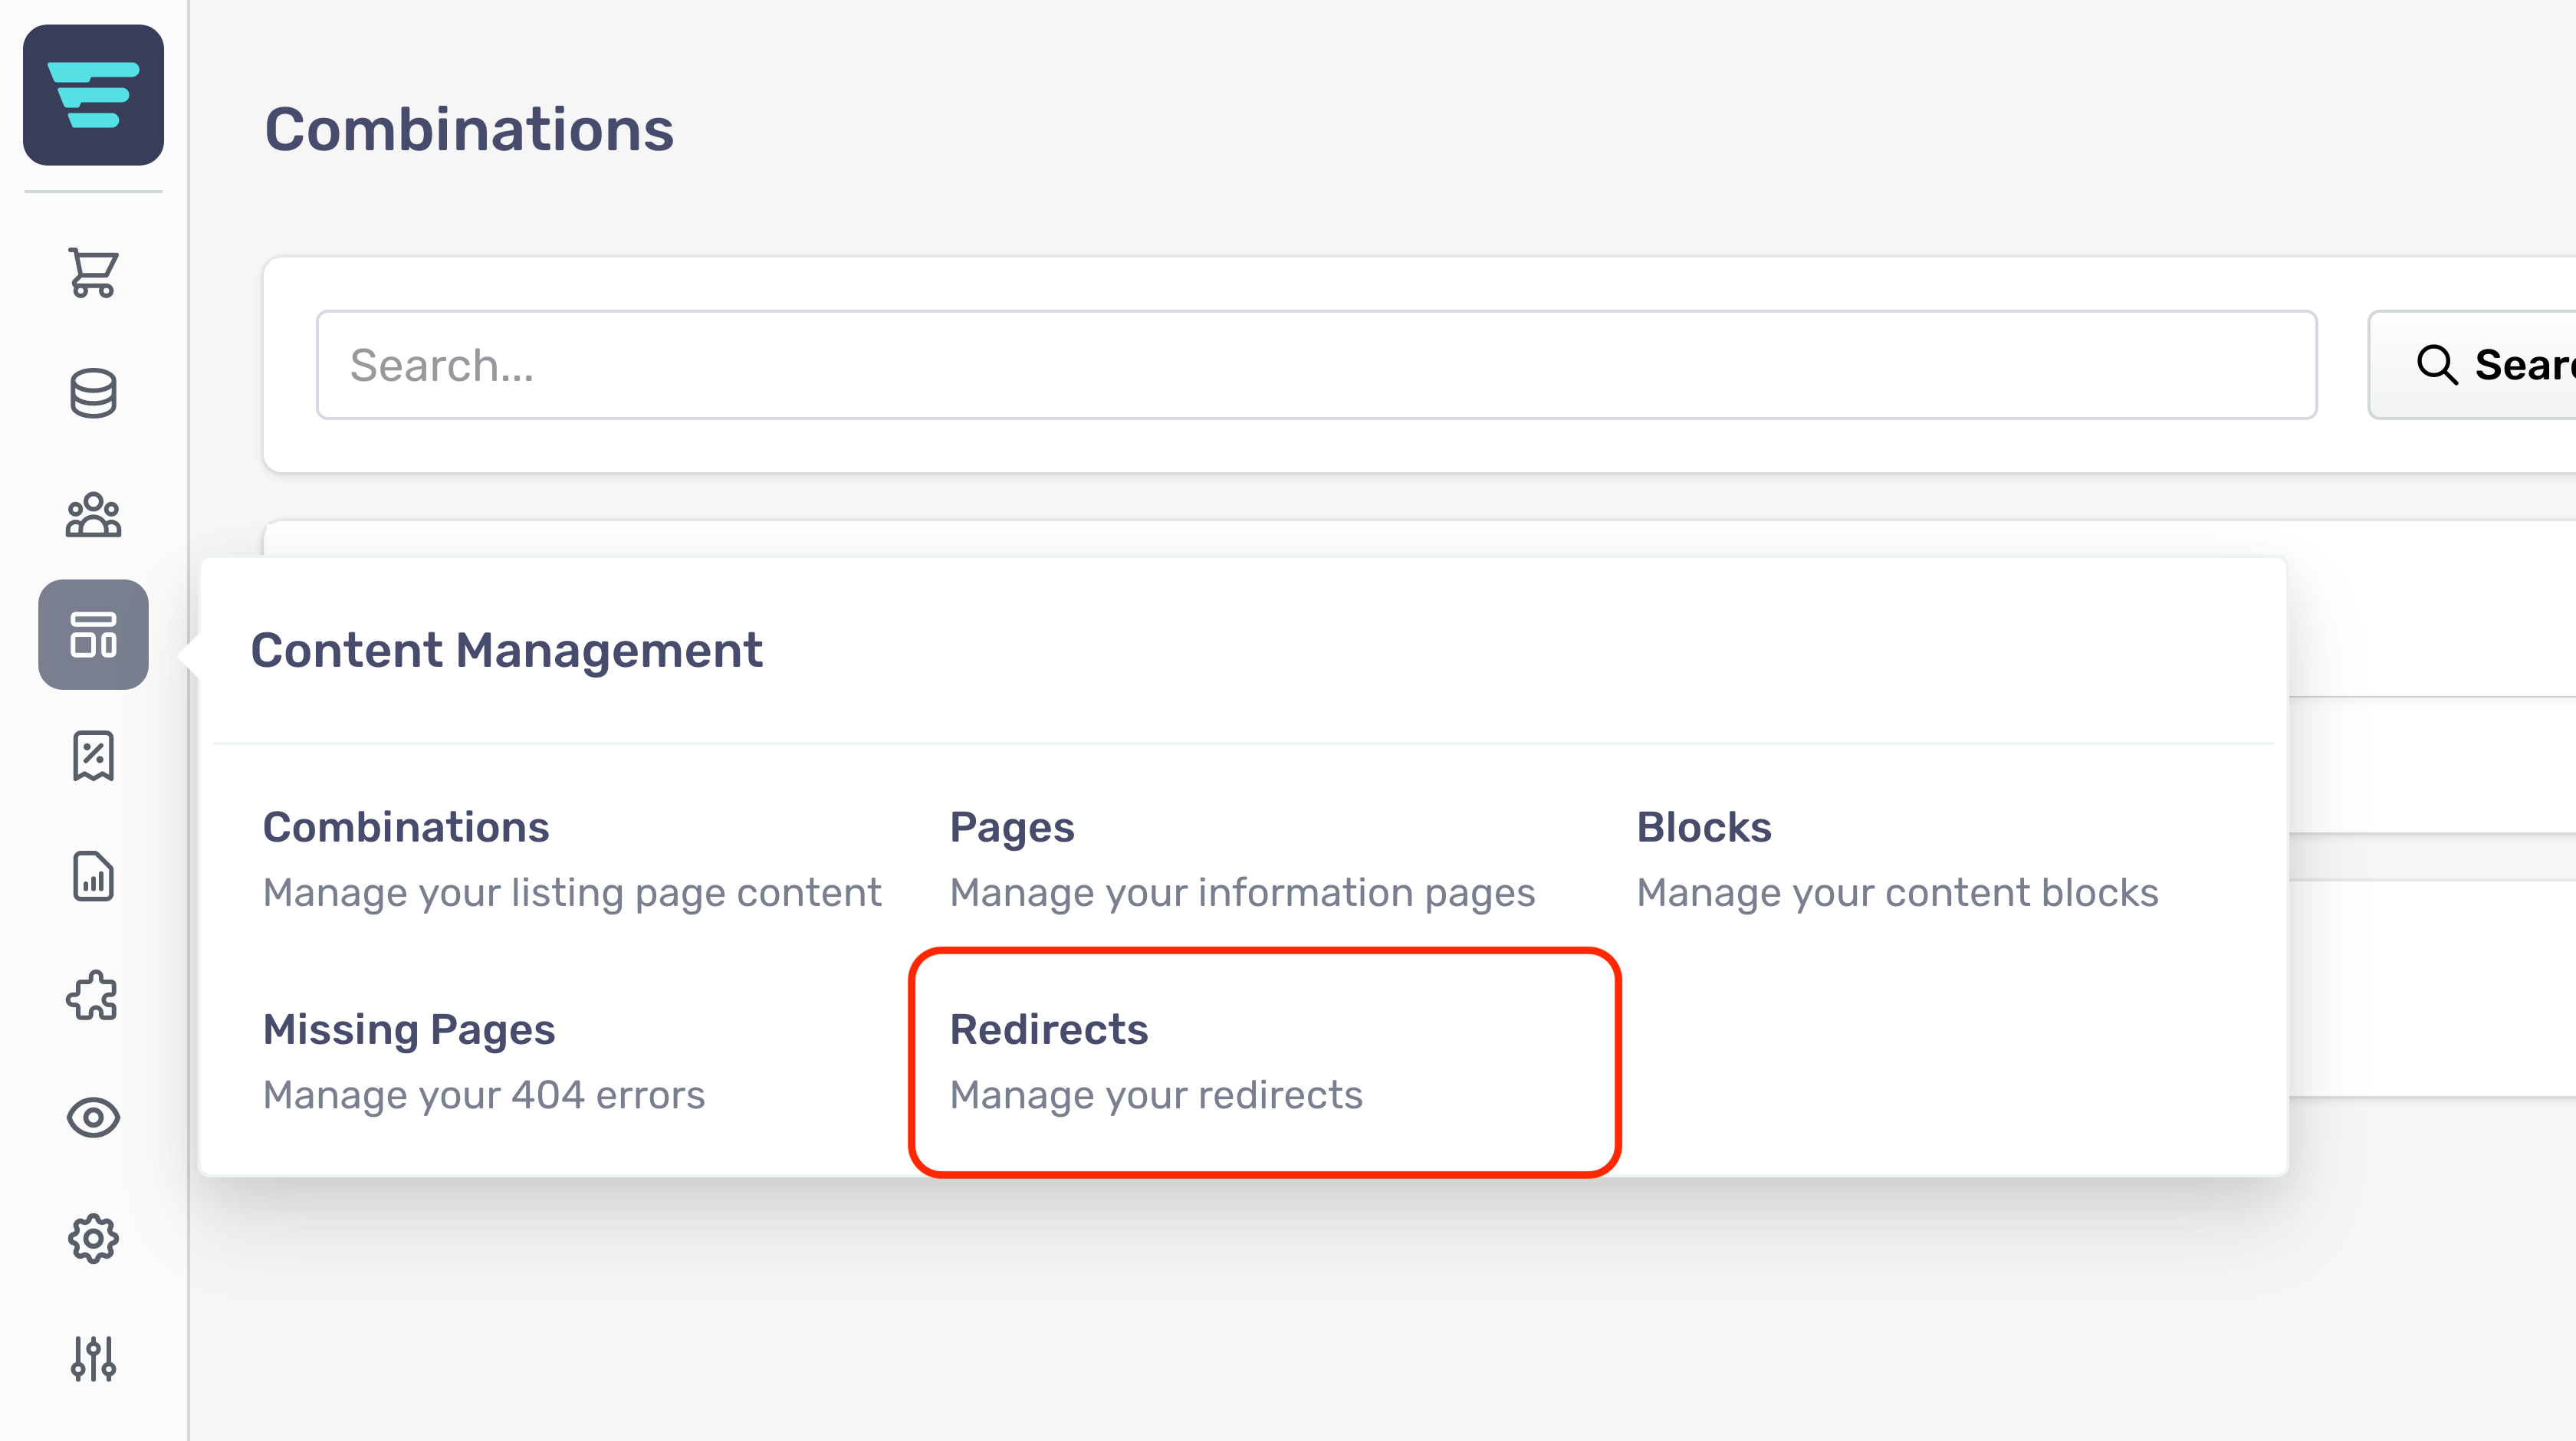
- Step 2 - Select Redirects from the Content Management menu

How do I search my redirects?
- Step 1 - Login to your Aero Admin Console - Step 2 - Hover over the 'Content Management' icon in the left hand menu
- Step 3 - Click on 'Redirects'
- Step 4 - Enter your search term in the SEARCH input at the top of the page

- Step 5 - Click 'Search'
How do I delete a redirect?
- Step 1 - Login to your Aero Admin Console - Step 2 - Hover over the 'Content Management' icon in the left hand menu
- Step 3 - Click on 'Redirects'
- Step 4 - Search for the redirect(s) you would like to delete (more information here; "How do I search my redirects? - Step 5 - Select the redirect(s) you would like to delete by click their checkbox(es)

- Step 6 - Select 'Delete Redirects' from the 'Select a bulk action' dropdown - Step 7 - Click go - A confirmation tick will appear when your bulk action has been complete
How do I export my redirects?
- Step 1 - Login to your Aero Admin Console - Step 2 - Hover over the 'Content Management' icon in the left hand menu
- Step 3 - Click on 'Redirects'
- Step 4 - Click the 'Export' button in the top right of your screen

- Step 5 – Click ‘Export as CSV’

How do I edit a redirect?
- Step 1 - Login to your Aero Admin Console - Step 2 - Hover over the 'Content Management' icon in the left hand menu
- Step 3 - Click on 'Redirects'
- Step 4 - Search for the redirect you would like to edit (more information here; "How do I search my redirects? - Step 5 - Click on the redirect NAME or arrow icon - Step 6 - Edit or enter the necessary information for your redirect - (more information here; "How do I create a new redirect? - Step 7 - Click the 'Save' button in the bottom left of your screen
What is the redirects list?
Your redirtects list shows any redirects you currently have setup, along with their from and to urls and the status code.
How do I create a new redirect?
Redirects are slighly different to how you create a new one, when compared with the other elements in the store.
Redirects require only a small amount of information therefor the create form is part of the listing page.
In order to create a new redirect first navigate to the redirect listing page. The new re-direct form is part of the listing page, being displayed between the search and the content.

Create redirect form
The form has only three fields to fill out;
-
From URL - Enter the URL that you want to redirect traffic from - To URL - Enter the URL that you want to redirect traffic to - Status - Select the appropriate code;
- 301 - Moved Permanently - This and all future requests should be directed to the given URI
302 - Found - Tells the client to look at (browse to) another URL
308 - Permanent Redirect (RFC 7538) - The request and all future requests should be repeated using another URI
- 301 - Moved Permanently - This and all future requests should be directed to the given URI